
(And A Lesson In Tempering Chocolate!)
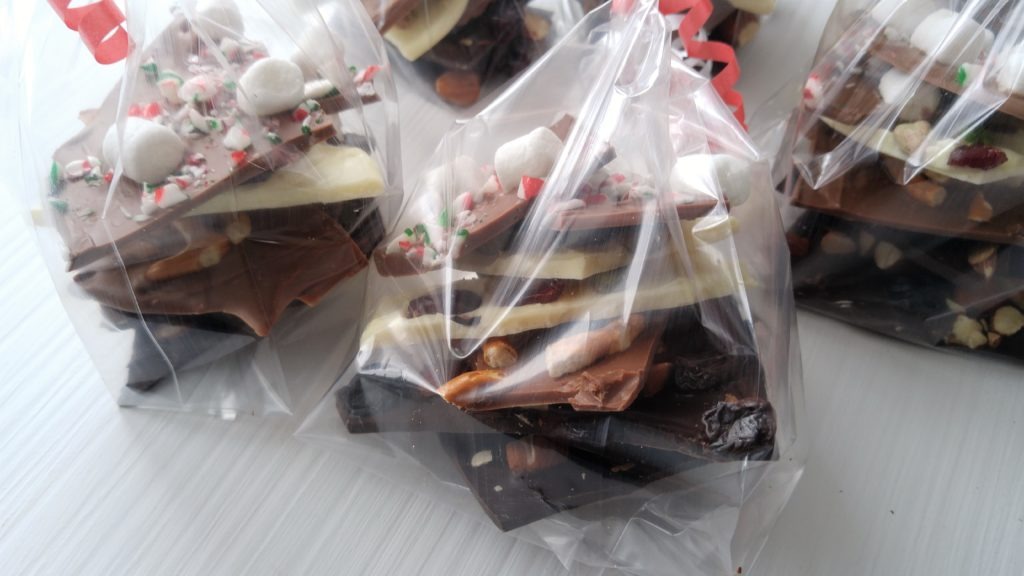
This Chocolate Christmas Bark is made for chocolate lovers. If you’re a lover of sweet, salty, and crunchy coming together in perfect harmony, this recipe is for you. It’s also made for parents looking to make something fun with their kids. It’s the perfect treat for gifting and sharing. And, of course, it’s only a few simple ingredients, and so easy to make 🙂
This year, my kids and I have decided to make our gifts for teachers. I have often wanted to, but have been self-conscious about making a gift that teachers would actually like 🙂
Enter: Chocolate. Could chocolate ever really go wrong? Okay, unless you burn it, I suppose….or your dog eats it all. That would be bad….
But seriously, I think chocolate is a gift that is always appreciated! And this recipe provides a triple hit of the good stuff: dark, milk, and white chocolate, studded with your favourite choice of delicious toppings!
How to make Chocolate Christmas Bark
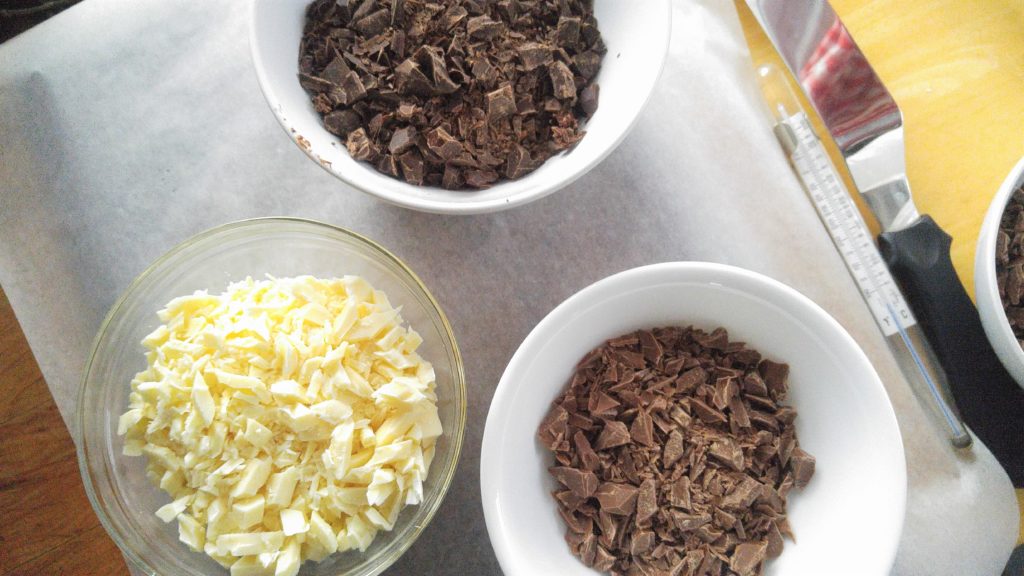
Before you begin, make sure you have all your ingredients ready and your tools set out. Chocolate can be temperamental, and doesn’t like it when you work too slowly. So be ready, and have on hand:
Tools you’ll need:
- instant read thermometer (if you’re going to temper your chocolate)
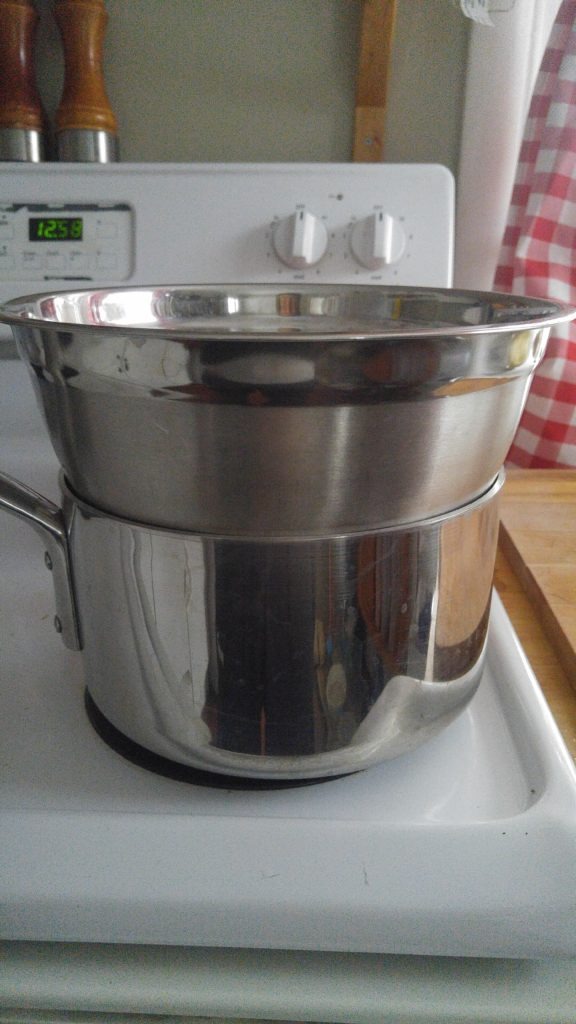
- pot
- heatproof bowl that fits over pot
- parchment paper or silicone mat
- offset spatula (I highly recommend owning one, as you can get a lot of use out of it if you like to bake at all) , or:
- rubber/silicone spatula
- Dark chocolate
- Milk chocolate
- White chocolate
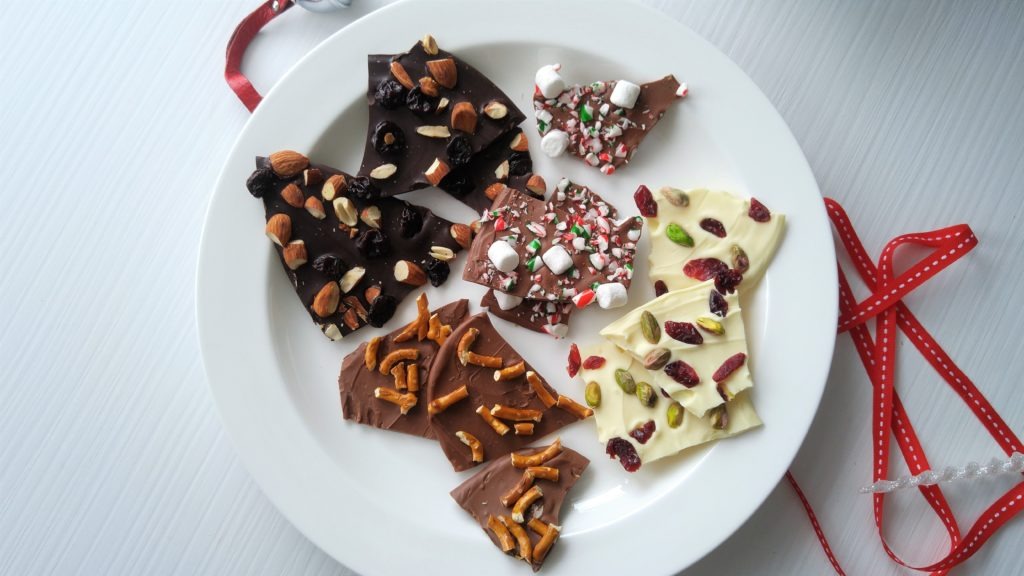
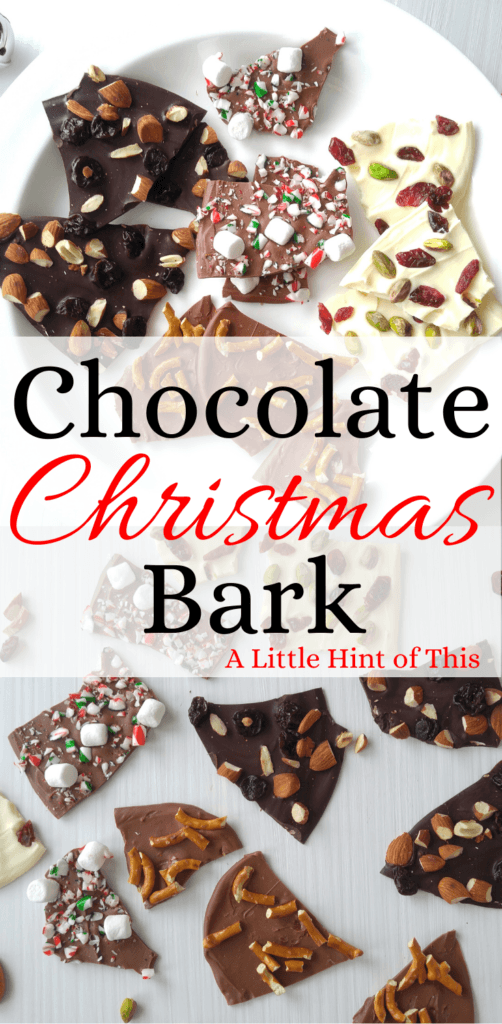
- Toppings (I’m using dried cherries, chopped pretzels, pistachios, dried cranberries, roasted almonds, candy cane pieces, and mini marshmallows)
Why should I temper my chocolate?
*Note: You can still make Chocolate Christmas Bark without tempering the chocolate, but the result will be slightly different 🙂 *
Have you ever melted chocolate for a treat, and when it re-hardens it is covered in a white film? Or do you find that as soon as you touch it, you leave a melted fingerprint in the chocolate? Melting chocolate without tempering it often ends up with these problems.
Tempering chocolate is a sciency thing that has to do with the cocoa solids being evenly distributed….
I won’t bore you with the details, but if you temper chocolate properly, you are left with a shiny chocolate that snaps nicely and doesn’t melt at the slightest touch.
But isn’t the chocolate I’m using already tempered?
Yes, it was (that’s why is was so smooth and shiny when you opened the package). But as soon as you melt the chocolate again, it looses it’s temper. You need to bring it back!
Okay, so how hard is it to temper this chocolate?
Tempering is just heating your chocolate to a specific temperature, and then cooling it to a specific temperature before using it. That’s it! With some patience you can totally do it! Here’s how:
How to temper chocolate
1. Put a pot of water on the stove and bring to a gentle simmer. Reduce heat to the lowest setting on your stovetop.
2. Set a heatproof bowl on top of the pot, making sure no water from the pot is touching the bottom of the bowl. This is a safe way to melt chocolate without burning it.
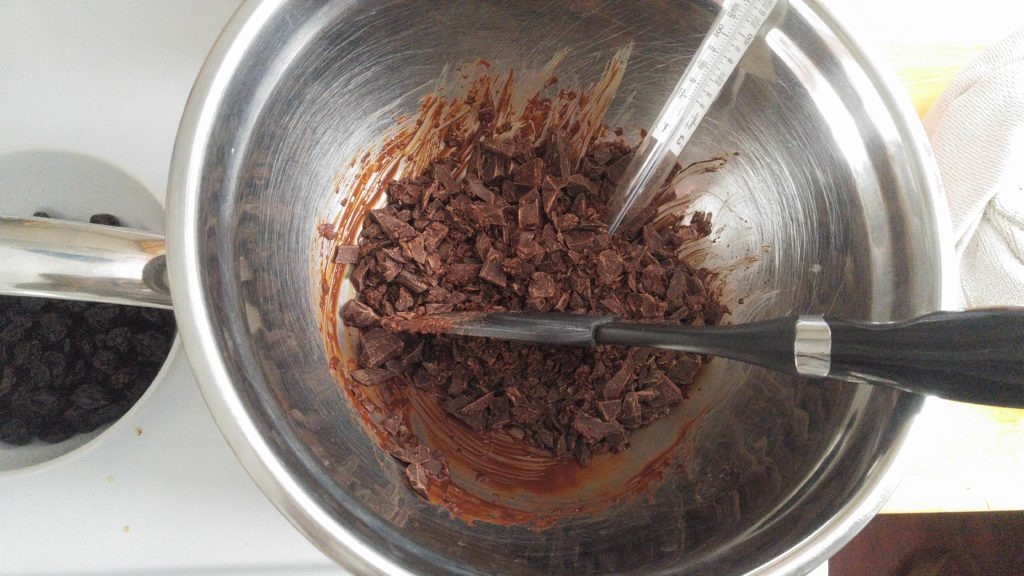
3. Put chopped chocolate in bowl. Using a rubber/silicone spatula, gently stir chocolate. Continue stirring until melted chocolate reaches the following temperature on an instant read thermometer:
- Dark Chocolate: 114 – 118° F (46 – 48° C)
- Milk Chocolate: 105 – 113° F (40 – 45° C)
- White Chocolate: 100 – 110° F (37 – 43° C) Note: be very careful as the high milk and sugar content in white chocolate will cause it to burn easily.
4. As soon as it reaches the right temperature, remove bowl from heat, making sure no steam or water droplets hit the chocolate (water will cause chocolate to seize up)
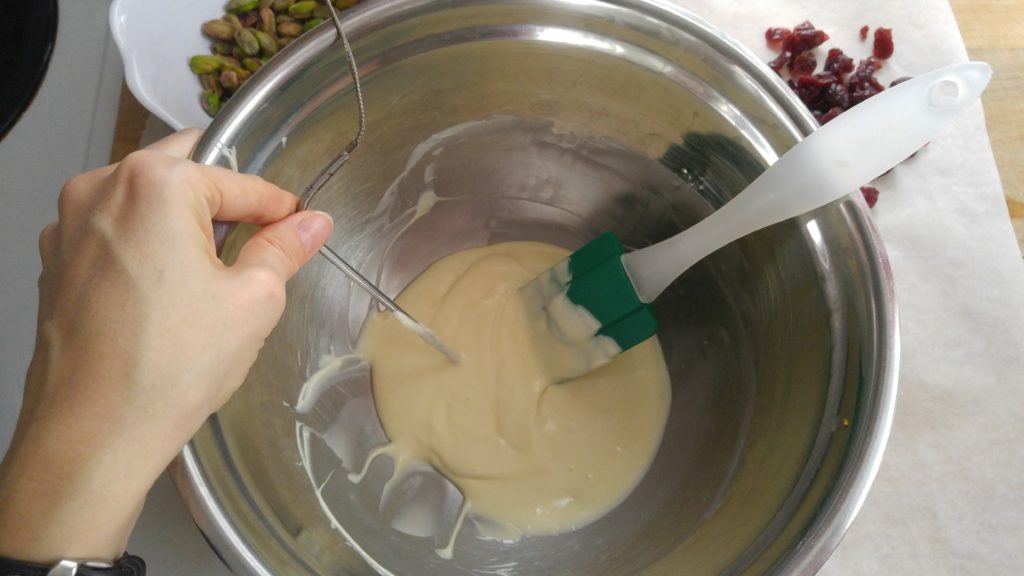
5. Gently stir in remaining third of chopped chocolate to help the melted chocolate cool down. Continue gently stirring the chocolate until it has cooled to a smooth, custard-like consistency and reaches the following temperatures (this could take up to 15 minutes):
- Dark chocolate should be between 88 – 89° F (31° C)
- Milk and white chocolates should be between 84 – 86° F (29 – 30° C)
6. That’s it! You now have tempered chocolate! Remember to use it quickly, as it does set up very fast 🙂
How to make Chocolate Christmas Bark
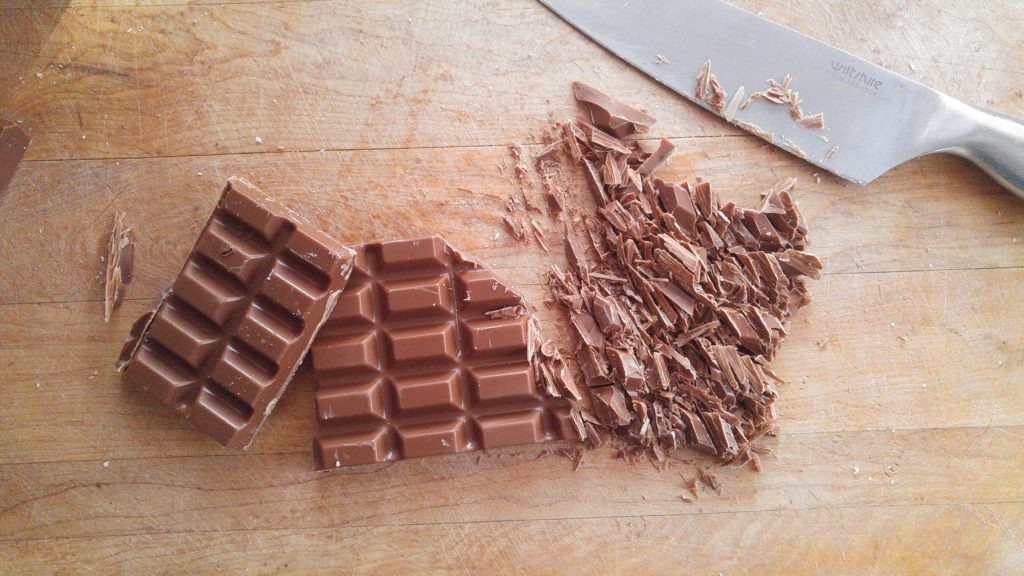
Chop chocolate in to uniform pieces (as best as possible) so they melt evenly. Divide out one third of the chocolate and set aside for later.
Melt and temper chocolate according to directions above, using the reserved third of the chocolate to help cool it down. (Alternately, simply melt all your chocolate, then continue to the next step, without tempering it).
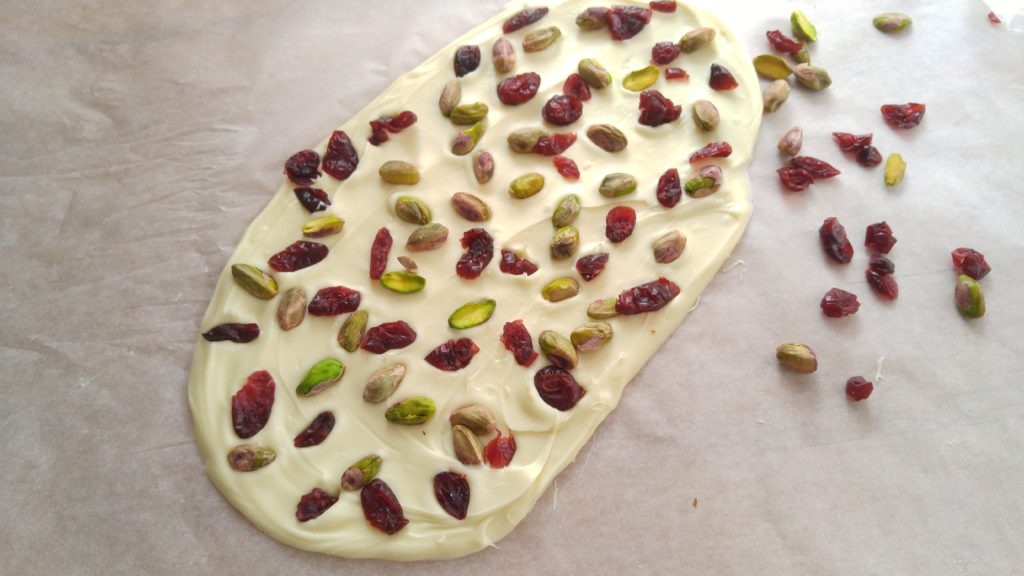
Pour tempered chocolate onto a piece of parchment paper or silicone baking mat. Using an offset spatula or rubber spatula, spread chocolate out into a thin layer (about 1/8 inch thick).
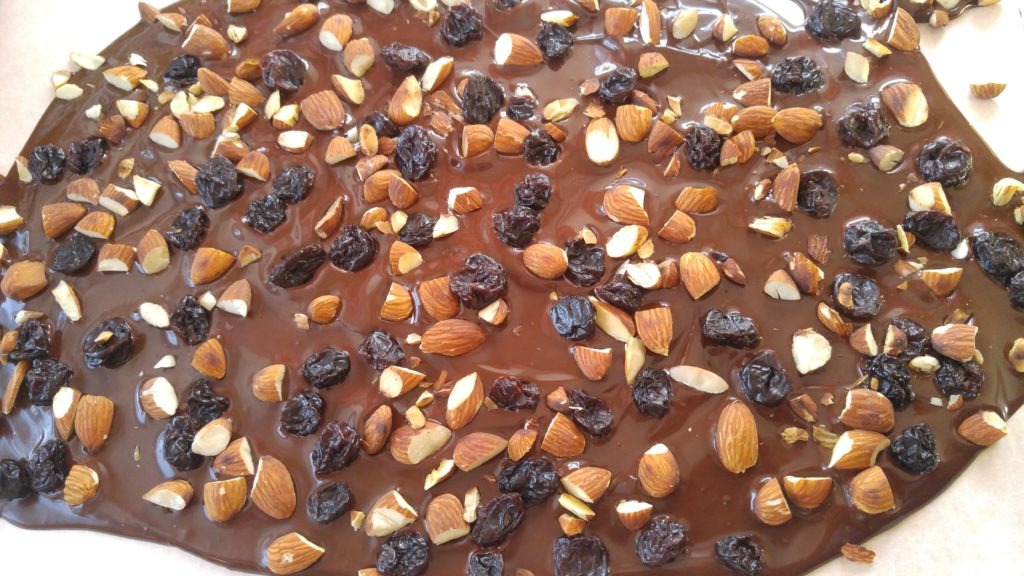
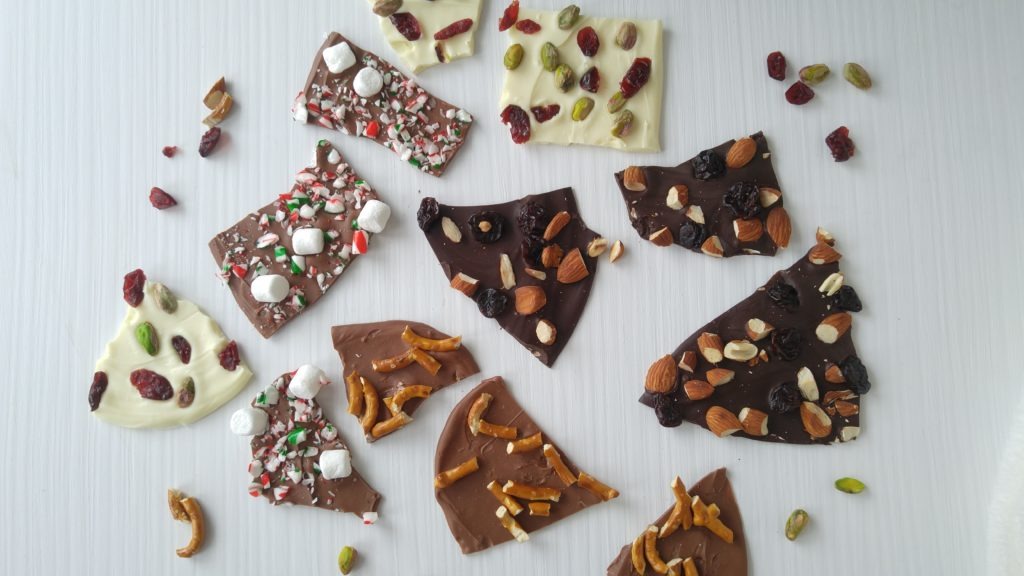
Quickly sprinkle desired toppings over top of chocolate. Don’t worry about being neat, Chocolate Christmas Bark has a rustic look and feel:)
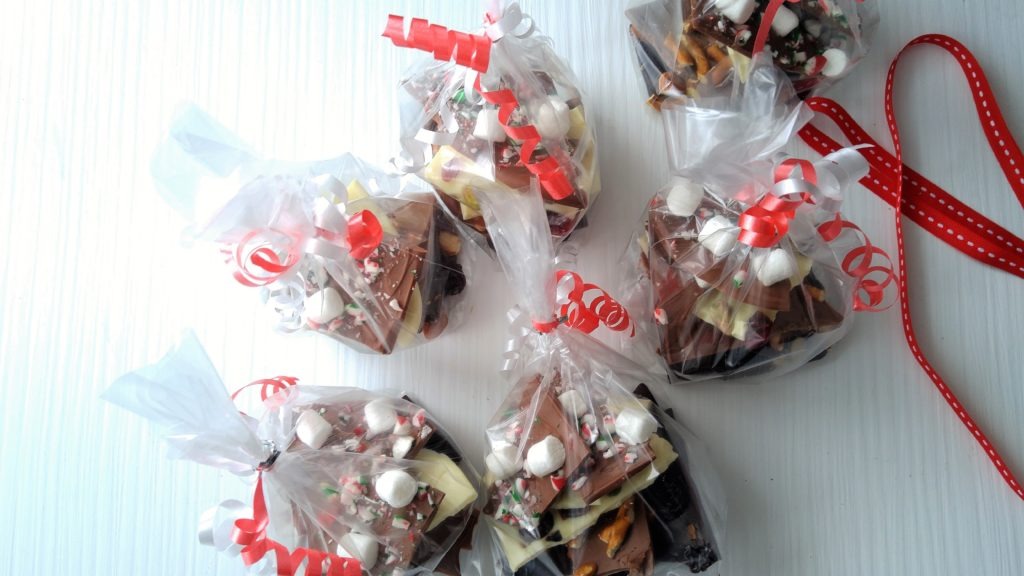
Allow Bark to dry for 12-24 hours. Snap Bark into pieces. Package in cellophane bags for gifting or enjoy right away!
Chocolate Christmas Bark toppings
The options for topping Chocolate Christmas Bark are as endless as your imagination! Just try to include a range of textures like nuts, dried fruits, and marshmallows.
Also, don’t top your Bark with items that are too ‘wet’. They won’t set up in the chocolate properly 🙂
You can also layer different types of chocolate (letting one set before pouring the next type over it), or drizzle the top with a different chocolate (such as white chocolate drizzled over dark chocolate bark).
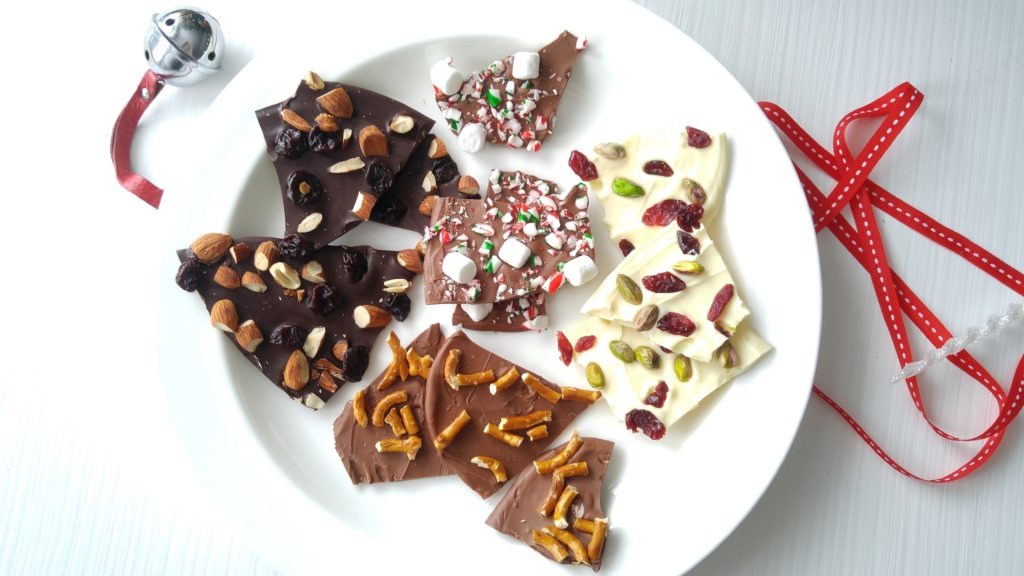
To help get you started, I’ve listed the variations we made here:
Dark chocolate with dried cherries and toasted, chopped almonds
Milk chocolate with crushed candy cane and mini marshmallows
White chocolate with pistachios and dried cranberries
Milk chocolate with salted pretzel pieces

Chocolate Christmas Bark
Ingredients
- 300 grams good quality dark chocolate
- 300 grams good quality milk chocolate
- 300 grams good quality white chocolate
- 3/4 cup each various toppings, such as candy cane pieces, mini marshmallows, chopped pretzels, dried cherries, dried cranberries, salted pistachios, chopped roasted almonds
Instructions
- Prepare all ingredients before beginning to melt chocolate.
- Finely chop chocolate. If tempering chocolate: Reserve 1/3 of each type of chocolate for future use.
- Fill a pot with approx. 1 inch of water. Bring to a gentle simmer. Keep warm on lowest stovetop setting.
- Place a heatproof bowl over hot water, ensuring the bottom of the bowl is not touching the water. Add desired type of chocolate to bowl.
- Using a rubber spatula, stir chocolate gently until melted. Remove from heat immediately. If tempering chocolate: follow tempering instructions in blog post above, then continue to next step.
- Carefully pour chocolate onto a sheet of parchment paper. Using spatula or offset spatula, spread chocolate into a thin layer.
- Sprinkle chocolate with desired toppings. Press gently into chocolate with fingers.
- Allow chocolate to dry completely. If chocolate is tempered, it is best to allow it to sit for 12 hours in a cool spot (not the fridge). Gently break Bark into pieces. Serve.
Notes
What are your favourite Chocolate Bark combinations? Let me know in the comments below!! And don’t forget to sign up and join our Little Hints community!
Check out my other holiday recipes and posts
Chocolate Cherry Shortbread Cookies
Pin it for later
That’s exactly what I was looking for! I’m going to make some of these chocolate barks for my friends, thanks for sharing!
I’m so happy to hear that! It’s a perfect gift 🙂