
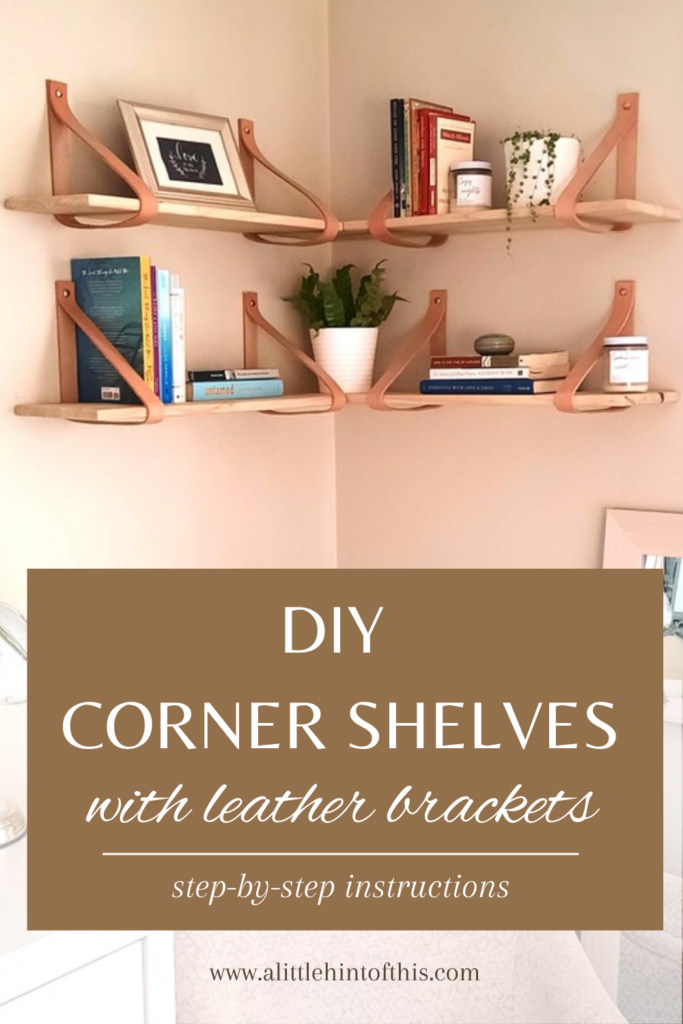
These DIY corner shelves are a great way to add both decor and storage to unused wall space in your home. We give you step-by-step instructions so you can make your own as a fun weekend project!
In an attempt to create a more spacious feel in my small master bedroom, I decided to remove a clunky old oversized bookshelf and create a cozy corner reading nook.
However, by removing the bookshelf, I also removed a fair amount of storage!
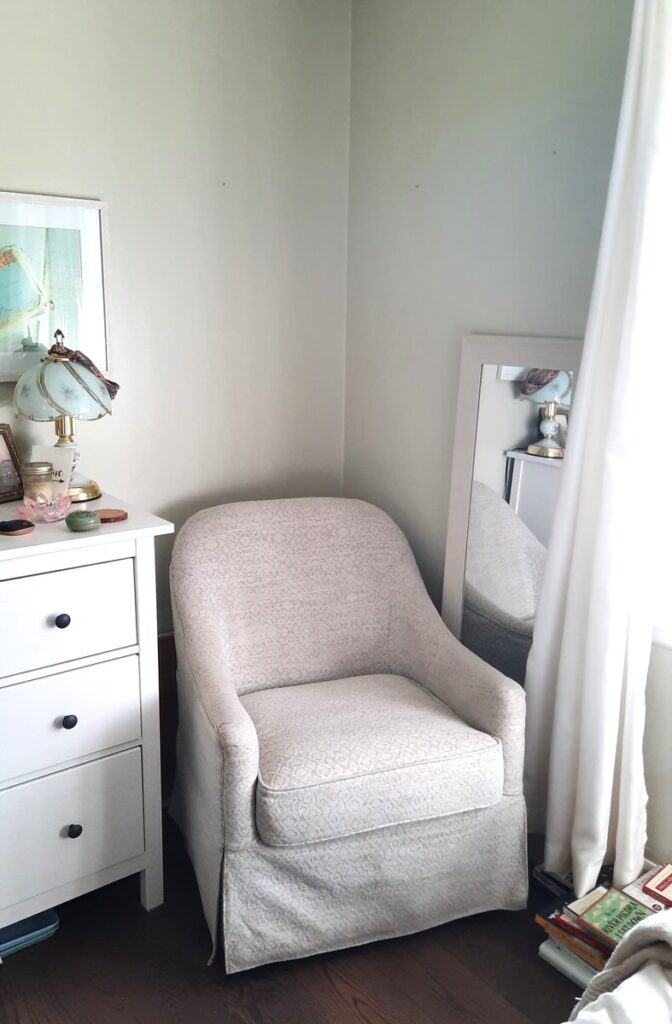
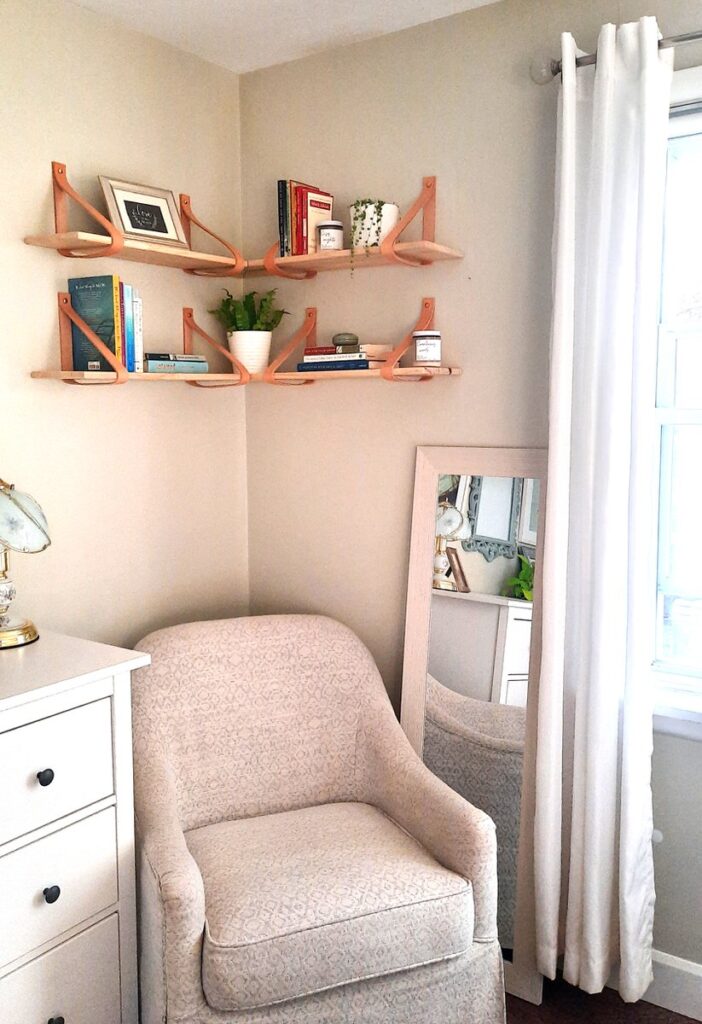
As much as I loved having the open space, I needed a place to put my favourite books. I decided to build some DIY corner shelves to hang above my new chair where I could display some books and other objects.
Making these shelves was surprisingly simple, and only required a few easy cuts and drill holes. I opted to keep the natural wood look and accent it with a light leather strap to maintain a spacious, natural, almost beachy feel to the shelving. I’m so happy with the result!
What wood do I build shelves with?
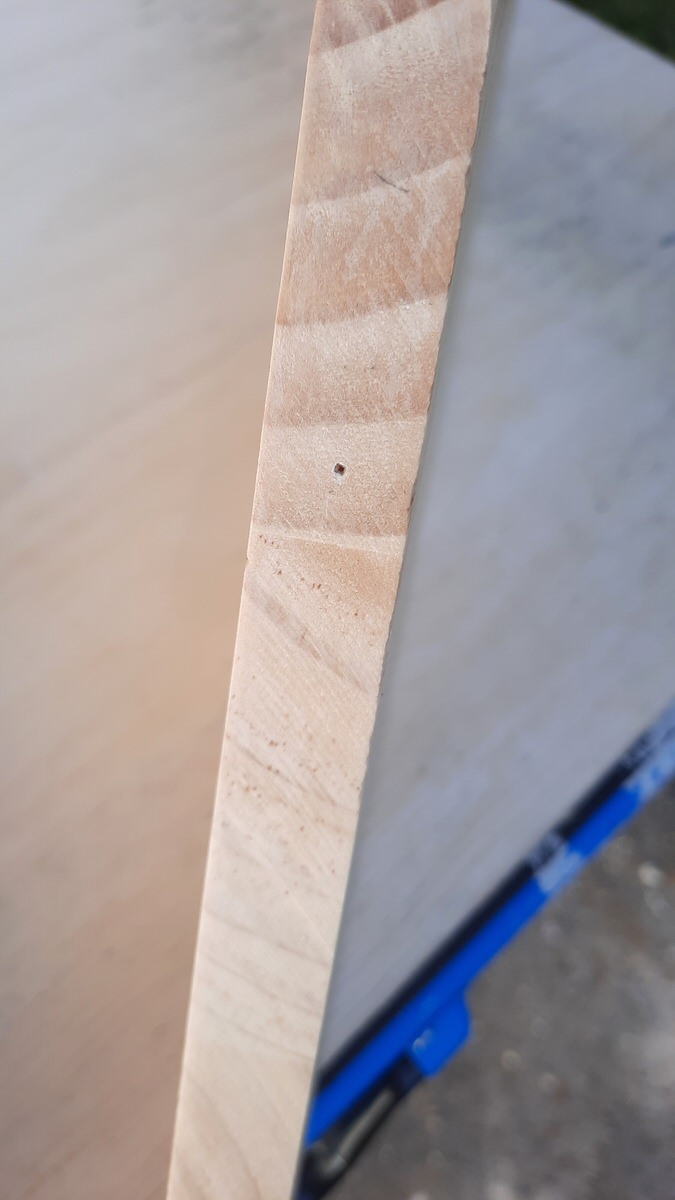
You can use all sorts of wood to build shelves out of. We chose to use basic pine boards. They are easy to find at your local hardware store and are less expensive than many other types of wood. They also take stain easily if you’re looking to tint them another colour. Given that our DIY corner shelves are hanging on the wall, I felt comfortable using softwood (like pine) because they wouldn’t be subject to lots of wear and tear.
How do I build DIY corner shelves?
First, carefully measure your wall and boards. I used a measuring tape and eyeballed about how long I wanted each shelf to run along each wall. I decided to make the shelves symmetrical, making each shelf the same length, but you can do one long and one shorter board if desired.
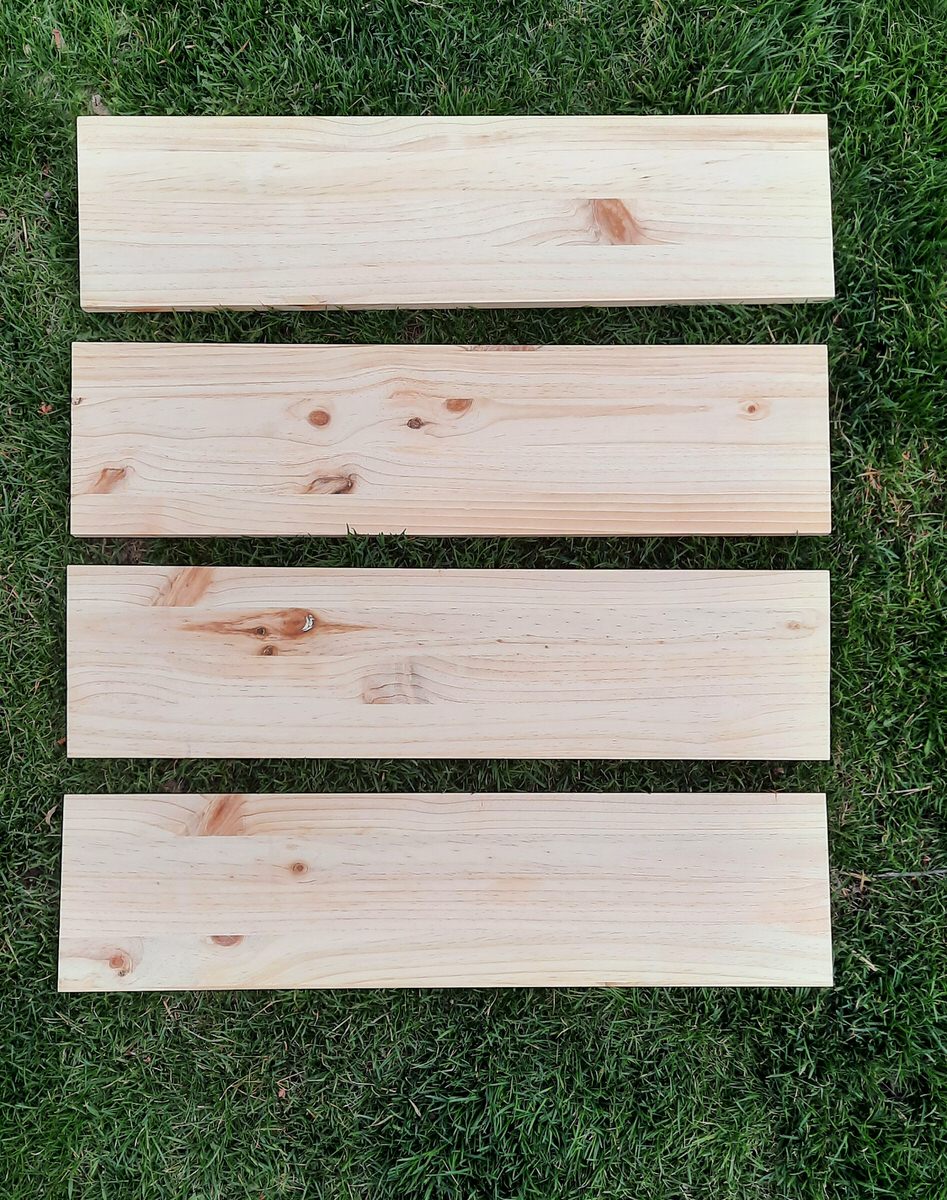
For my room, 8″ wide pine boards allowed books and plants to fit nicely on the shelves. I went with 1″ thickness, and 30″ lengths for each board. (For ease: that’s 4 boards, each sized 1x8x30. This is enough to make 2 corner shelves. If you’re only making one shelf, you’ll need 2 boards instead of 4).
You can purchase your boards at a local hardware store. Most boards come in longer lengths. This isn’t a problem! Just buy the longer boards and have the store cut them to size.
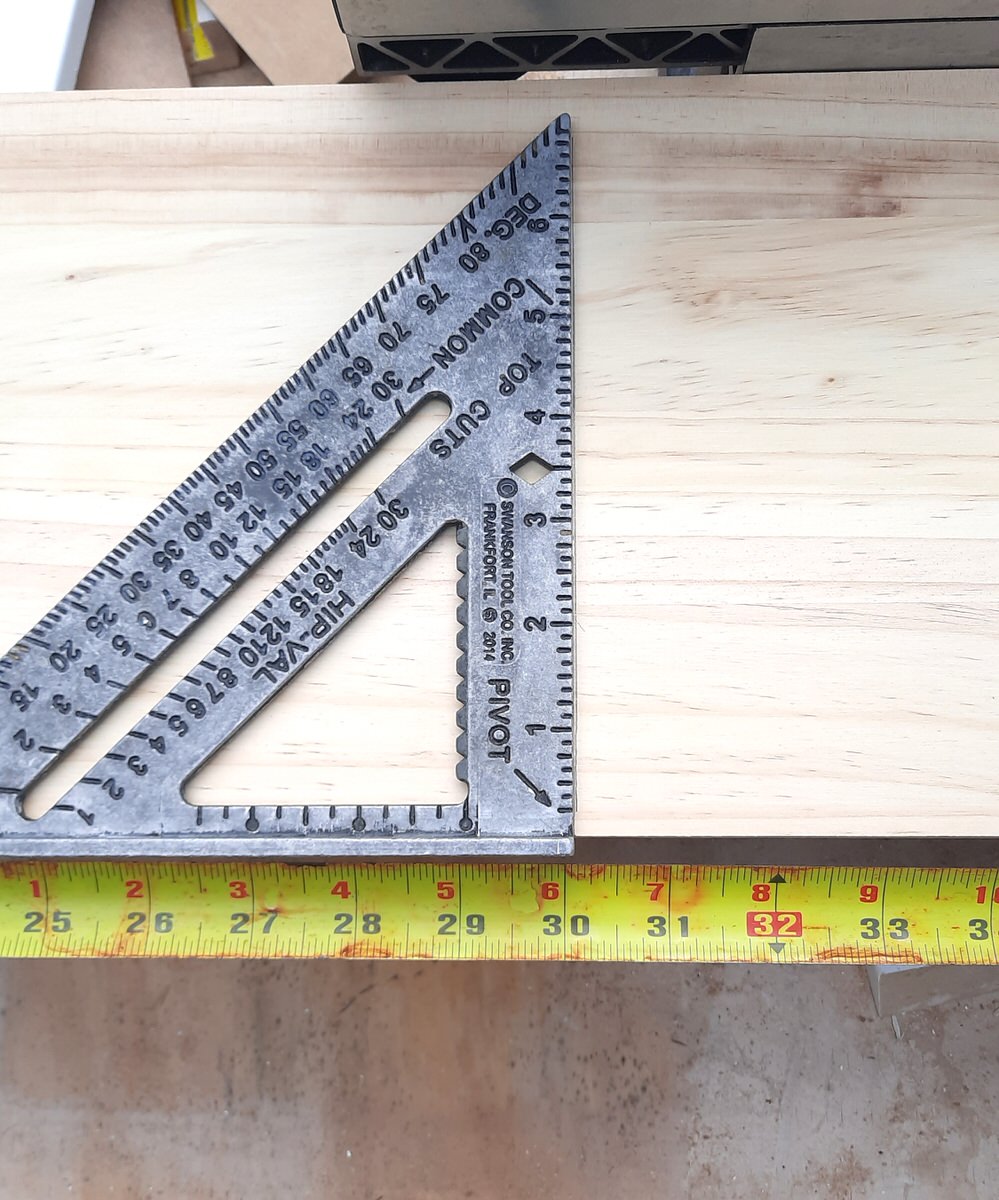
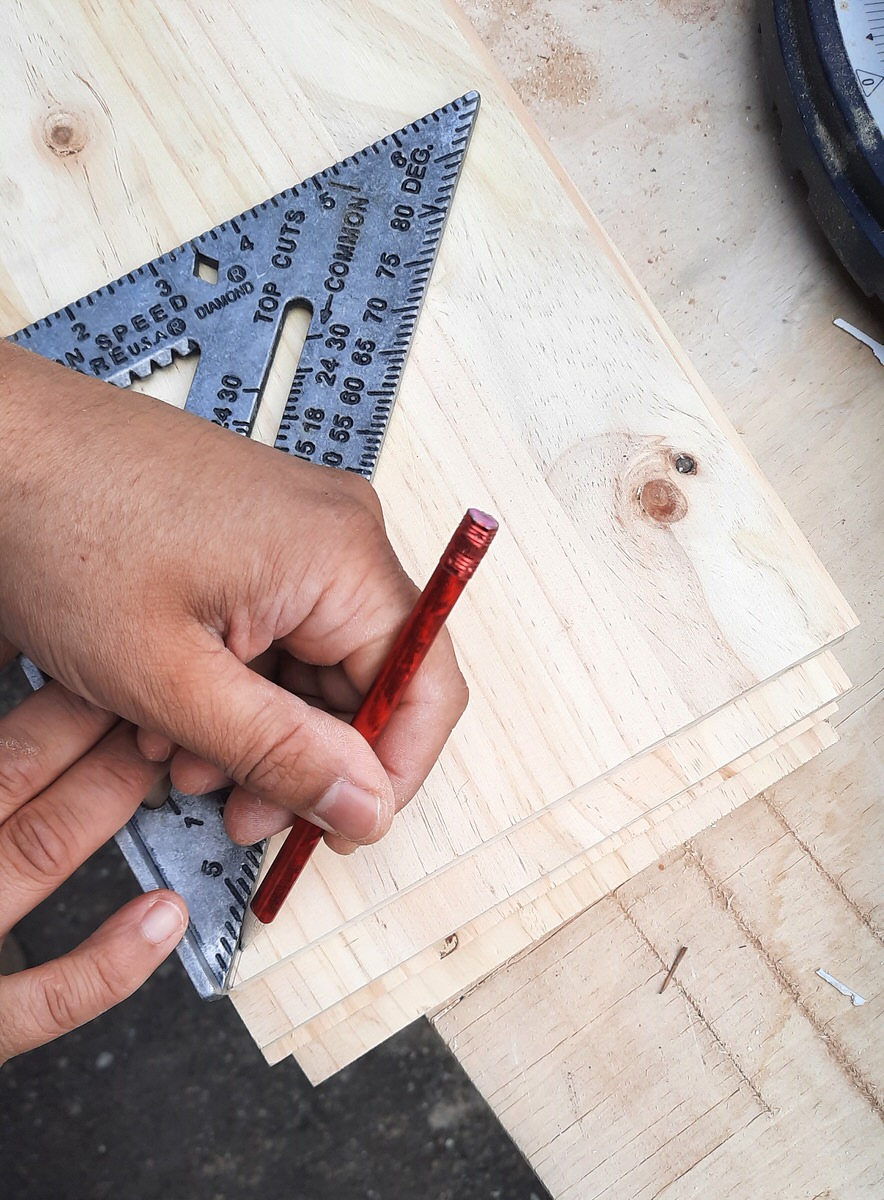
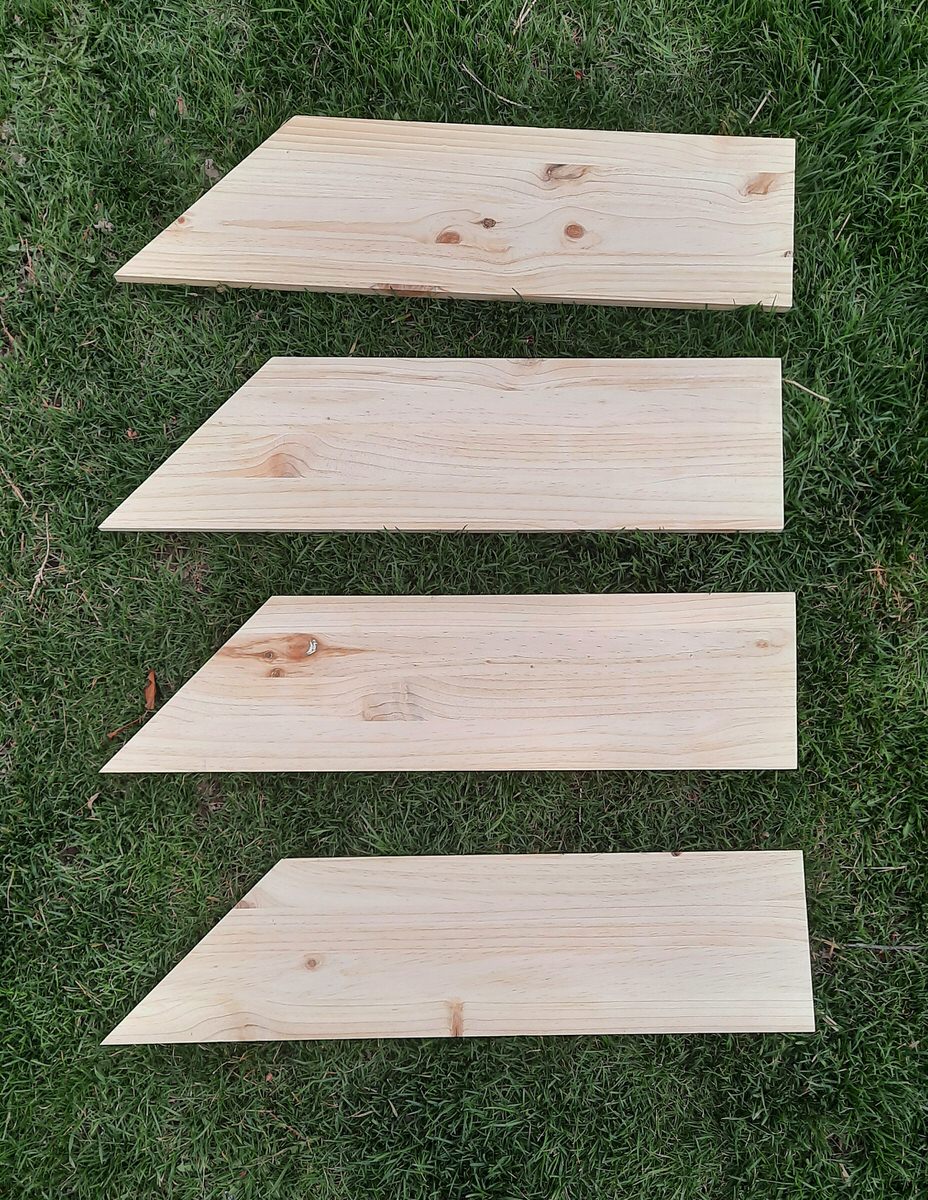
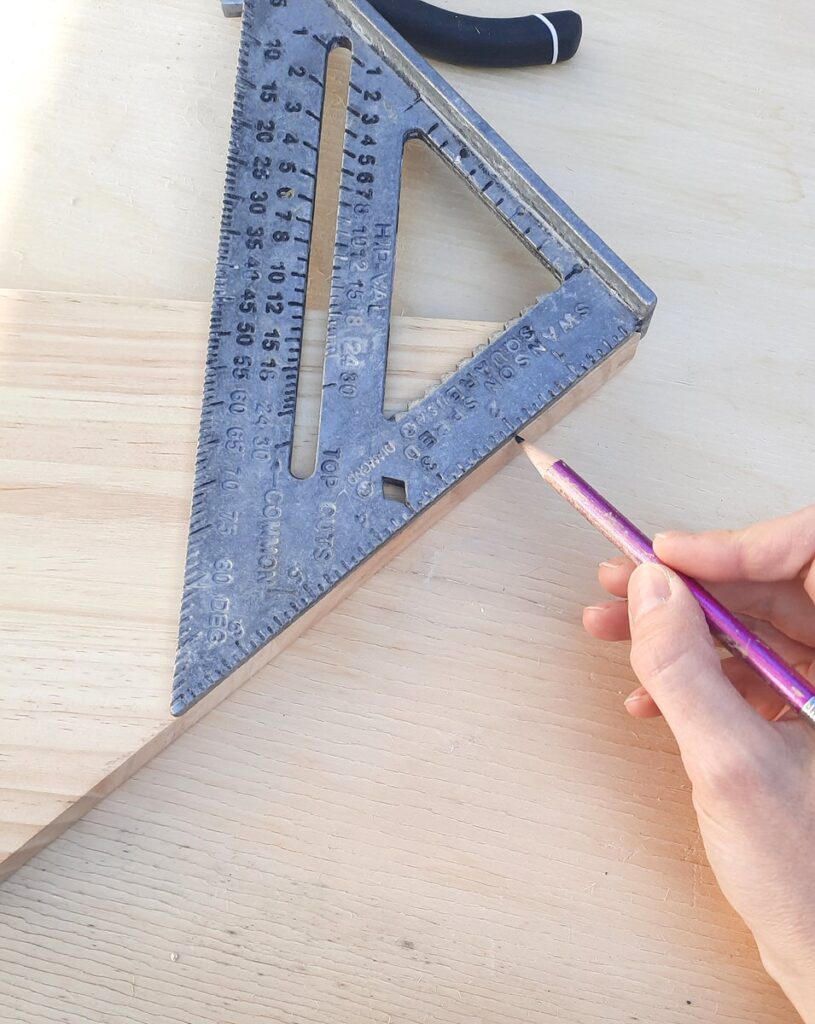
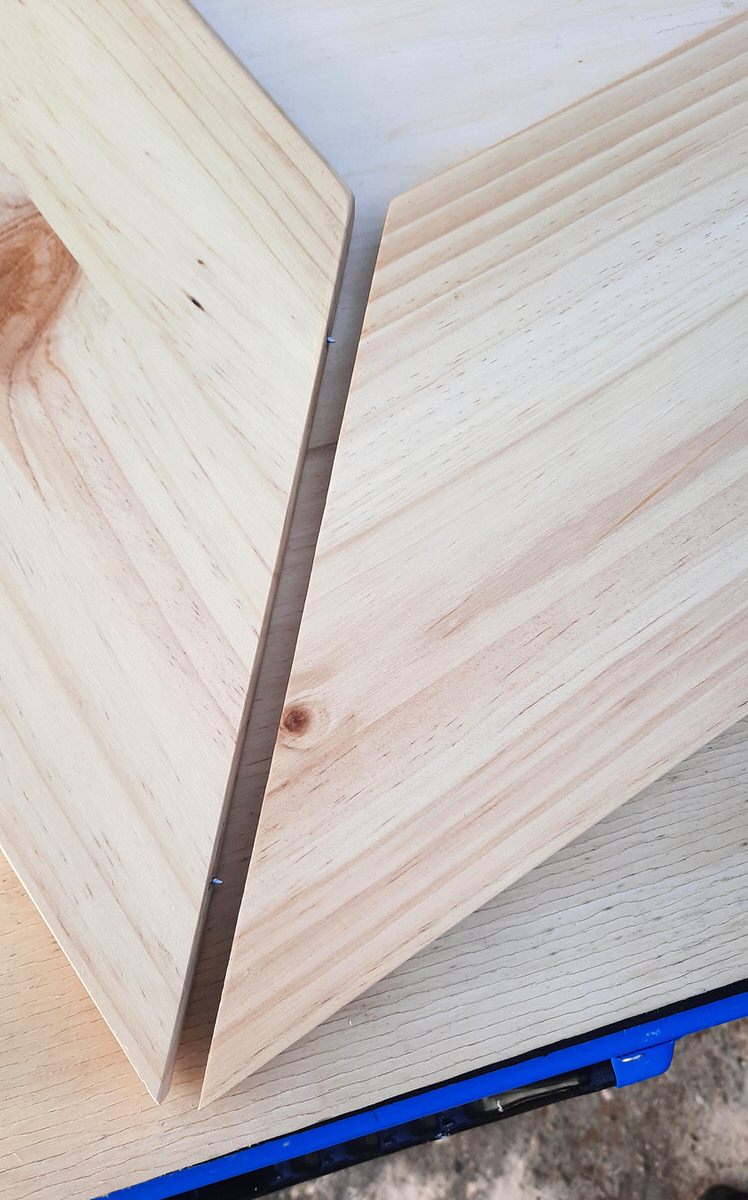
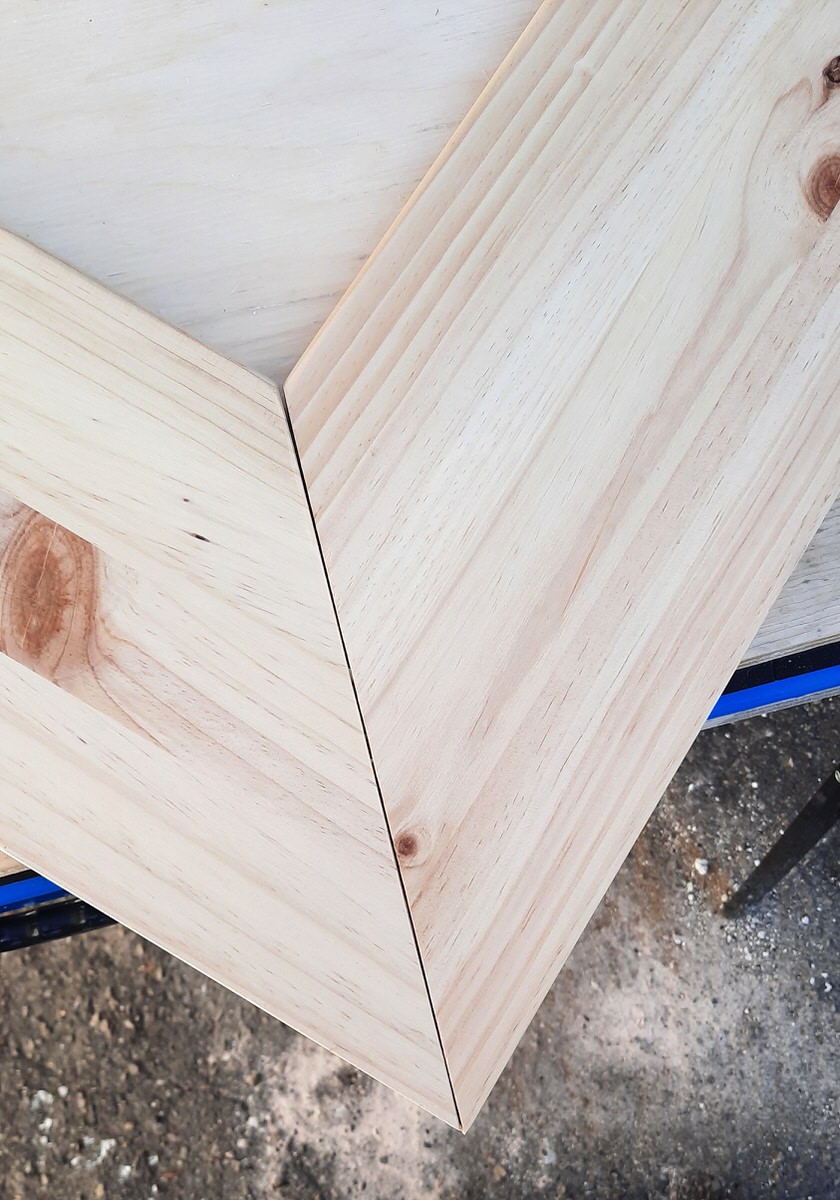
Cut one short side of each board on a 45-degree angle. This is so that they will fit together to form a 90-degree angle and fit in the corner of your walls. You can do this with a mitre saw like we did, but you could also cut it with a circular saw (being very careful to make a straight cut!). We used a triangle measure to get a clean 45-degree line.
Sand your shelves. We used an electric sander, but you can totally do this with regular sandpaper. We chose to create soft, curved outer edges for our shelves.
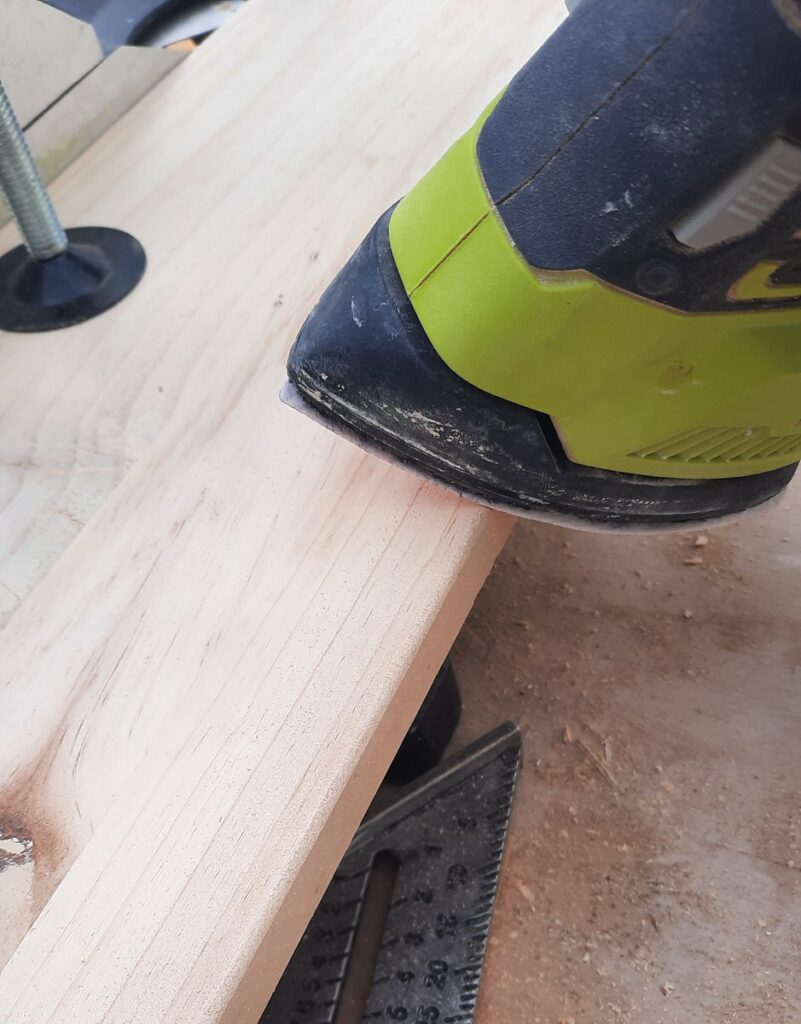
NOTE: When creating the rounded edges, we left the back edge and the 45-degree cut edge of each board sharp/unsanded so they would align with the wall and the other shelf smoothly.
How do I connect my corner shelves?
Connecting your two shelves together to create one corner shelf can seem daunting, but if you follow these steps, it can be pretty straightforward.
1. On one board, measure 2″ from the edge on both sides of your 45 degree cut side and draw a line.
2. Measure halfway down each line and make a mark (you will have 2 crosses on the board)

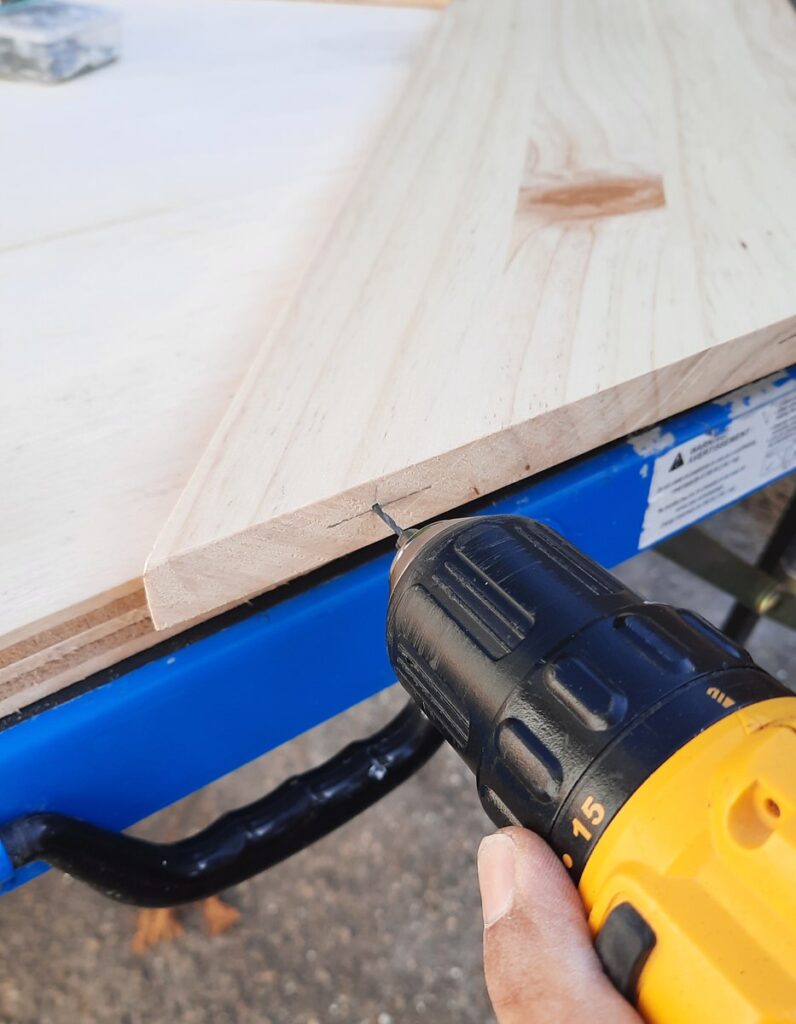
3. Drill a hole (approx the same size as your finishing nails) at the center of each cross, approx. 3/4″ deep (insert your drill bit into your drill leaving 3/4″ extruding from your drill to help keep each hole consistent).
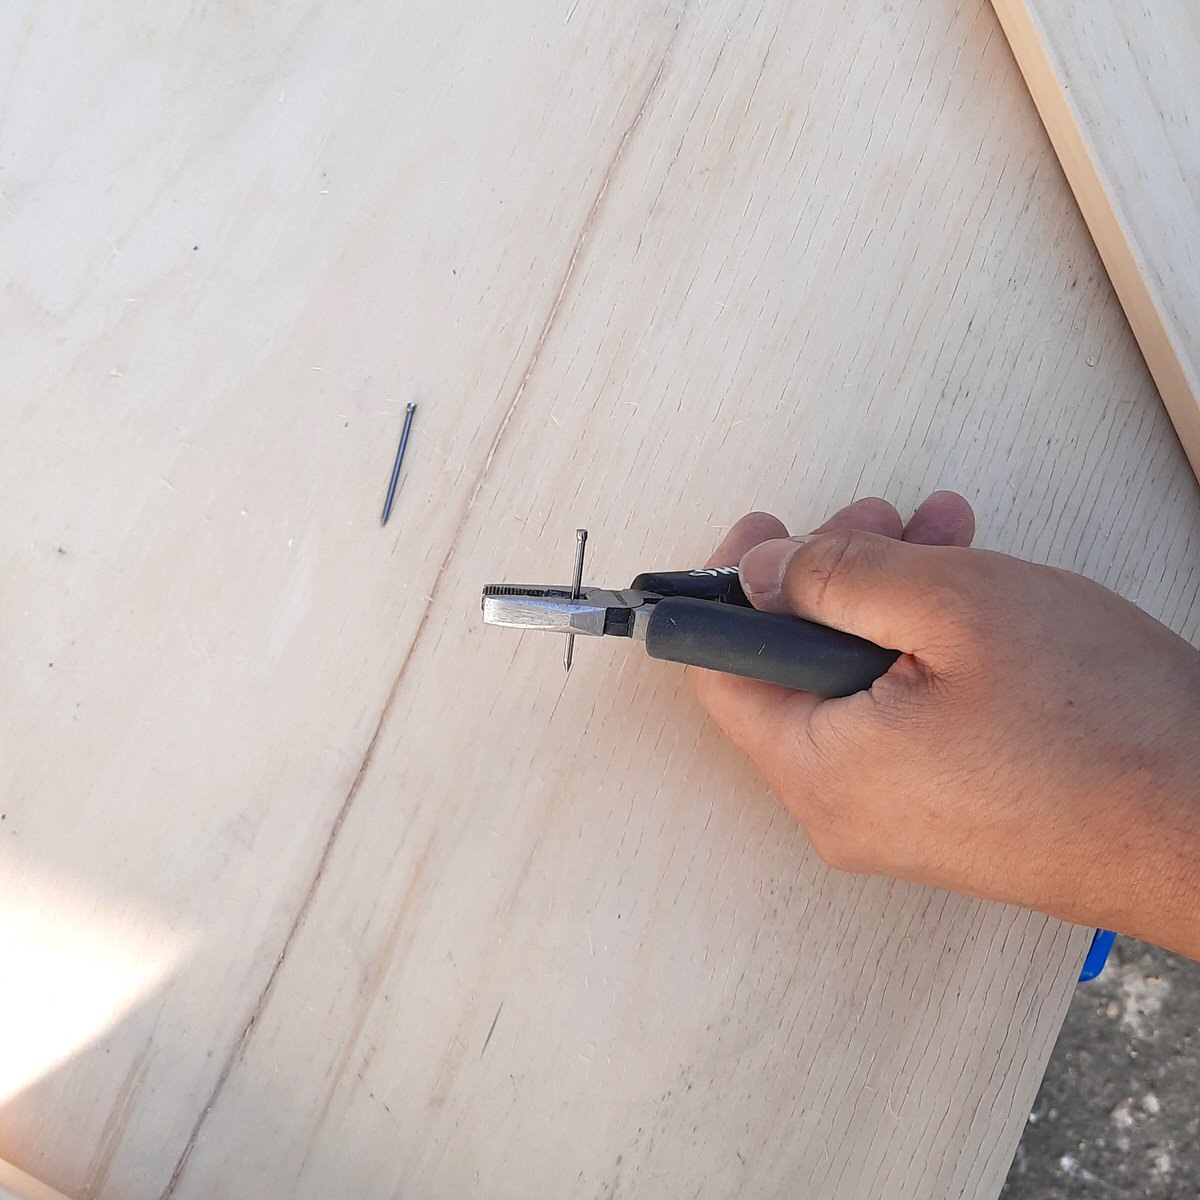
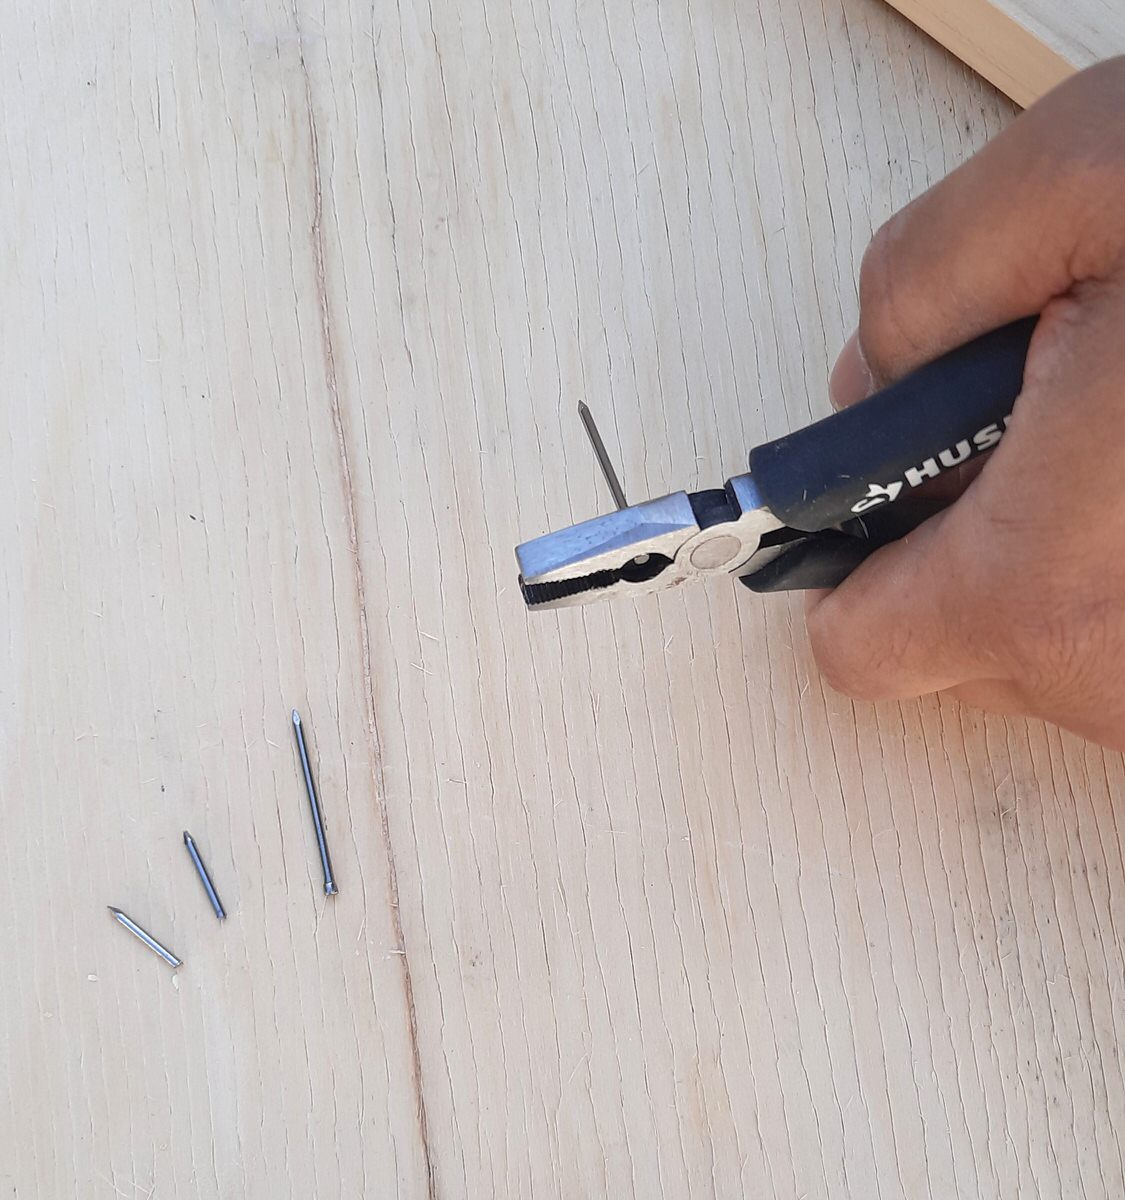
4. Using metal snips, cut 2 small finishing nails in half. Cut another 2 nails, removing the top ‘head’ of each nail.
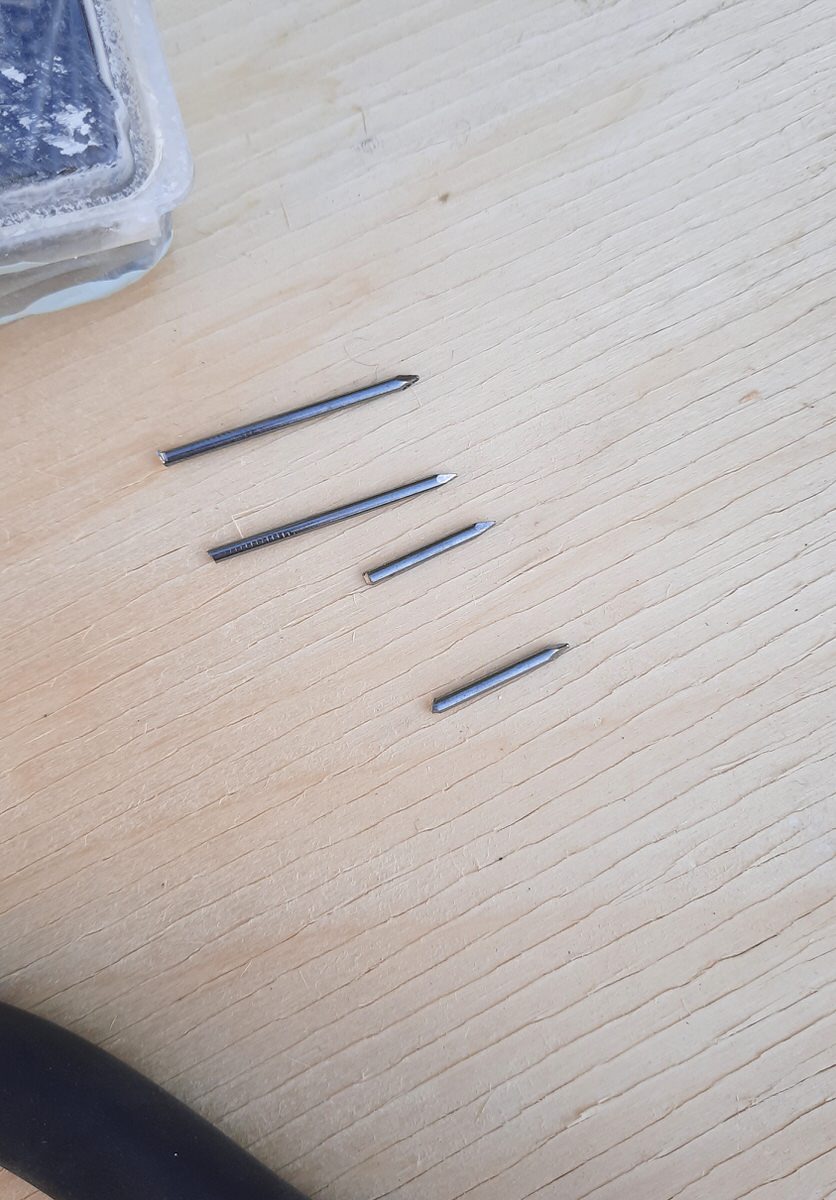
5. Insert one nail, pointy side out, into each of the two holes in your board. You should have a small point sticking out of your board at each nail.
6. Press your 2 shelf boards together. The points of the nails will leave a mark on the second board. Separate boards and remove (and discard) small finishing nails.
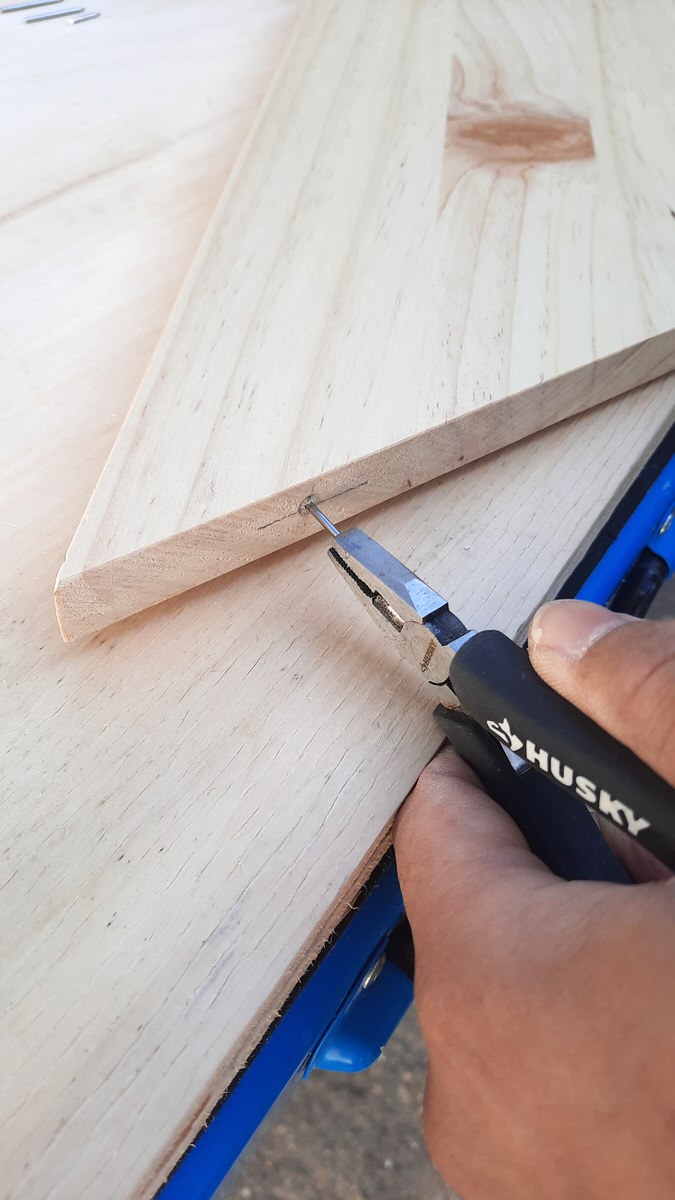
7. Drill a hole in each hole mark made on the second board (again, about 3/4″ deep).
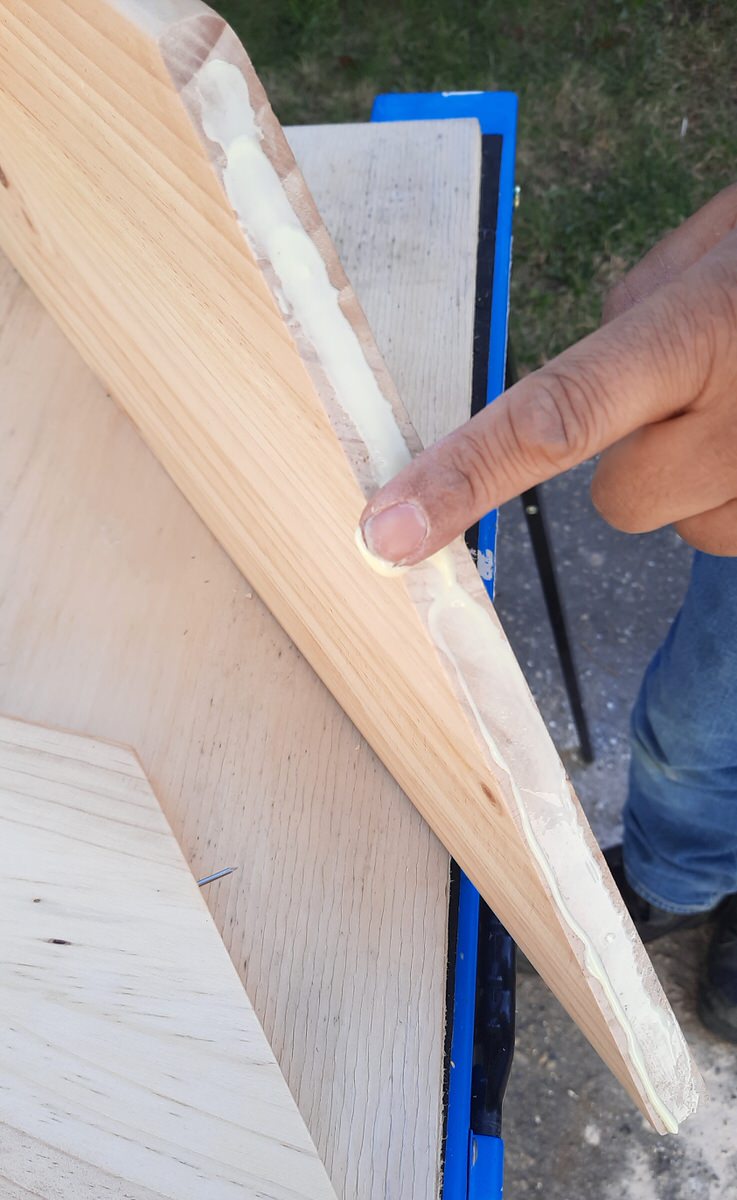
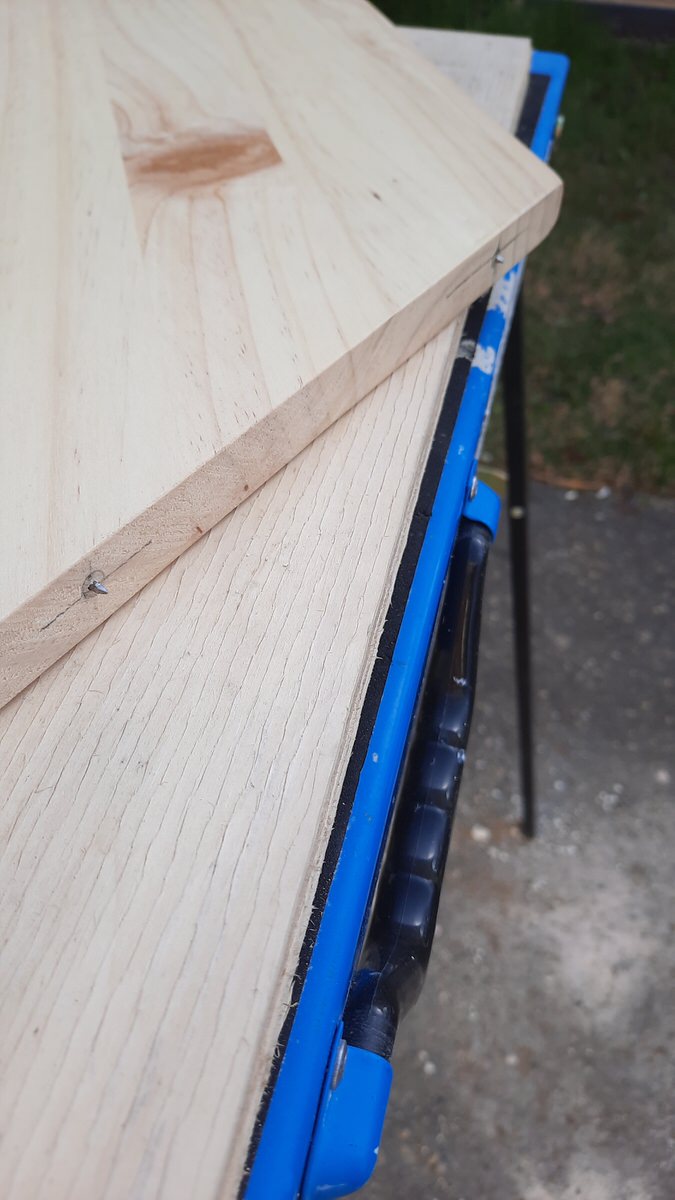
8. Spread a thin layer of glue along one of the cut sides of each shelf.
9. Press boards together, aligning nails into drilled holes on the second board. Clamp together and allow to dry overnight. If the alignment isn’t perfect, don’t worry, just sand your shelves a bit more to smooth out the connected edges.
How do I finish DIY corner shelves?
Once your shelves are built, you can stain and finish them to suit whatever style you like.
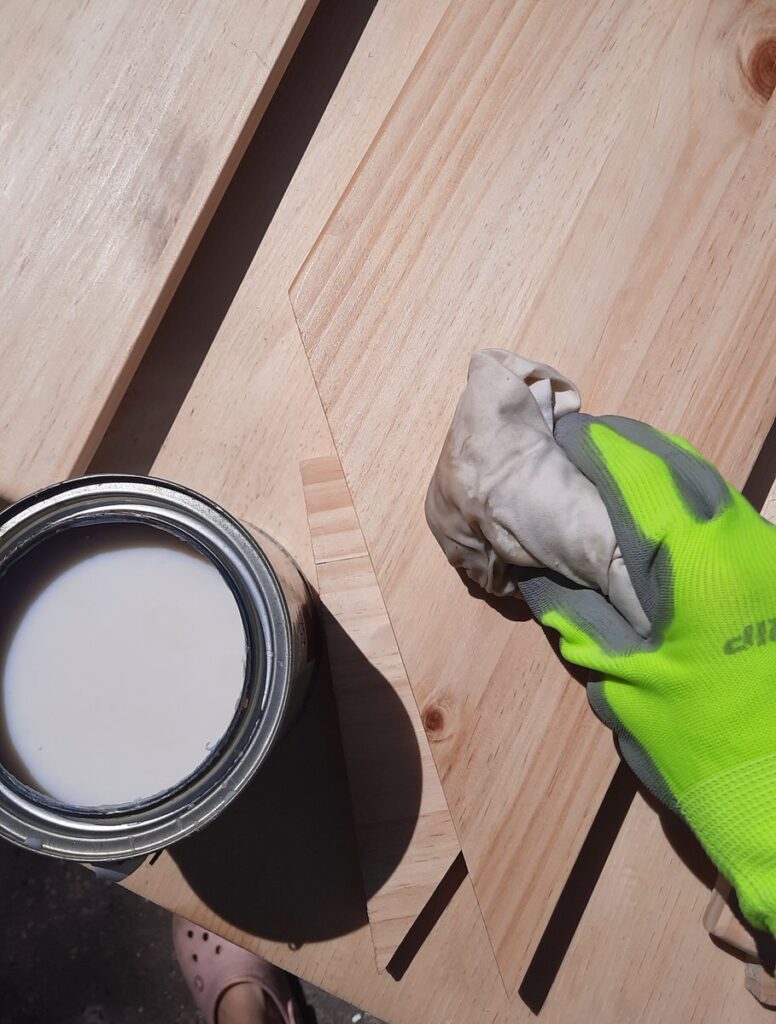
I chose to finish my boards before they were attached, but after doing this, some of the finish became scratched when attaching the boards. I’d recommend staining and finishing them after connecting them.
I opted for no stain and a clear finish. This protects the wood but leaves it with its natural colour.
Of course, you can stain your wood any colour you want, just be sure to seal it with a finish after. If you opt to paint your shelves, no finish is needed.
How to hang corner shelves
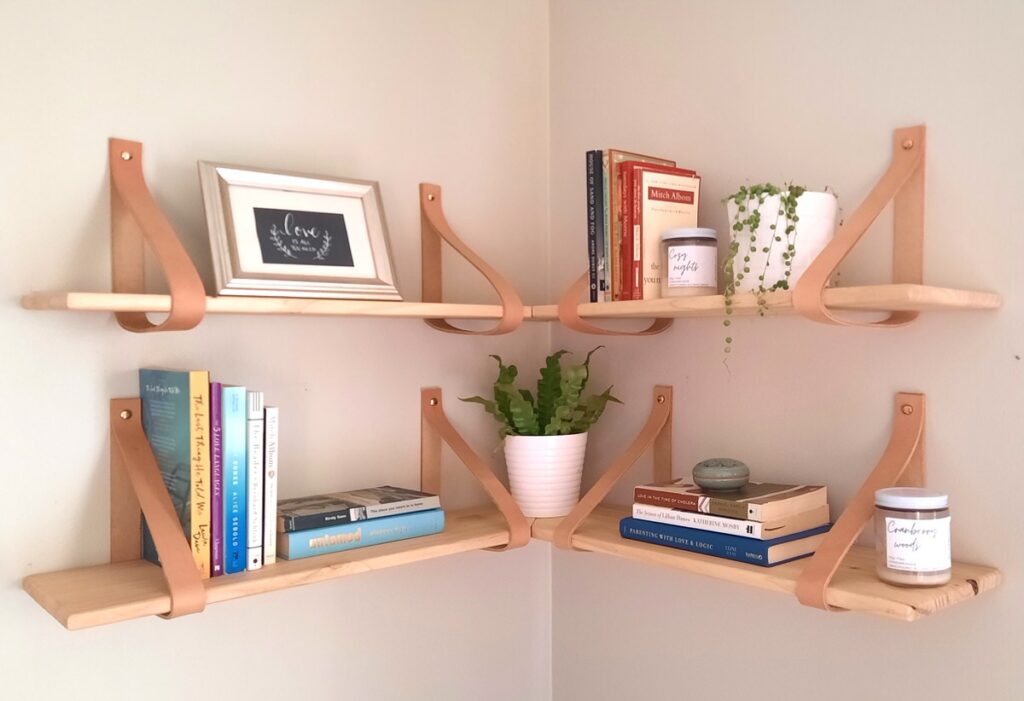
I really like the look of leather straps holding up these DIY corner shelves. And it is so easy! Here’s how we did it:
Cut your leather straps to size. I went with 1″ wide straps that I sourced online. I used 8 straps for this project, each being 2 ft. long.
Make sure all your straps are cut to exactly the same length, so your shelves are level!
To attach your straps, drill a small hole in both ends of your strap where you want your screw to be. Using a plug and screw, attach 2 straps for one side of your shelf to the wall.

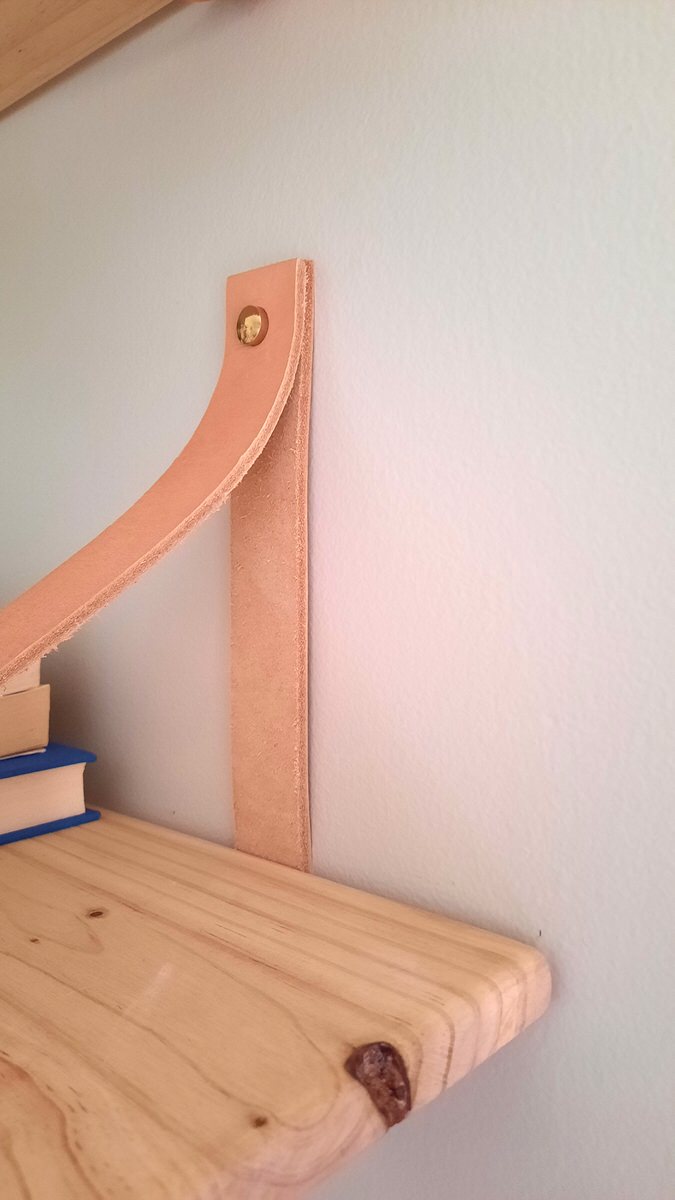
Ideally, you are drilling into a stud for extra support, but if not, the plug will help strengthen and stabilize your shelves.
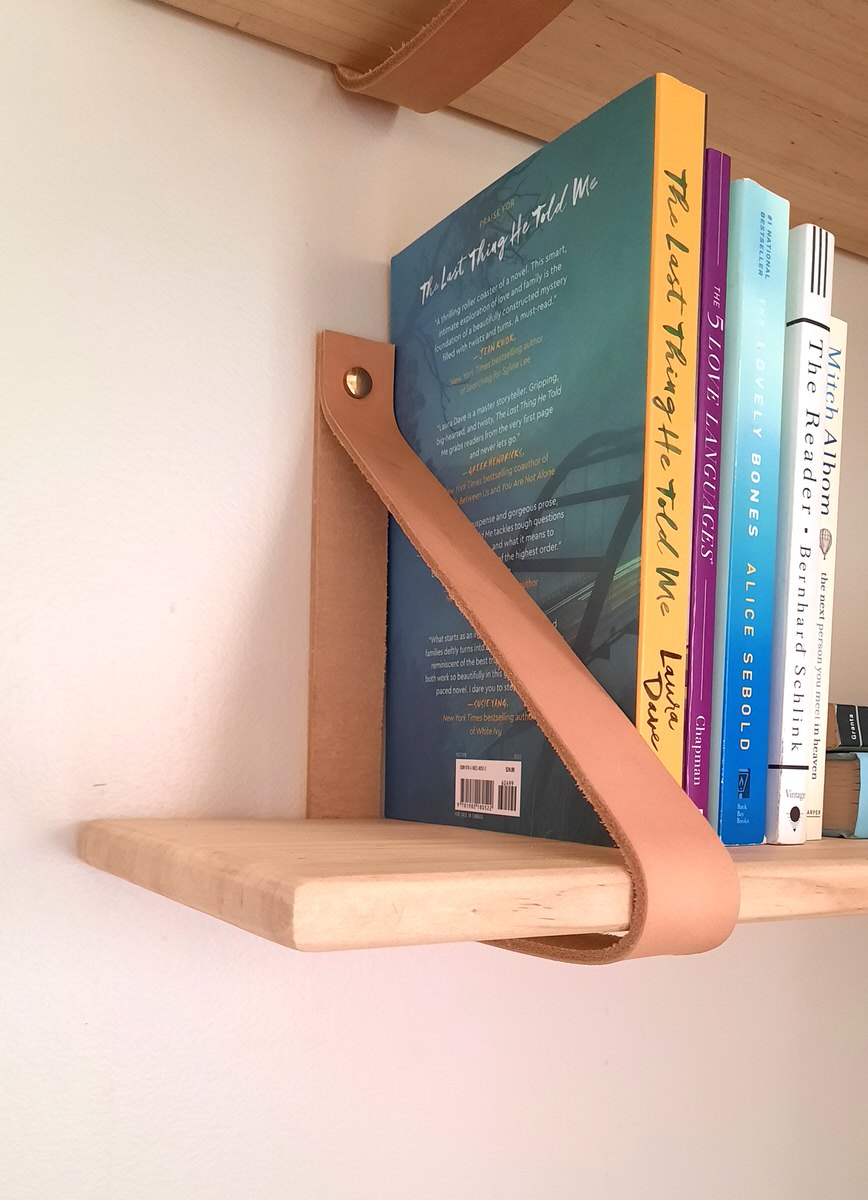
Slide your shelves into the mounted straps.
Have someone hold up your shelf to support while you slide your other 2 straps around your shelf and attach them to the wall as well. Use a level to be sure all your straps are sitting in the right position to keep your shelves straight.
Hide screws using brass screw covers.
If the straps bend away from the bottom of your shelves a bit, don’t worry. The weight of your books will weigh them down, and they will soften over time. Feel free to bend them a bit to help them out, but overall, it won’t be an issue in the long run.
How do I style corner shelves?
I like to keep my shelves fairly simple and clean. Place some books you enjoy, some stacked vertically and some stacked horizontally to add dimension to your shelf. Add a plant or two in a pretty pot, and one or two special items.
I think it’s important to have special/sentimental things around your home that tell a story and make your space your own. Just be careful not to over clutter your shelves with too many tiny trinkets, as it will quickly look messy. Keep it simple! And no need to head to the store. Often just repurposing items from around your home is all you need to do. Be creative!
And there you have it! DIY corner shelves that add both storage space and charm to any unused corner in your home.
What you’ll need to make DIY corner shelves
Pine boards (source at your local hardware store). We used 4 1x8x30 boards to make 2 corner shelves.
Triangle measure (if not using a mitre saw that cuts the angle for you)
Drill and Drill Bit (about the same width as your finishing nails)
Leather or vegan leather straps (you’ll need 16′ or 192″ for this project)
Screws and plugs
Looking for more?
Check out these other projects!
DIY Rustic Farmhouse Barn Door
Pin it for later
Don’t forget to sign up below to have all our new projects, recipes, and more sent straight to your inbox. We can’t wait to have you as part of our Little Hints community!
Leave a Reply