
This Easy Brownie Ice Cream Cake is made up of layers of fudgy homemade brownie and two flavours of ice cream, topped with whipped cream and extra brownie pieces. It’s a great way to get two delicious desserts in one. My son invented this dessert for his eighth birthday. He loves brownies and ice cream, so he asked for both made into a cake. Easy enough. If you can whip up a batch of brownies, you can totally make this cake 🙂
How to make perfect brownies
The best recipe I’ve ever found for perfect brownies came right from the package of Fry’s Cocoa. I have used it for years and years. The brownies have a rich chocolate flavour and perfect fudginess. It’s simple and uses basic ingredients. I’ve added it to the recipe below.
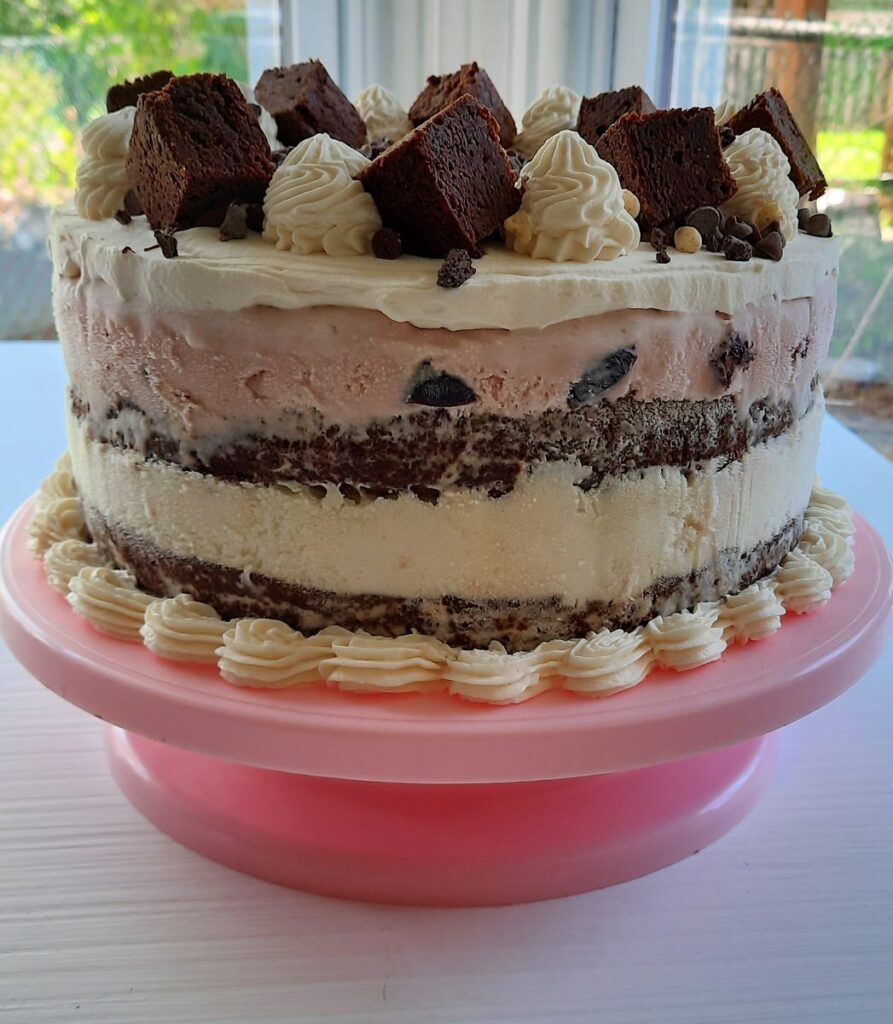
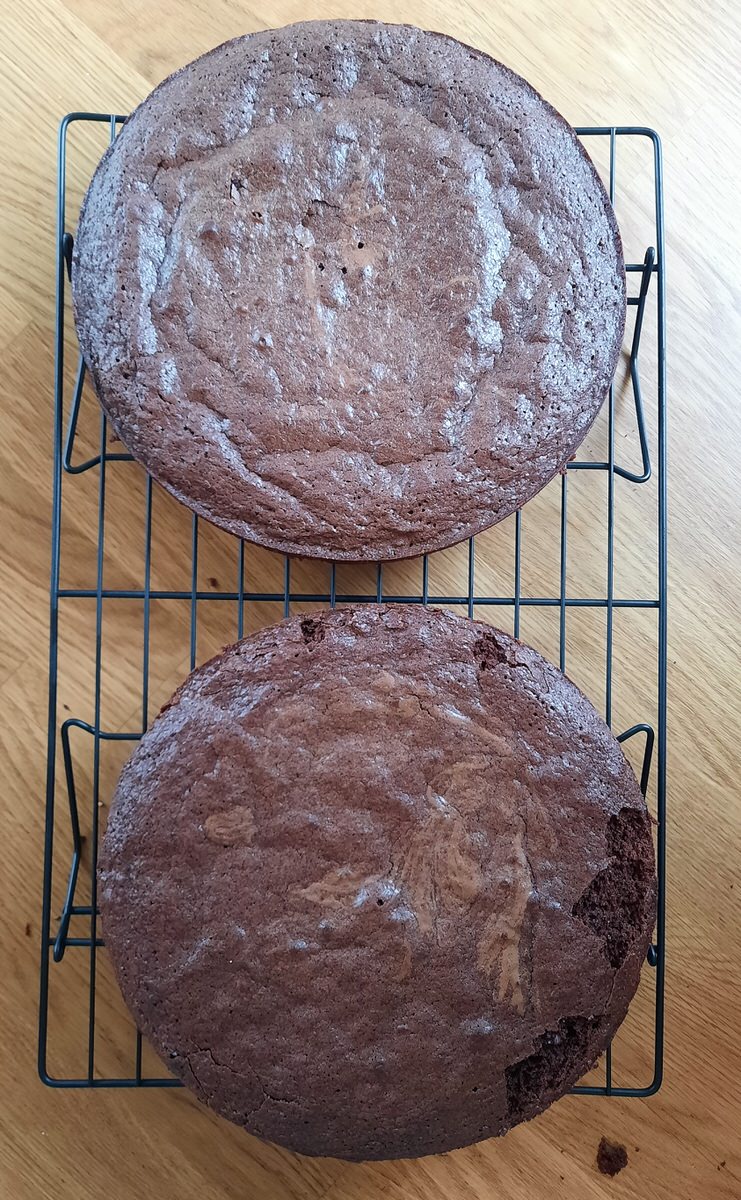
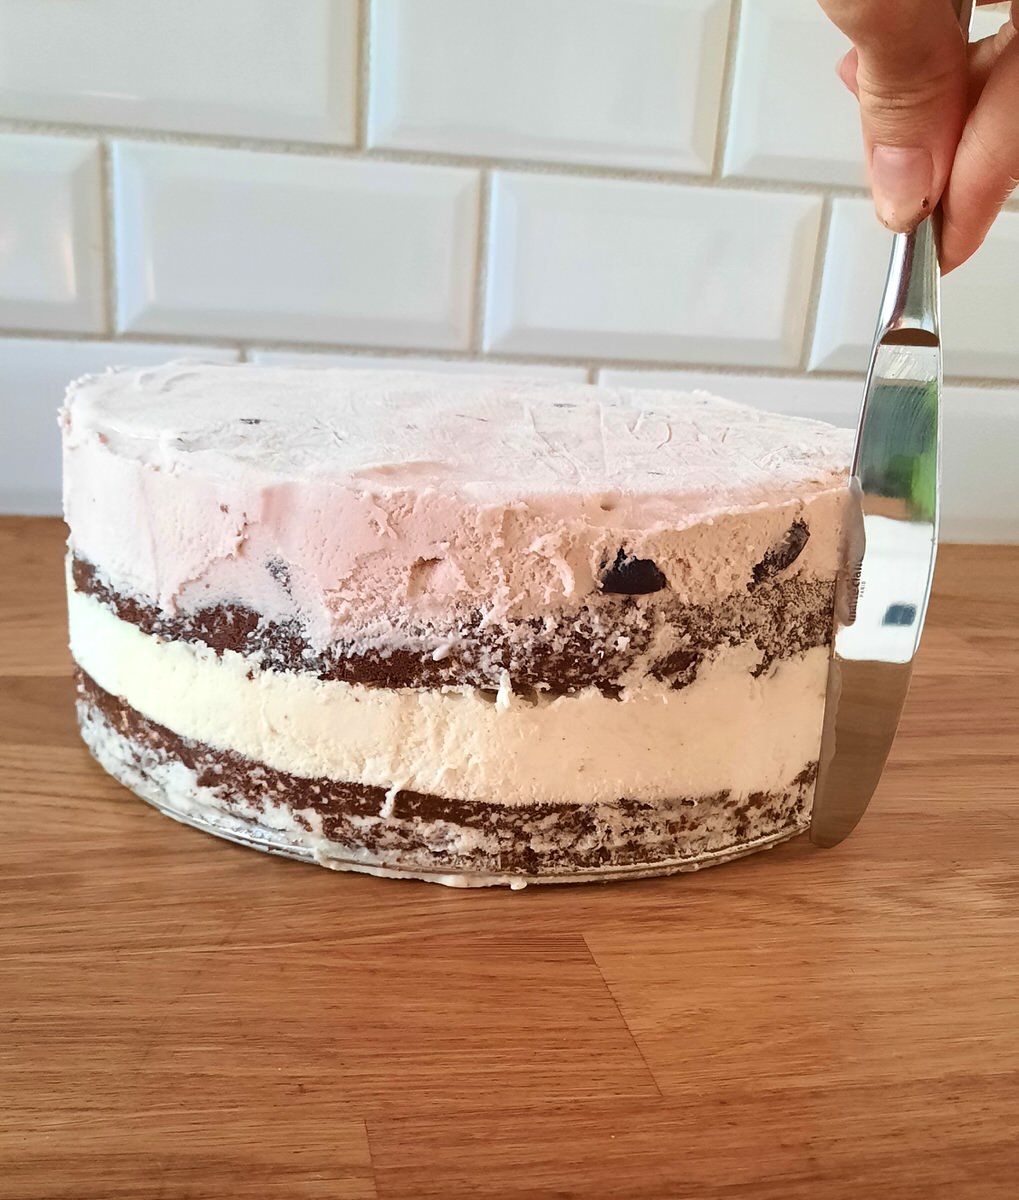
For this easy brownie ice cream cake I made a big batch of brownies and divided it between 3 pans: 1 x 9″ springform pan, 1 x 9″ round cake pan, and one 9″ square pan. This gives enough brownies to make 2 layers for the cake as well as some extra to top the cake with and to snack on…you’re going to want to snack on them, trust me…
How to make easy brownie ice cream cake
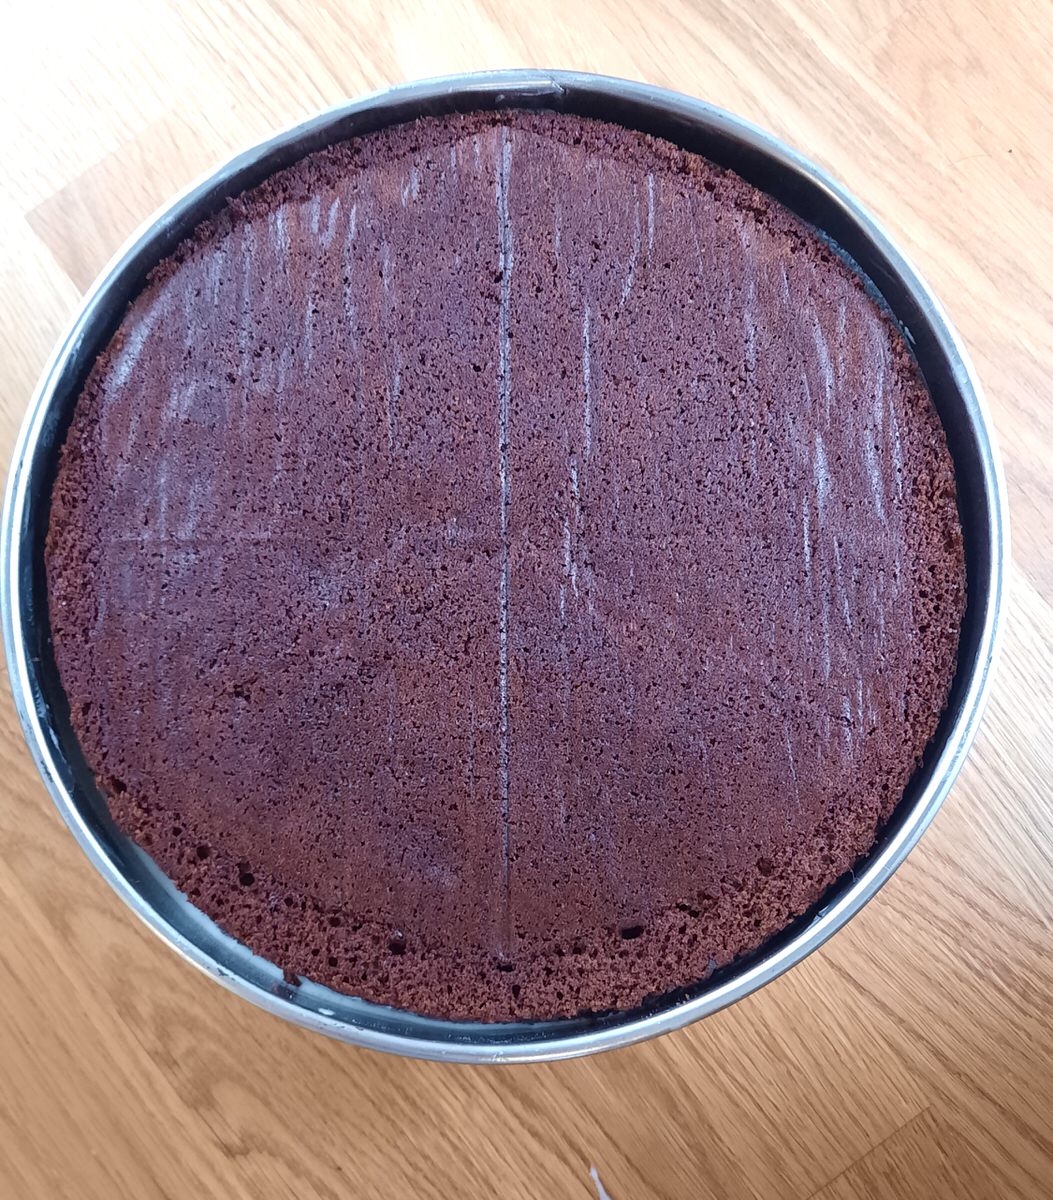
First, prepare your brownies. Bake them in the pans listed, being sure to grease and line the bottoms of the pans with parchment paper. The springform pan is going to be the pan the rest of the cake is made in, so baking the brownies on the bottom of that pan creates your first layer. Once the brownies are baked, carefully remove from pans.
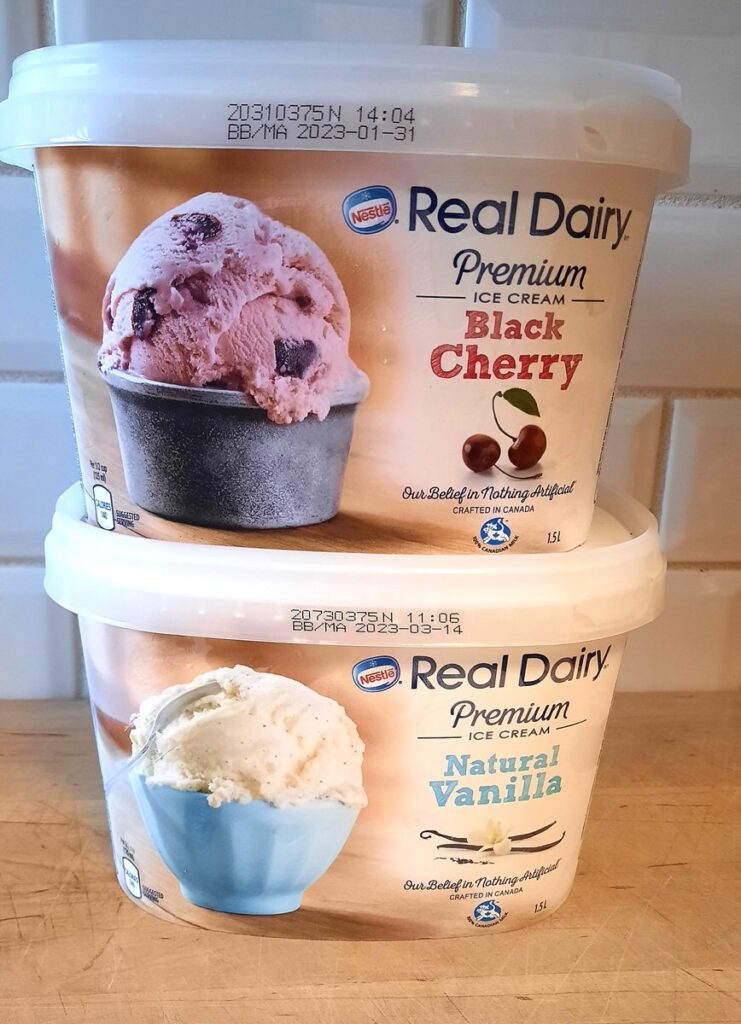
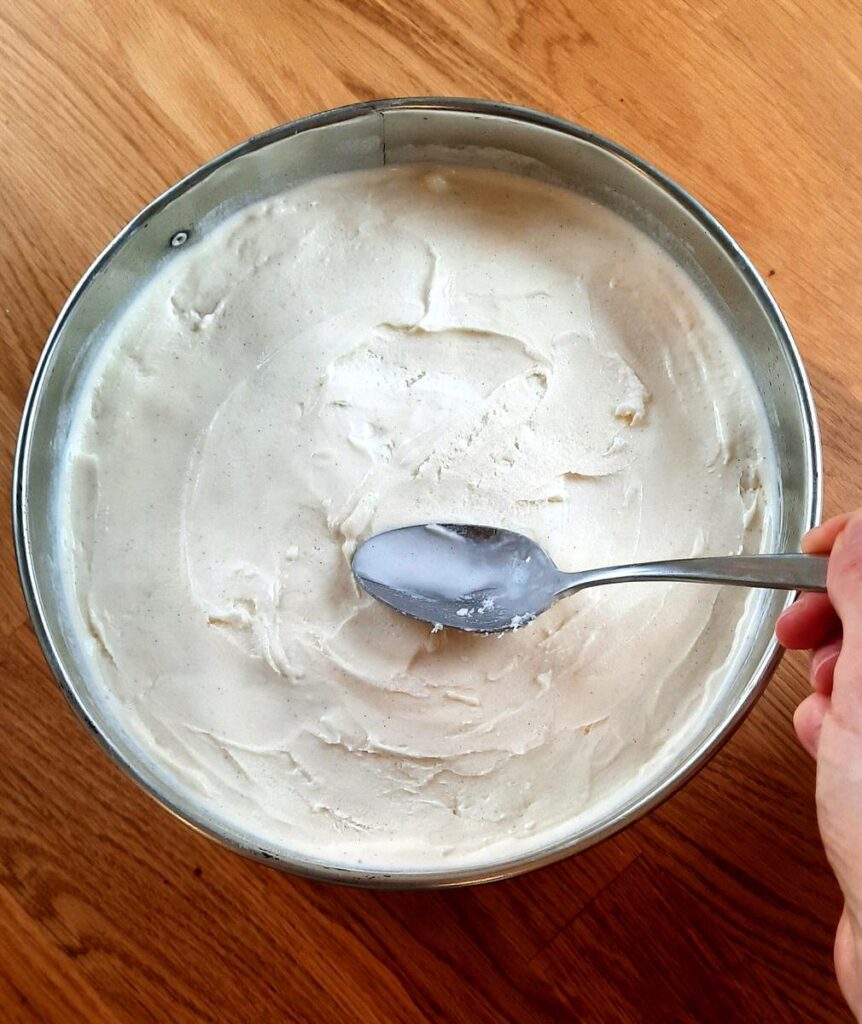
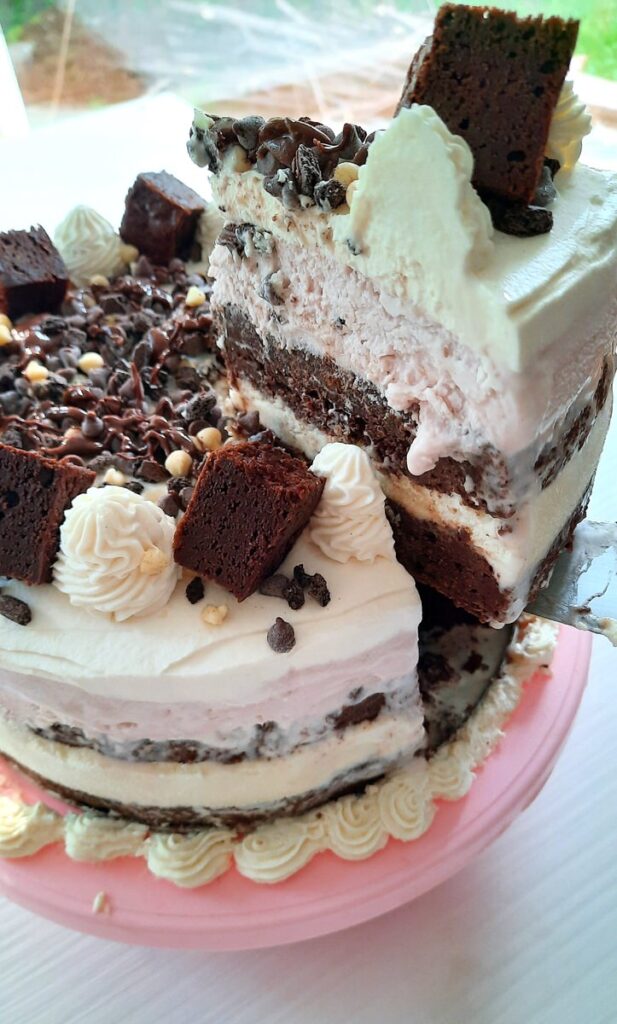
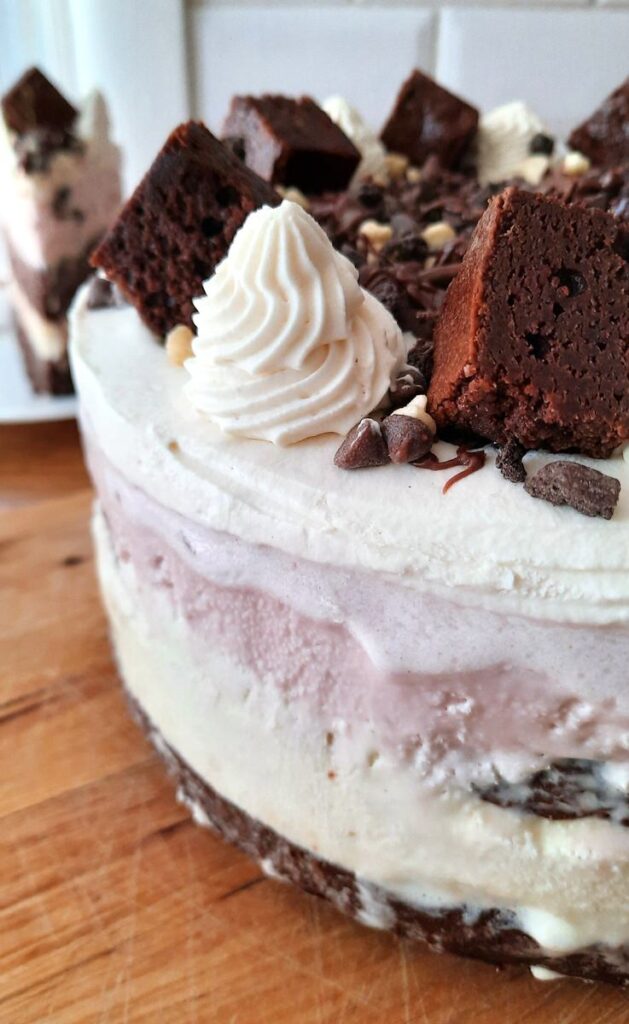
Soften one container of ice cream until spreadable, but not melted. Our son chose vanilla ice cream for the first layer of his brownie ice cream cake, and cherry ice cream for the other ice cream layer.
Place your first brownie layer into the springform pan.
Spread your first flavour ice cream on top of your brownie base. Cover with plastic wrap and place in the freezer until hard, for a couple of hours.
Next, carefully remove the brownie from the 9″ round cake pan, and remove the parchment lining on the bottom. Press brownie onto the ice cream in the springform pan.
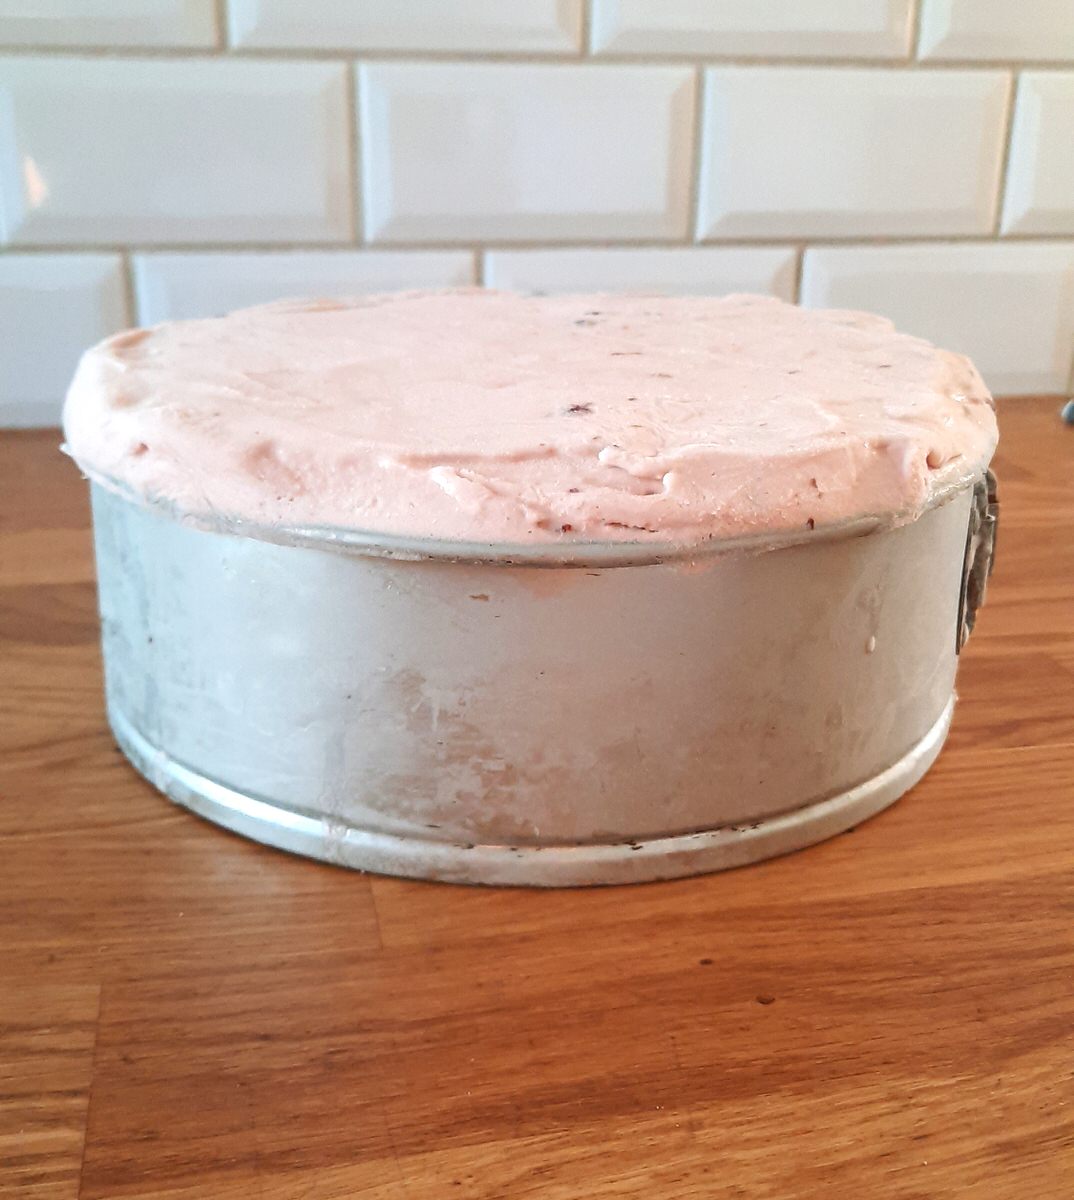
Top with your second flavour of slightly-softened ice cream. If needed, the ice cream can come above the edge of the pan, just shape it so it looks consistent with the rest of the cake. Wrap with plastic wrap again, and freeze until firm.
How do I frost an ice cream cake?
The best thing I’ve found to frost an ice cream cake is stabilized whipped cream. It freezes really well and softens to a creamy texture that pairs perfectly with the ice cream and brownies. You can make stabilized whipped cream easily, just follow my simple recipe here. Note that you can make stabilized whipped cream a few hours in advance and store it in the fridge until ready to use.
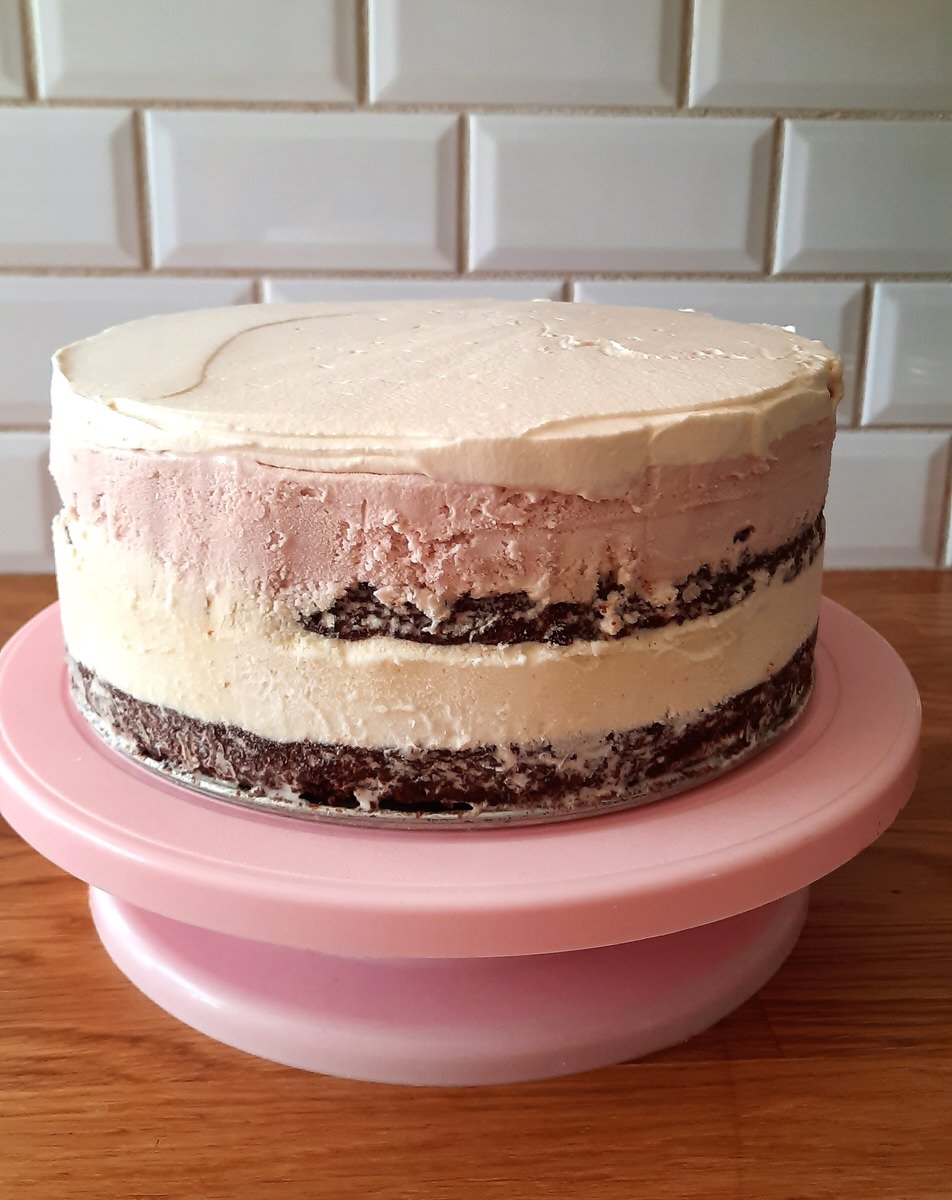
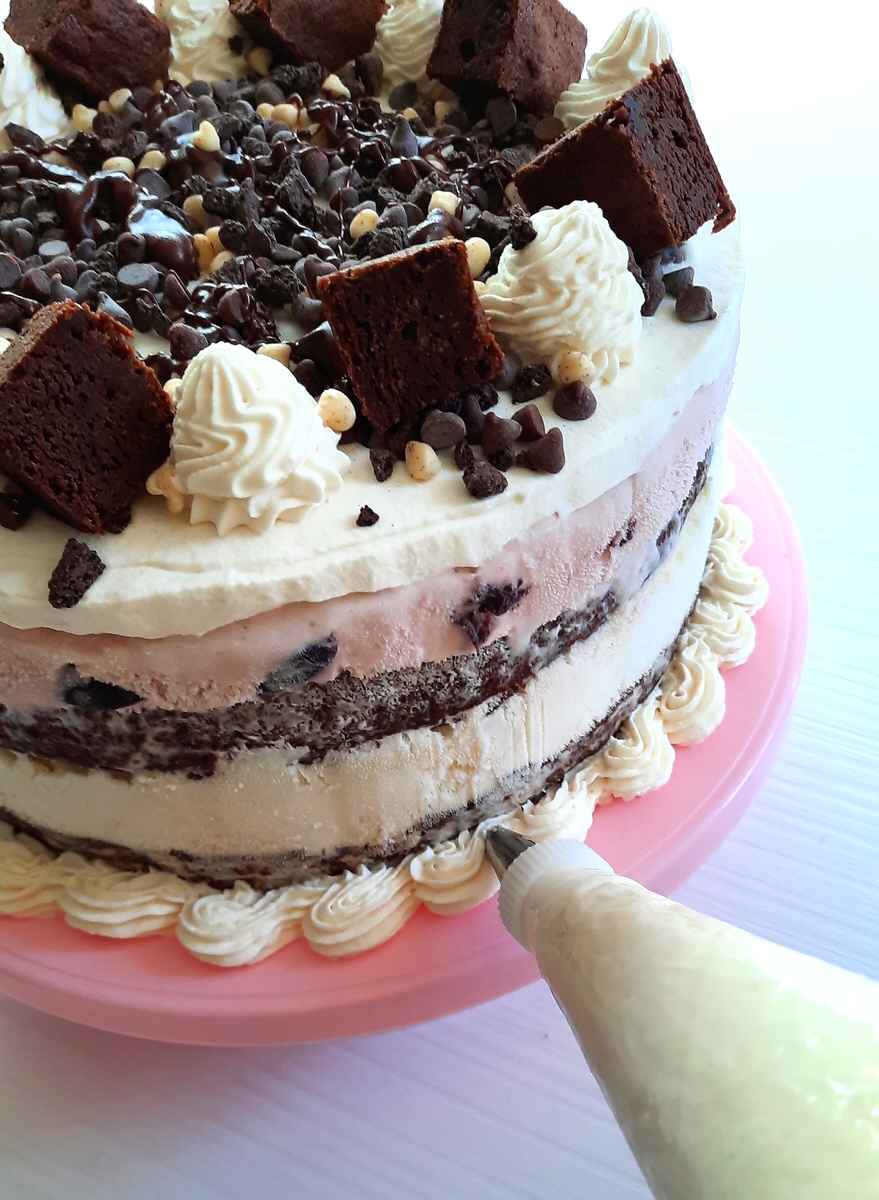
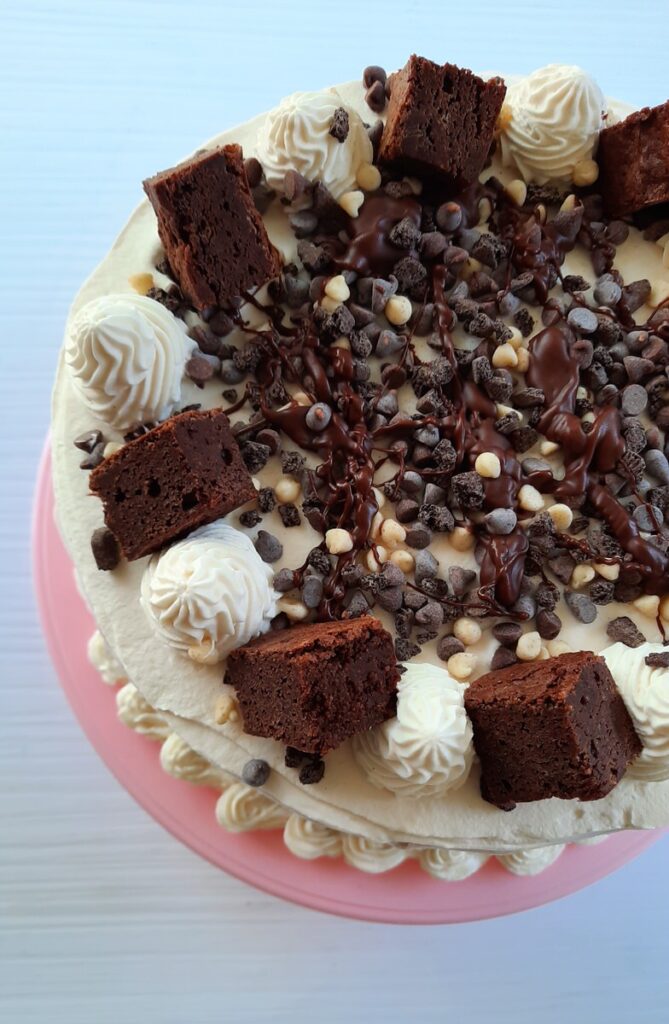
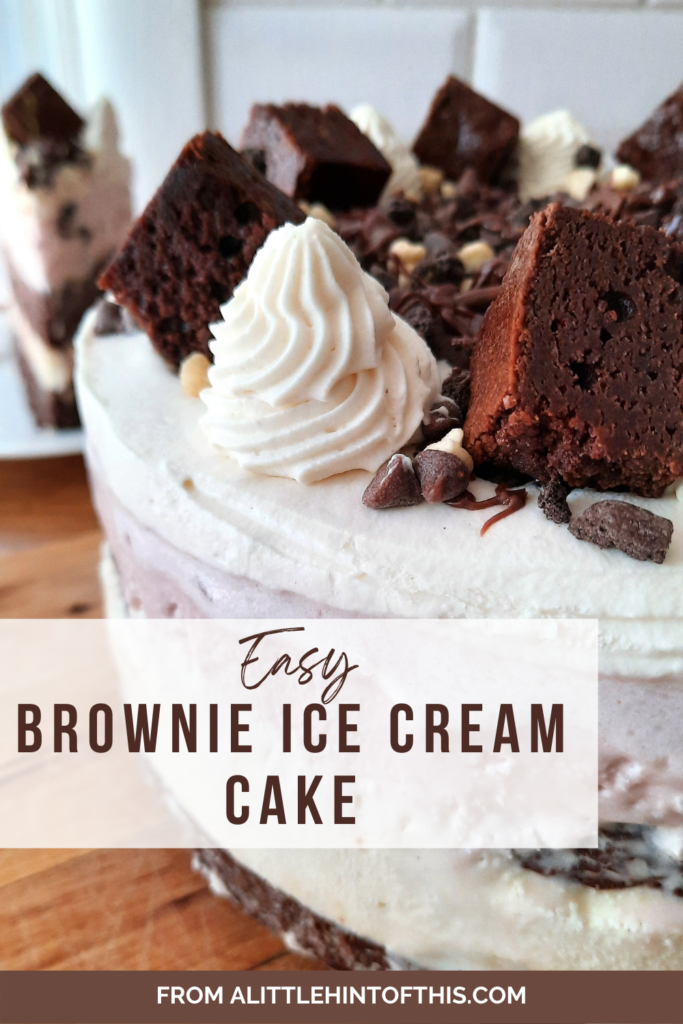
To use, simply fill a piping bag or spread directly on to cake. We spread a layer on the top of the cake and then piped the details around the bottom and top. Leaving the edges without the whipped cream allows all the layers to show through.
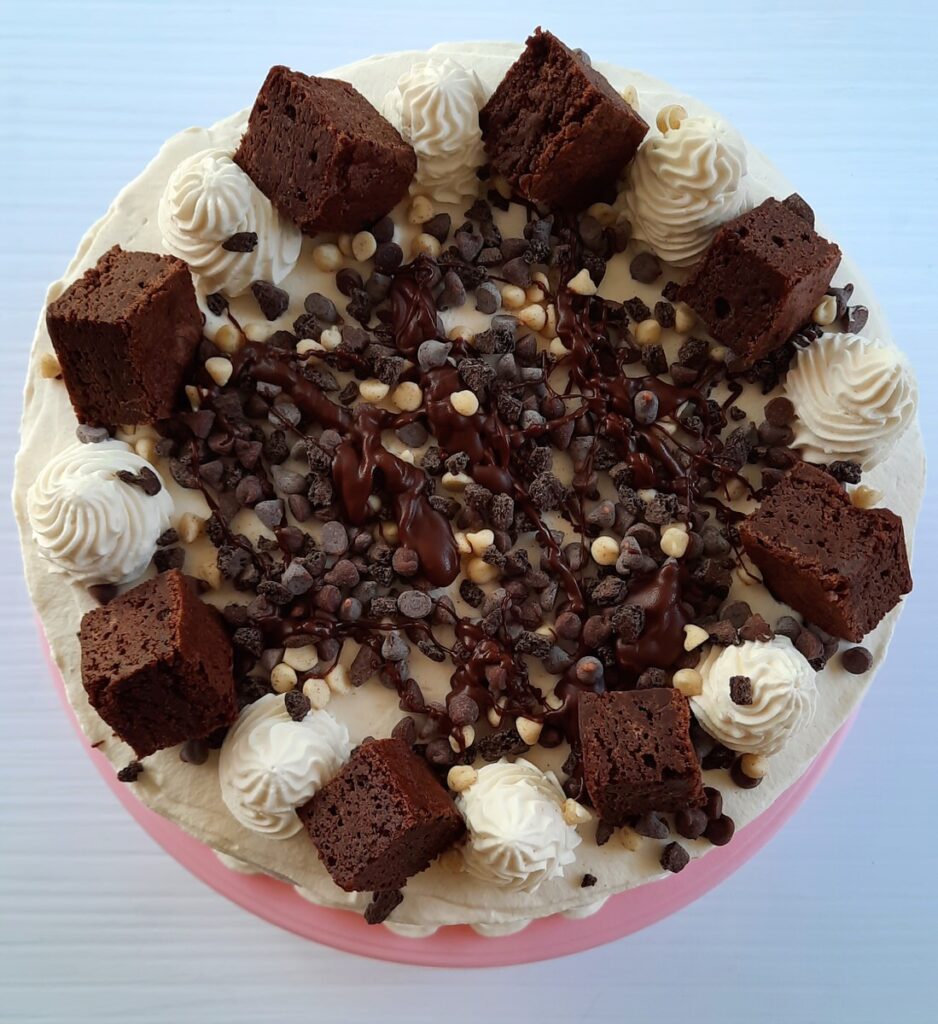
We chose to add some store-bought chocolate hazelnut spread (warmed in the microwave for a few seconds), brownies, mini chocolate chips, and a few crushed oreo pieces to decorate our cake, but you can decorate it however you like! Once decorated, you can either freeze your easy brownie ice cream cake (don’t cover with plastic wrap until whipped cream is fully frozen!), or serve right away.
And that’s it! It’s so straightforward and easy, giving you lots of room to change it up however you like to suit your tastes.
Don’t love chocolate? Why not try blondies instead of brownies?
Can’t eat dairy? Try coconut ice cream and a dairy-free brownie for a delicious alternative.
Special event? Try picking different colour ice creams to coordinate with your party!
Easy Brownie Ice Cream Cake
Ingredients
For the brownies
- 2 ⅔ cups all-purpose flour
- 2 tsp baking powder
- 1 tsp salt
- 2 cups butter
- 2 cups cocoa powder
- 4 cups sugar
- 8 eggs
- 2 tsp pure vanilla extract
For the cake:
- 2 1.5 L tubs ice cream, any flavours
- 1 batch stabilized whipped cream recipe at Stabilized whipped cream – A Little Hint of This…
Optional:
- ¼ cup mini chocolate chips try milk, white, semisweet
- 3 tbsp Nutella warmed in microwave for a few seconds to soften
- 2 Oreo cookies or chocolate wafer cookies, crushed
Instructions
For the brownies:
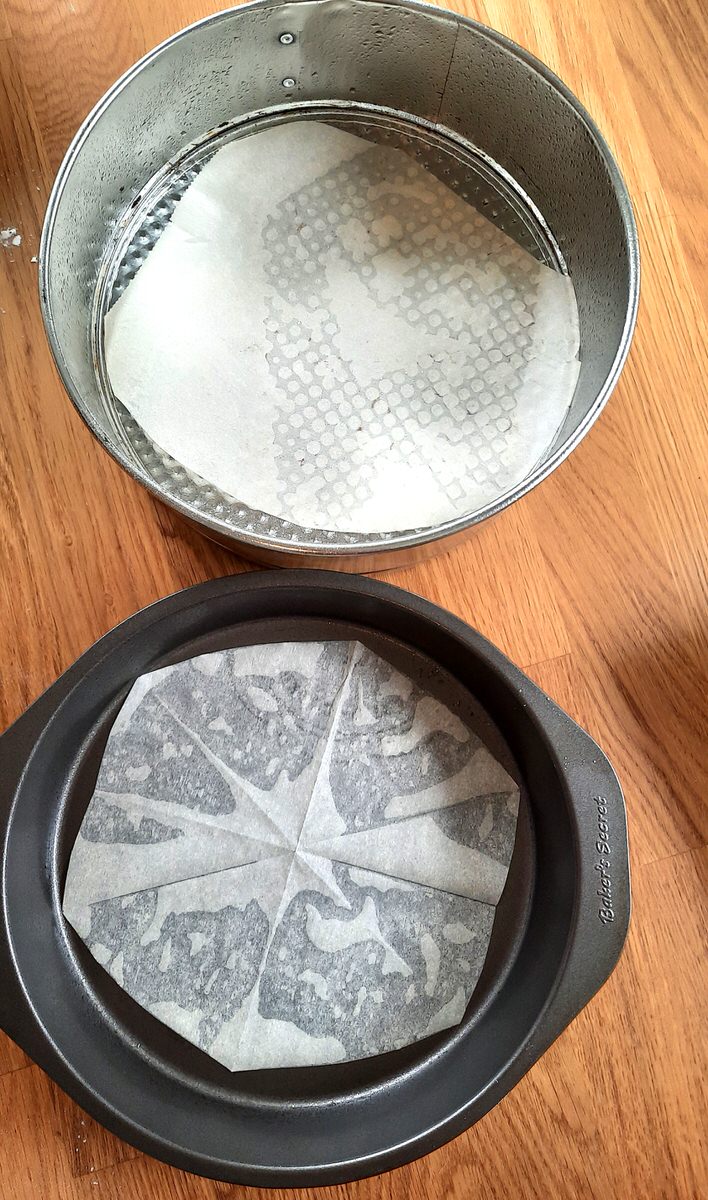
- Heat oven to 350°. Grease 1×9"springform pan, 1×9" round cake pan, and 1×9" square pan and line bottoms with parchment paper.
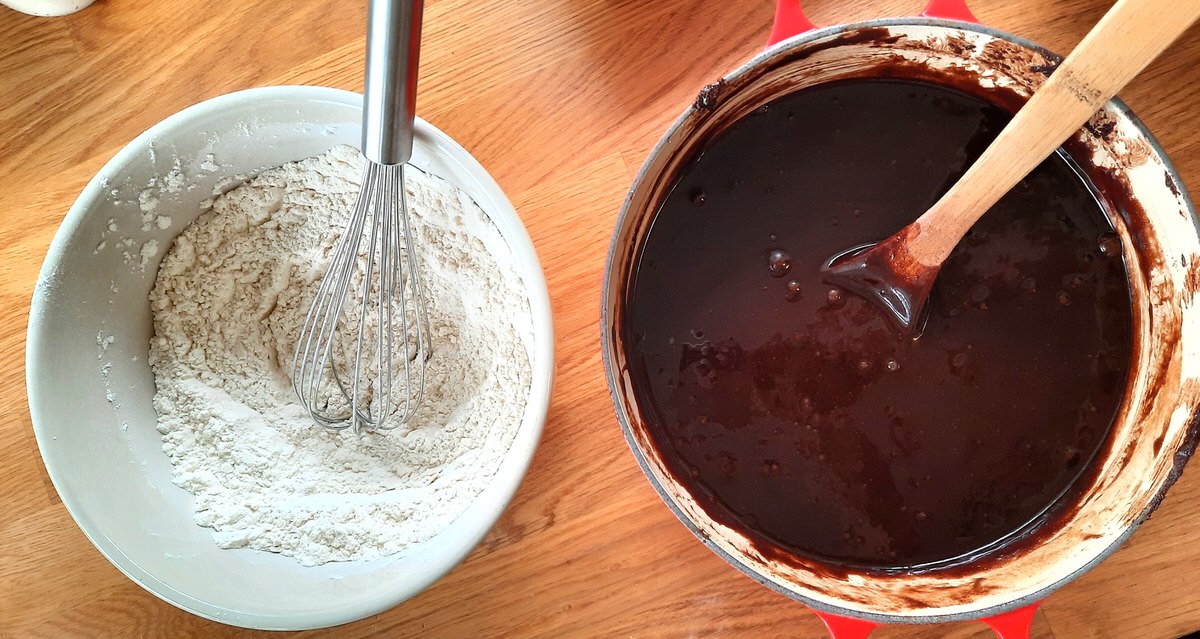
- Mix flour, baking powder, and salt in a bowl. Set aside
- Melt butter in a medium-large saucepan. Add cocoa powder, stirring to remove clumps. Remove from heat. Blend in sugar, eggs, and vanilla.
- Add dry ingredients and stir to combine and no more flour remains. Divide eavenly between pans. Bake for 30-35 minutes until toothpick inserted comes out clean. Cool completely and carefully remove round brownies from pans.
For the cake:
- Place one round brownie into bottom of springform pan.
- Soften one container of ice cream until soft enough to spread, but not melted (approx. 10 minutes). Spread on top of brownie layer in spring form pan (about ¾ inch thickness). Cover with plastic wrap and freeze until firm.
- Carefully remove brownie from 9" round cake pan. Place on top of first ice cream layer in springform pan, pressing down gently.
- Soften second container of ice cream and spread onto second brownie layer. It is okay if the ice cream is higher than the edges of your pan, just scrape the edges with a knife to ensure they align with the rest of the cake. Wrap with plastic wrap and freeze until firm.
- To remove frozen cake from springform pan, simply warm up the sides of the pan with a hot, damp cloth. You can remove the metal base from the cake or leave it, the choice is yours.
To frost/decorate cake:
- Prepare stabilized whipped cream (see Stabilized whipped cream – A Little Hint of This… for recipe).
- Spread a layer of prepared whipped cream frosting over the top of the ice cream cake. If cake begins to thaw, place back into freezer until firm and then continue to the next step.
- .Sprinkle chocolate chips and cookie pieces in the center of cake. Drizle with warmed Nutella.
- Pipe whipped cream rosettes around the edge of the cake. Cut rectange pieces of brownie from the 9" square pan of brownies. Place between rosettes. Freeze until firm.
Notes
If you loved this recipe, please let us know in the comments below. We LOVE to hear from you!
Shop this post
Pin it for later
Like this recipe?
Give these a try!
No-Churn Strawberry Cheesecake Ice Cream
Don’t forget to sign up below to get all our new recipes and hints sent straight to your inbox!
Leave a Reply