
The shed in our backyard was a rusty, dilapidated mess. So we decided to take on a DIY garden shed makeover for as little money as possible. We succeeded, and managed to transform the old metal shed into a quaint addition to our backyard for under $200! This is how we did it!
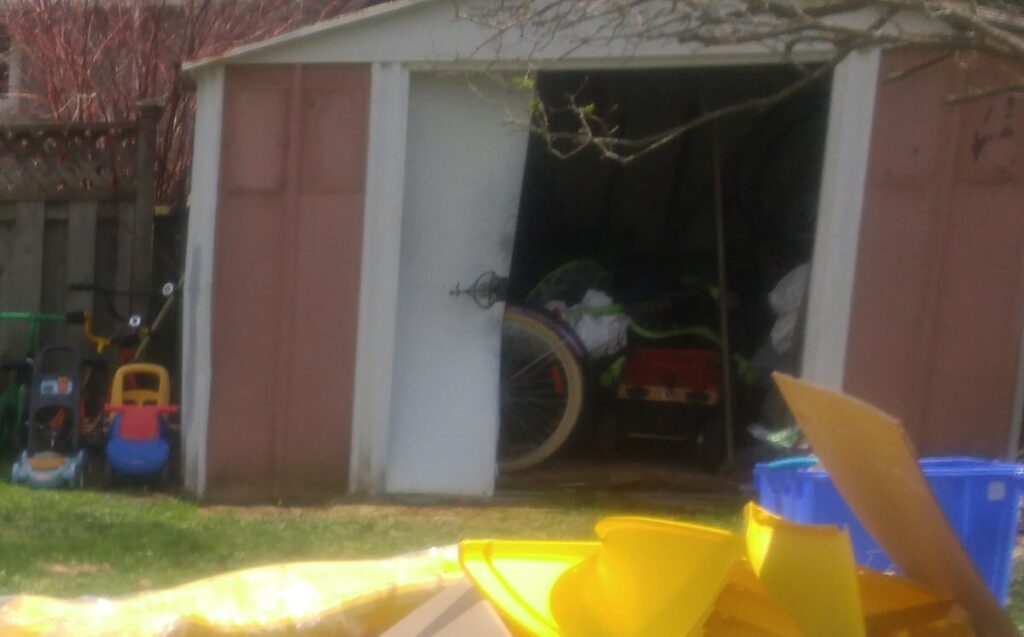
For years we rented our little bungalow house. This meant that whatever the landlord provided is what we were ‘stuck’ with. In our case, this included a rusty, falling apart old utility shed with no doors and a rotting floor. It was a total eyesore. I hated it.
Once we took ownership of the house (!), we quickly took on the shed as a small summer project. One thing I knew after just buying a house: I didn’t want to spend a lot of money on this project. Like, at all.
So how could I complete this garden shed makeover as inexpensively as possible?
Here’s how!
How to easily replace a garden shed floor
I was more than happy to tear out all the smelly old rotting plywood that acted as the base of the original shed. Just doing that alone removed the sour odours and we were left with a flat dirt floor.
Next, we used some old paving stones we had lying around to create the new floor.
If you don’t have any around like we did, you can often find them for free on Kijiji from people just looking to offload them. Often if you’re willing to pick them up, they give them away! We lay them in a bed of ‘A’ gravel we had from a previous project and then surrounded them in sand to help them stay put.
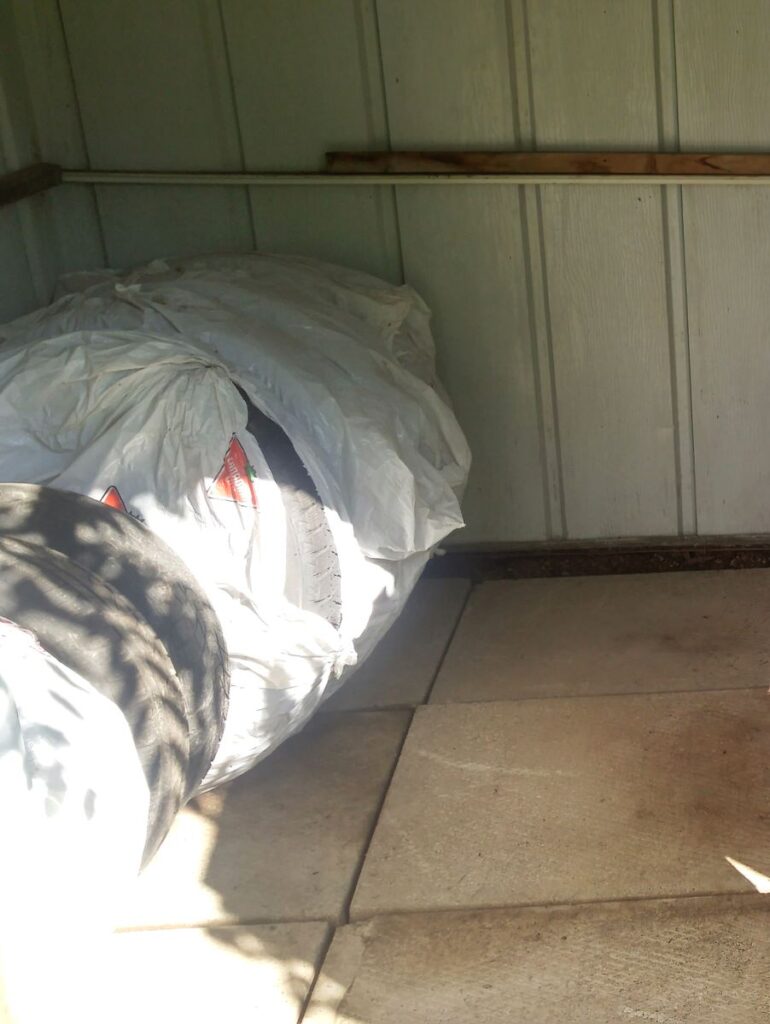
They weren’t perfectly perfect, but they did create a stable new floor that we could easily store all our tires and yard ‘stuff’ on!
How to cheaply refurbish garden shed walls
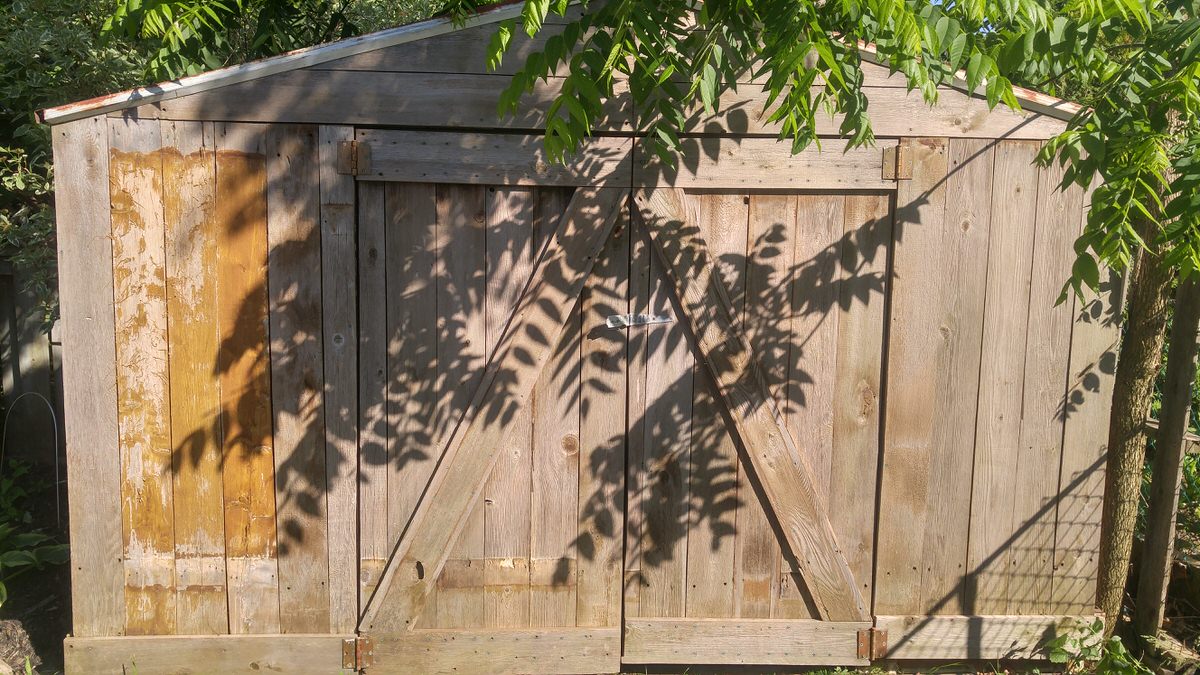
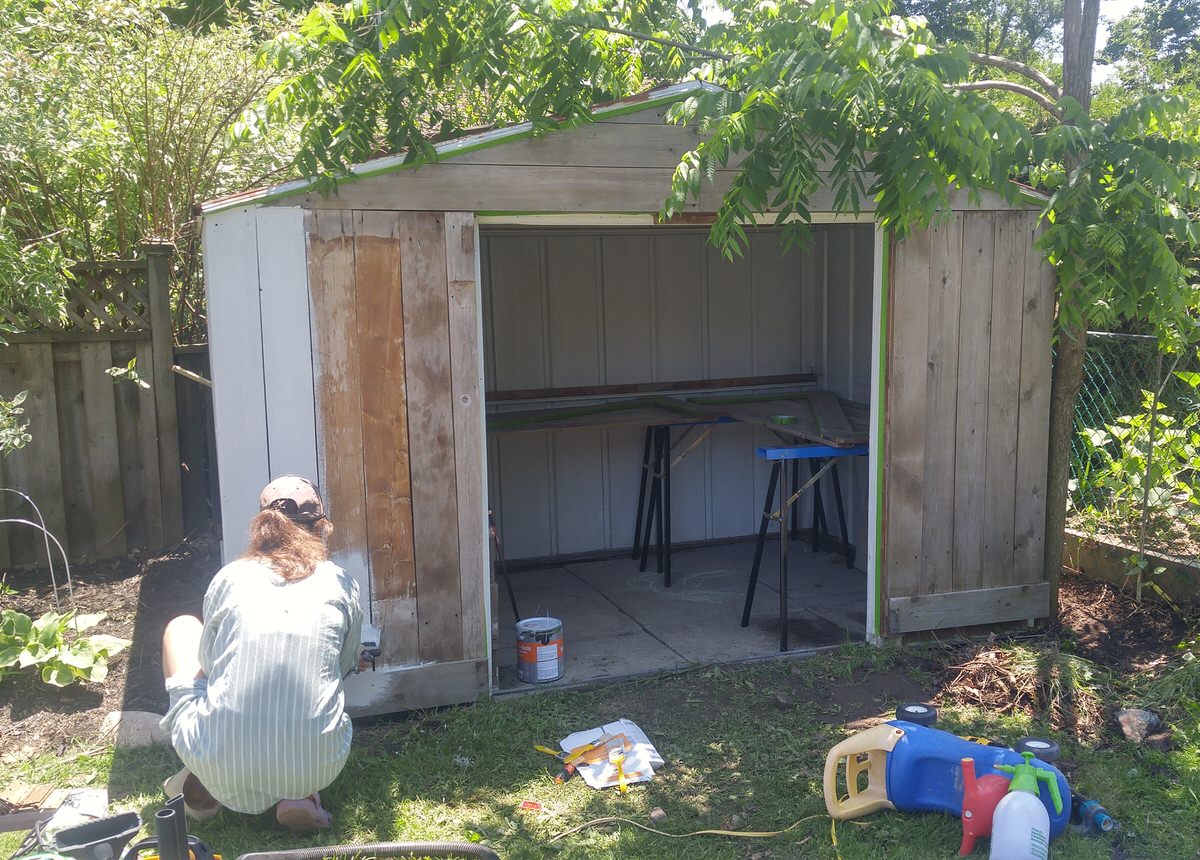
The original walls of our shed were aluminum. They were rusted and beat-up. However, the walls were straight enough, and I decided to clad them with other wood to provide a warm, cottage feel.
My dad was able to source some old cedar deck boards for free from someone taking apart an old deck. Just like the paving stones, as long as we were willing to remove them from the seller’s property, they cost us nothing! And since we planned on painting them, the worn colours of the wood didn’t matter.
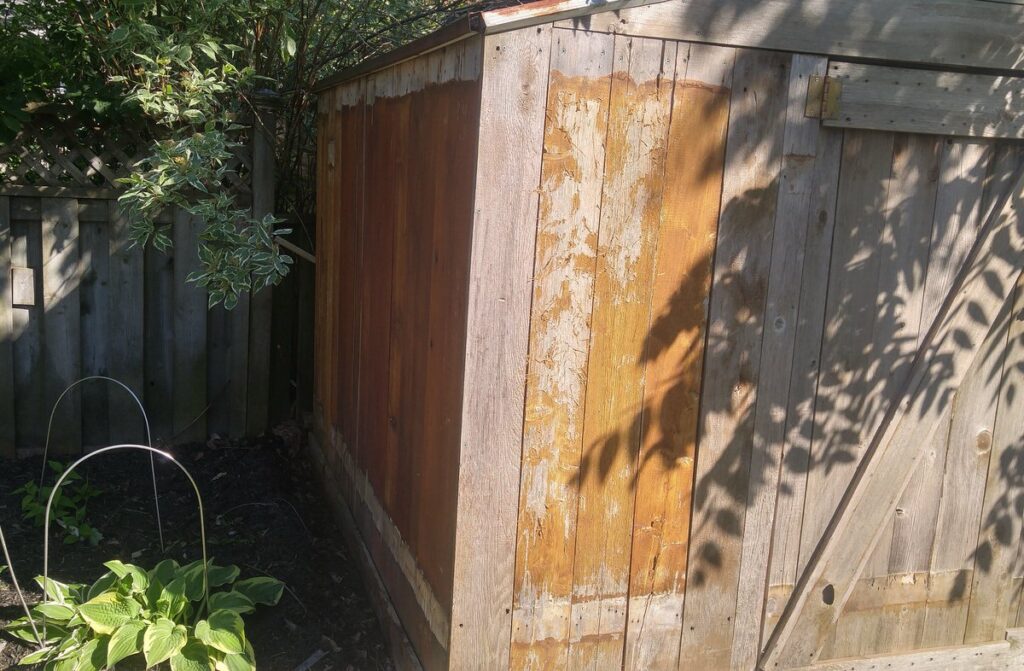
I didn’t mind if the boards we used were a bit beat up, as it added to the worn, cottage look I was going for.
In order to install the boards for our garden shed makeover, my dad screwed them through the original metal walls and into support beams he placed on the walls inside the shed.
In one afternoon we had all new walls on our shed. It was an instant improvement!
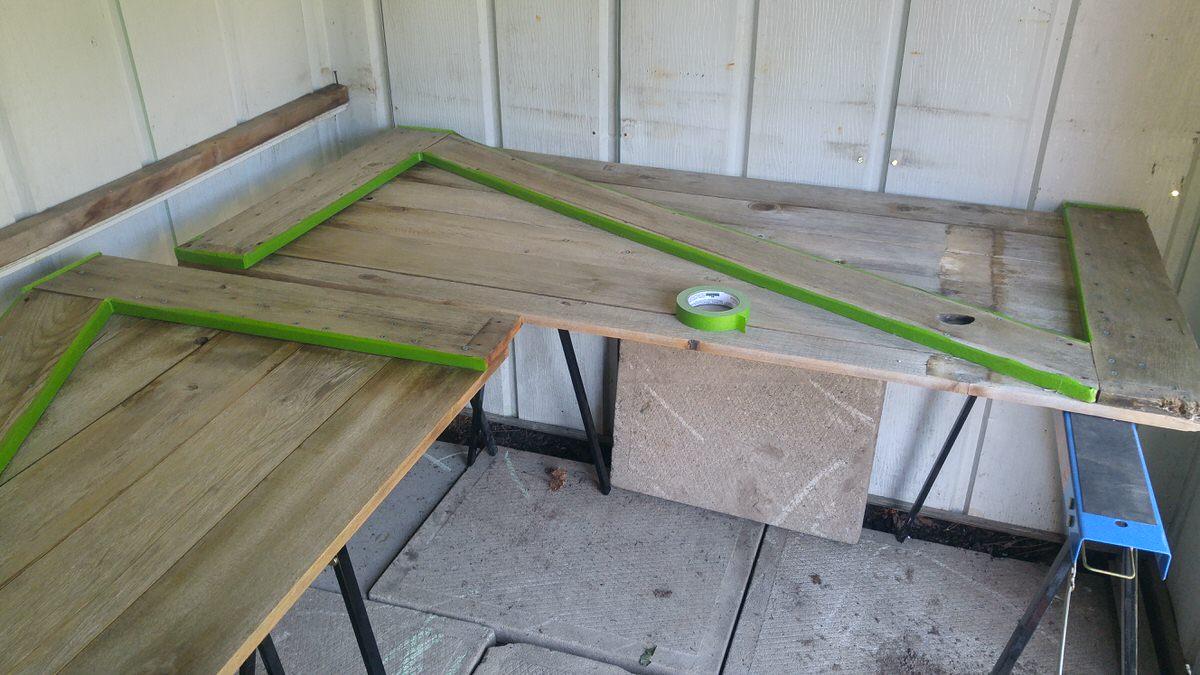
How do you replace a garden shed door?
Since we had plenty of deck boards to use up, my dad offered to build us 2 doors to use. I sketched out a quick design and he got to work. Some simple screws and cuts, and we had doors!
How do you paint an old shed?
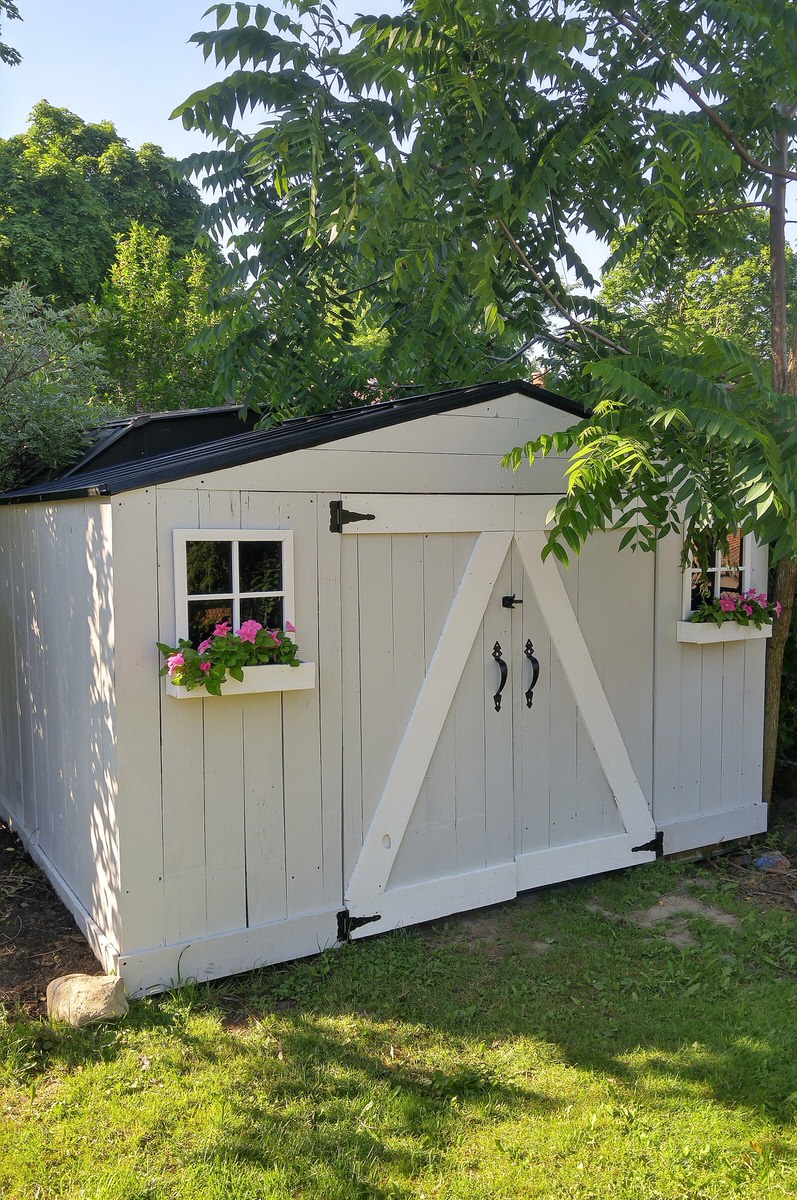
Because I knew we would be painting our brick bungalow white, and I was going for an English cottage feel with my landscaping, I wanted to create a soft and quaint feel with the shed. I chose a soft grey for the walls, and added accents with the same white paint I used for the brick on the house. I love the blend of the two colours!
How to prepare a shed to paint
If you are using repurposed wood like we did for our shed walls, you will want to wash them first. To do this, I wet all the walls down with a garden hose, then washed them with a cleaner that removes mould and mildew from the wood (just follow the package instructions). I’ve linked a good wood cleaner below. Make sure it dries completely before painting!
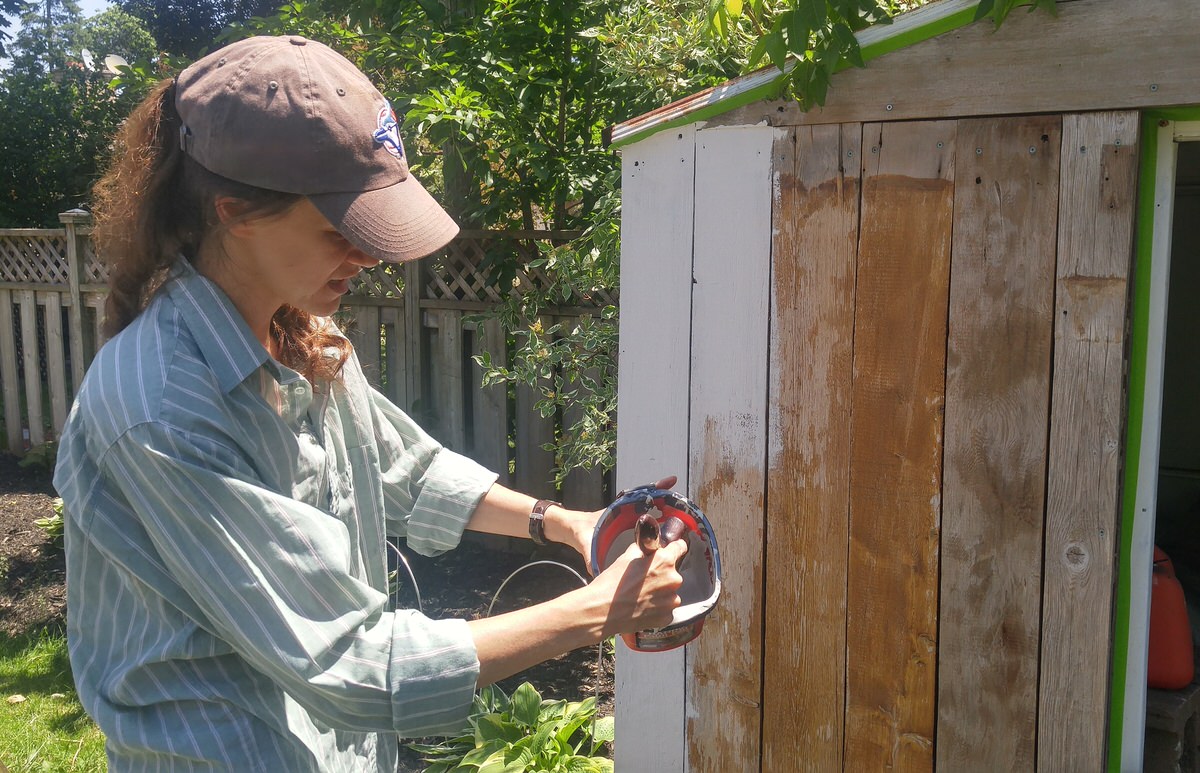
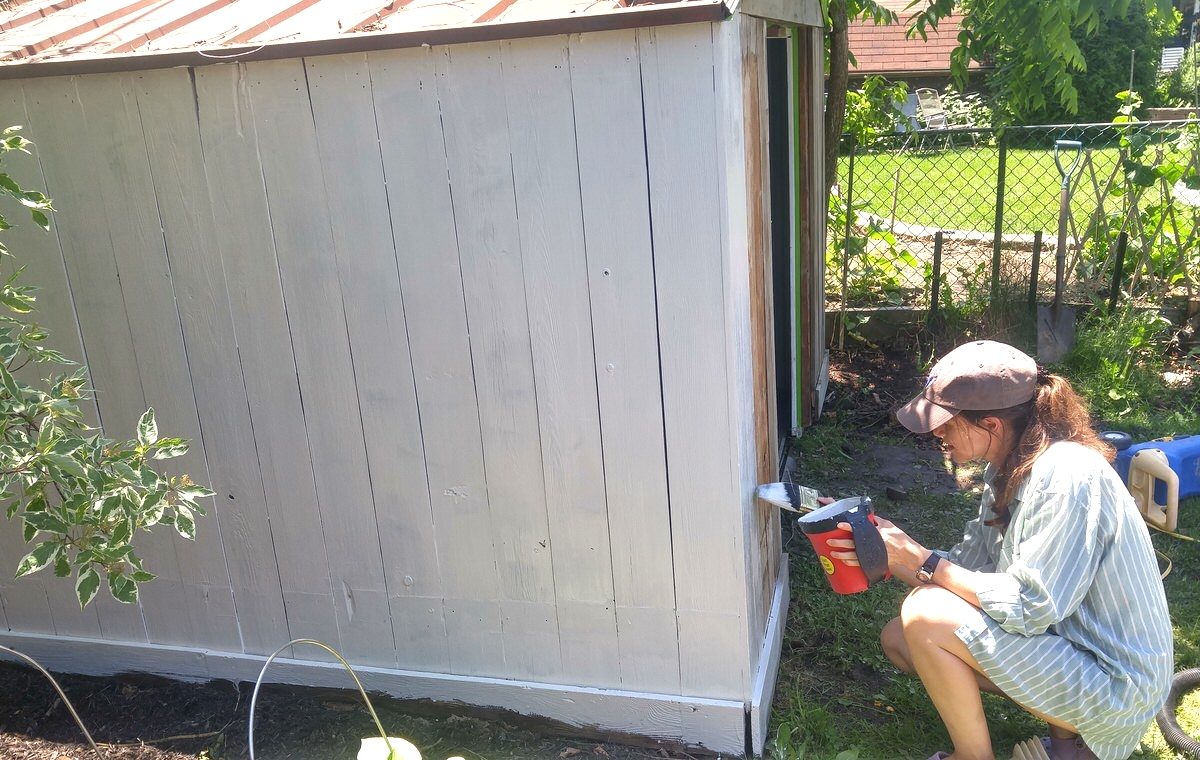
It’s important to use good quality outdoor paint or stain for your shed, especially if you’re painting over old deck boards. I went into my local hardware store and told them about the project I was working on. They helped me source the best products.
In my case, I used a solid stain grey deck paint for the main portion of the shed. If you’re using old wood like we did, avoid transparent or semi-transparent stain, as the wood will show through it. Solid stain covers the wood really well. I used outdoor white paint (leftover from my painted bungalow reno) for the trim.
How do you update an old rusty shed roof?
I’ll be honest. This part was not fun. But I got it done and am very happy with the result.
The roof was extremely rusty. I decided to paint over it with anti-rust paint.
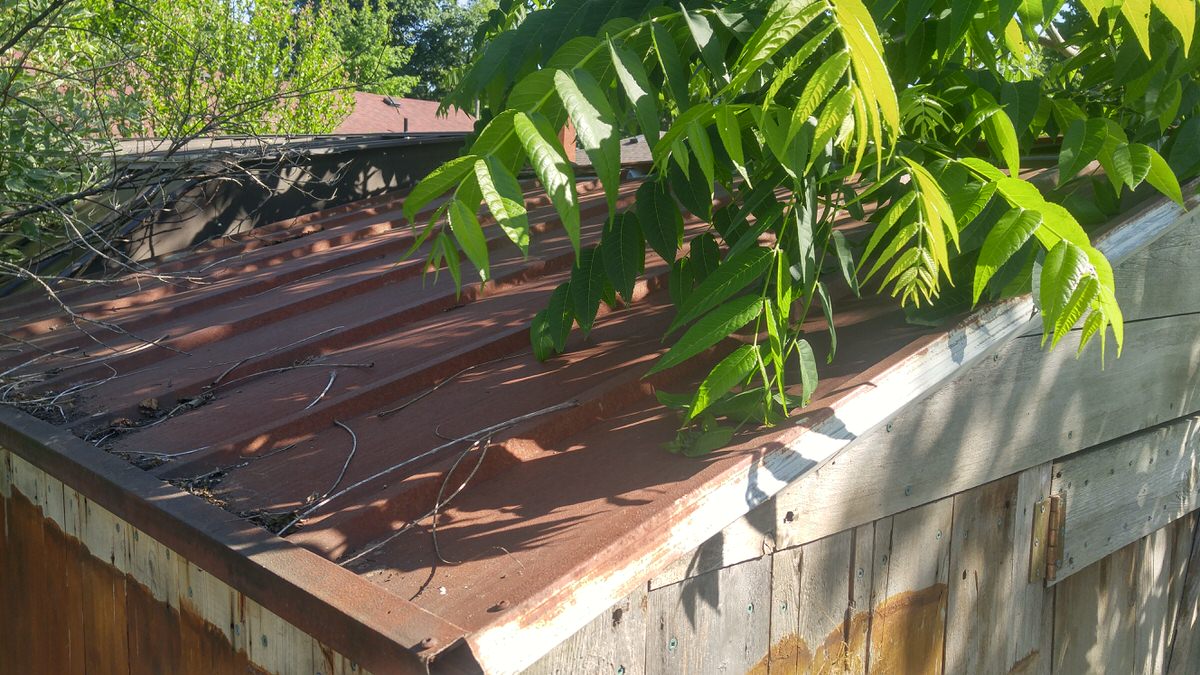
So I climbed up and scrubbed the roof as much as possible with a wire brush, sprayed it off, and let it dry. Then I covered the whole roof in rust paint.
I do realize it won’t last forever, but the alternative was building a whole new roof, which wasn’t in my budget.
I’m actually really happy with the result. You’d never know before this garden shed makeover that the roof was completely rusty!
The details
For this garden shed makeover, I knew I wanted the shed to have windows and window boxes that I could fill with spring and summer flowers. The only thing was that we didn’t actually want to cut in windows or pay for them!
So we faked it.
Using a few cheap cuts of wood, we created frames for our faux windows.
We then used a piece of 1/8″ clear acrylic that we had lying around in the basement.
However, because the acrylic was transparent (and would show the shed walls behind it), we decided to paint the back of it black, so it would look more like a window looking into a dark shed. I had an old can of blackboard spray paint that we used for this, but you could use any black spray paint.
After screwing the acrylic into the frame, we attached the faux windows to the wall. Perfect!
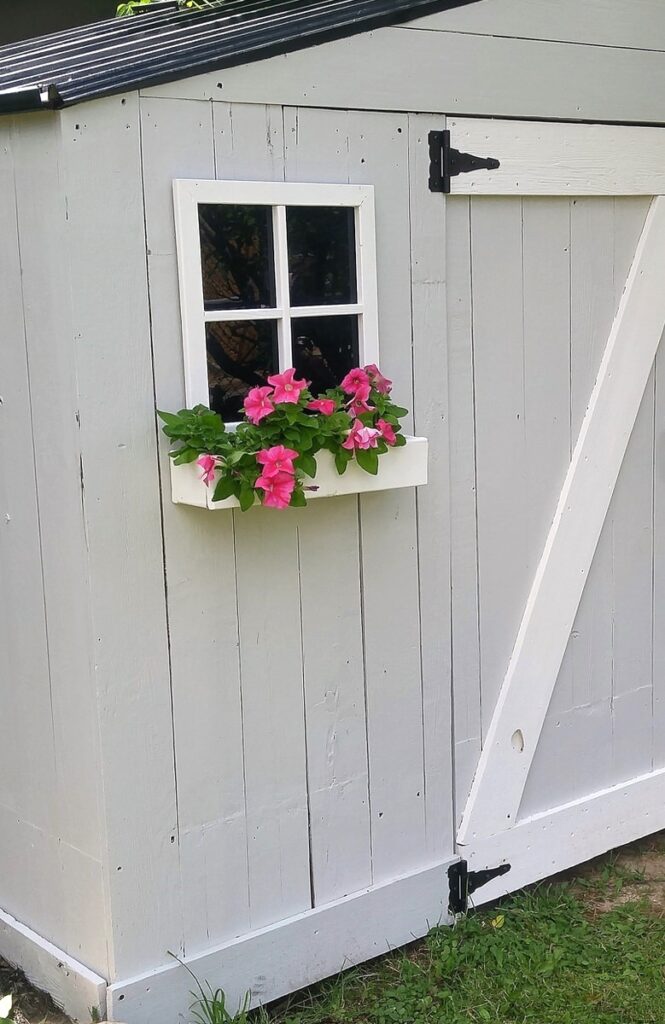
We also used some inexpensive wood to cut out and build a basic window box. We attached these with brackets underneath the windows.
And voila! The CUTEST little windows and window boxes!
The final touches
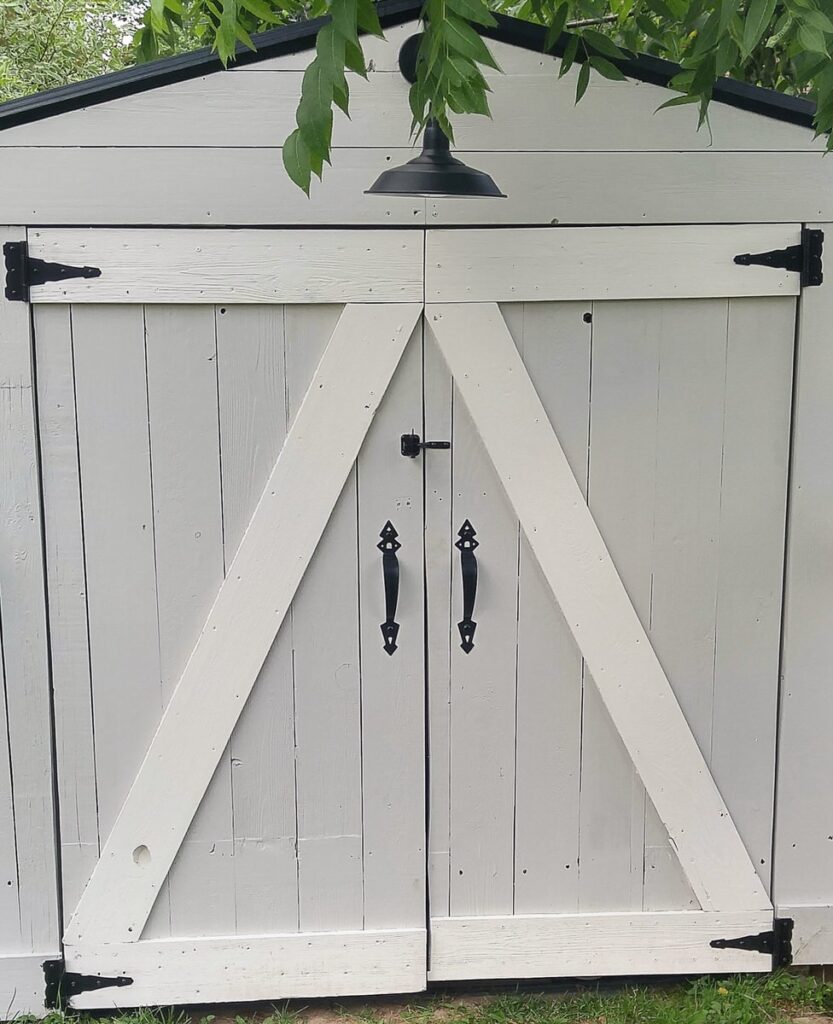
We decided to finish the shed with matte black, farmhouse-inspired hardware. It only cost a few dollars from the local hardware store. I’ve linked some online options below that are essentially the same ones we used.
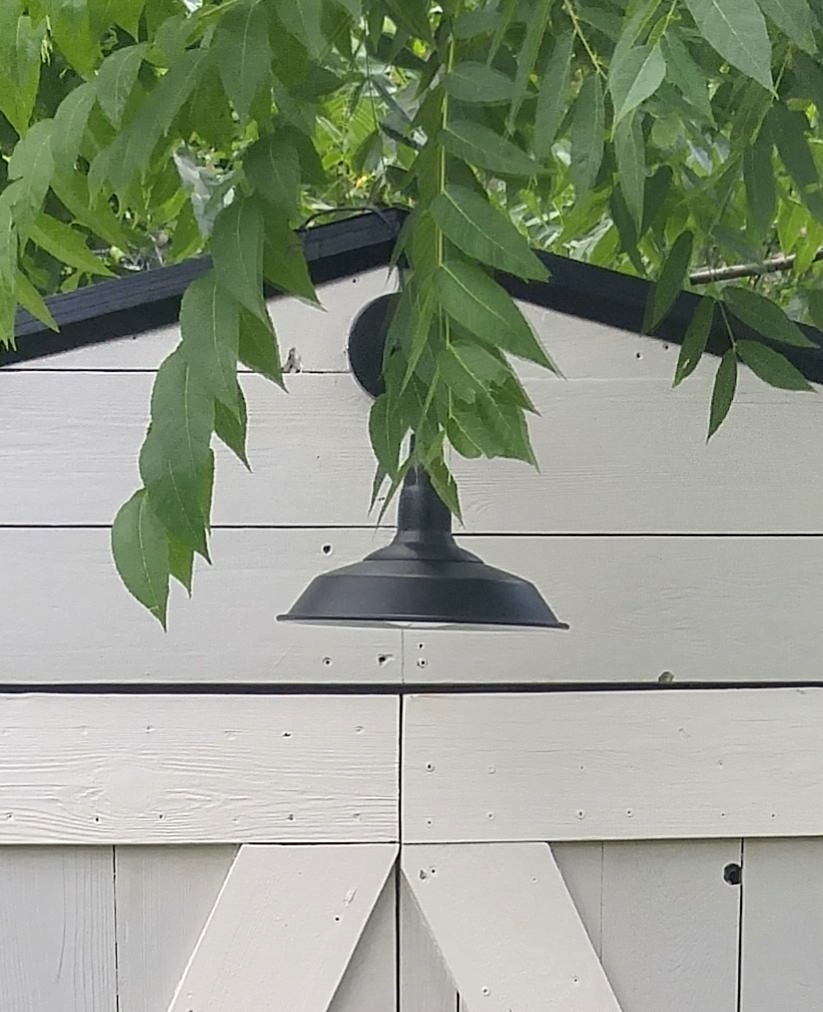
We hit the jackpot when we found a solar light from Costco that was just the right size and look we were going for! Using a solar light meant we didn’t need to have electricity running to the shed, so it was another cost savings. I’ve linked below both a solar option and an electric option if you’re looking to add outdoor lights to your own shed.
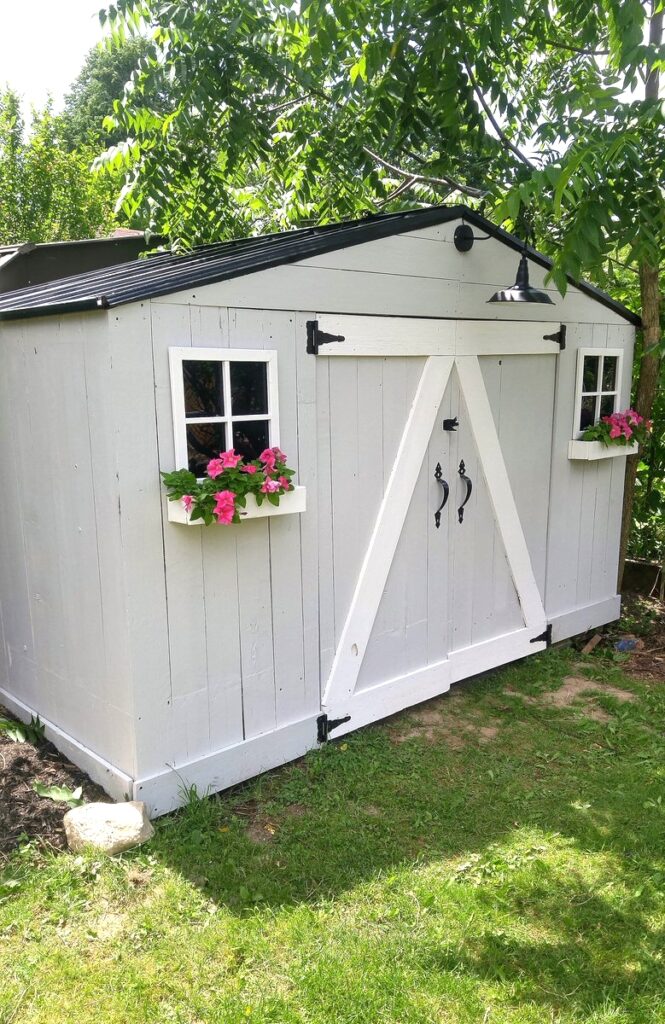
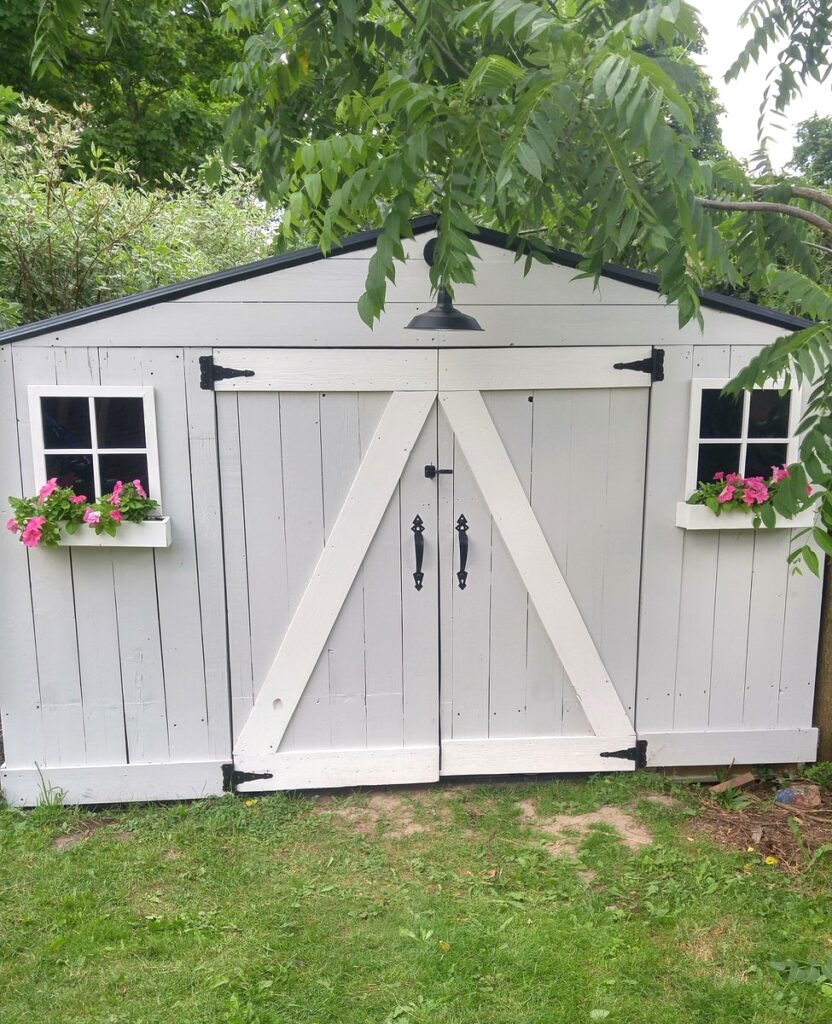
The completed garden shed makeover
Here is the completed shed. I have to say, I’m very happy with it, and knowing it only cost us around $200 makes it even better! A few cans of paint, a light, and some finishing hardware and we had a whole new shed! Future plans include a new pathway leading to the shed and lots of new plants and gardens, so stay tuned (and join our mailing list!) for more to come!
Shop this post
Solid wood stain, grey (note: we purchased our stain at a hardware store, but this one is a popular option and is in a colour very similar to the one we used)
Outdoor wood paint, white (note: again, not the exact product we used, but a comparable substitution)
Light fixture (while I couldn’t find an online source for a solar barn light, I did find these. They would look adorable hanging on either side of the door, above the windows. If you have electrical access, this barn light would look great, too!
If you’ve done any cool makeovers around your yard, or with a shed, we’d love to know about it! Share a pic or comment below to show off your own makeover adventures! And feel free to ask any questions you may have about this garden shed makeover.
Thanks again for swinging by A Little Hint of This!
Like this post?
You might like this, too!
DIY Rustic Farmhouse Barn Door
Pin it for later

Leave a Reply