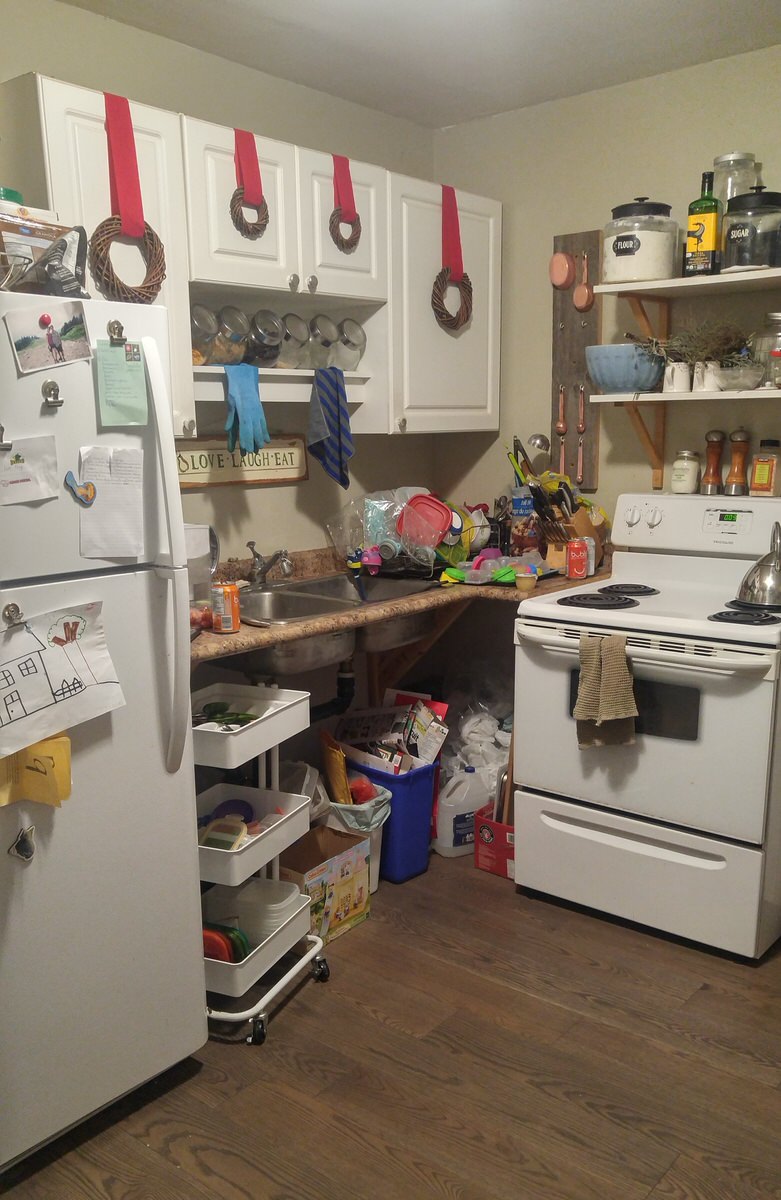
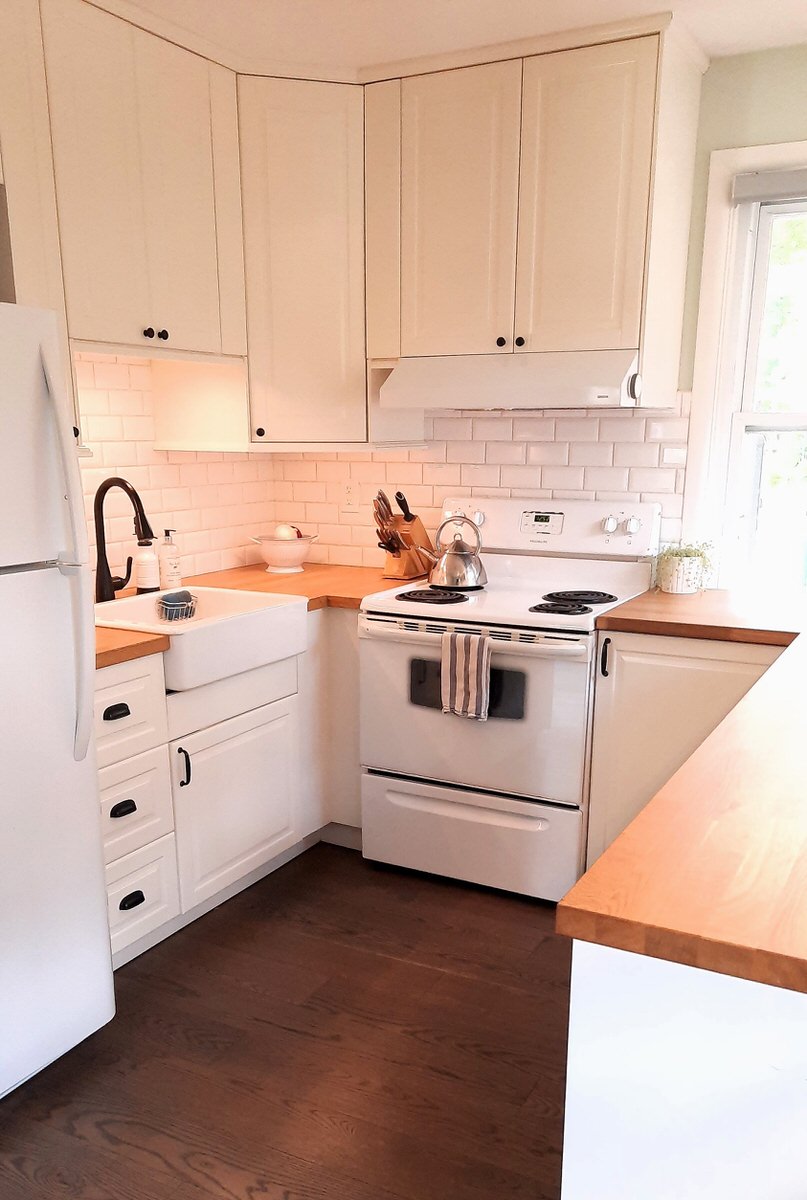

This small kitchen remodel was very much needed and so rewarding! We worked with a tight budget to create a warm and cozy kitchen in our little bungalow home.
Before we officially bought our house in the summer of 2019, we rented it for almost 7 years. Because we were renting, we were stuck with the house ‘as it was’, meaning I couldn’t put money into updating it.
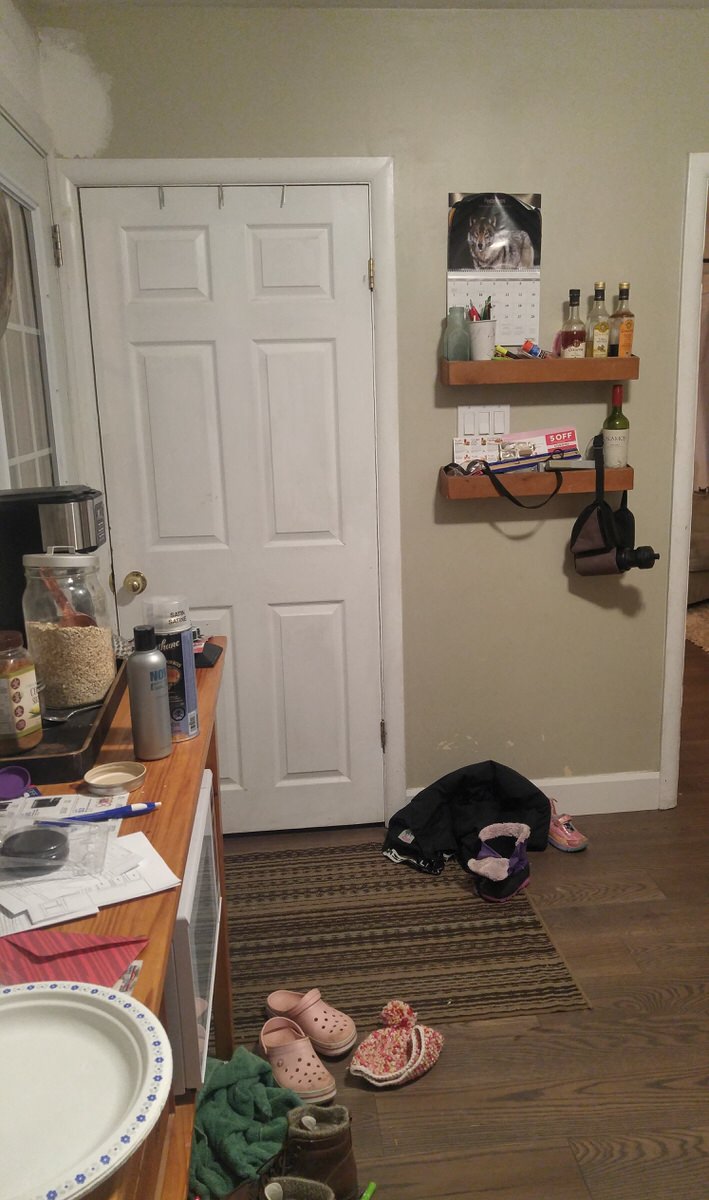
Once we finally owned our home, tackling the dreary kitchen was first on my list (look at the before pics to see why!).
However, after only a few months of ownership (and luckily before we began the remodel), we had a kitchen sink pipe burst while we were away.
The negative? Our kitchen was now even more inaccessible. We lived in a hotel for weeks. Fun for the kids, but challenging nonetheless.
The positive? Insurance covered all new flooring! Yessssss. This made our reno far more affordable! We chose to use the same engineered hardwood flooring throughout the main floor of our small bungalow. Because I love white furnishings, I chose dark, wide, wire-brushed boards to create a warmer, almost farmhouse feel. I am so happy with the decision!
Both the before and after pics in this post include the new flooring. Amidst the chaos of the flood, I didn’t get any pictures to show you the *ahem* SEVEN layers of flooring in the kitchen and hallway!
Small Kitchen Before
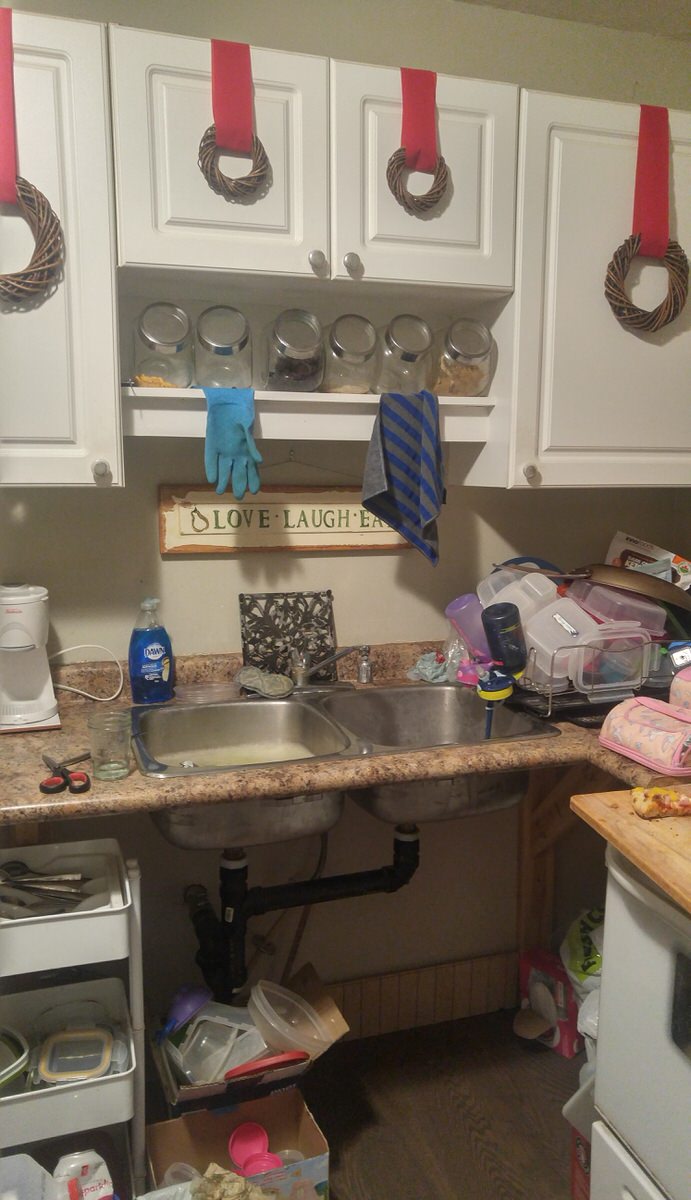
Here are a few before shots of the tiny kitchen we were living with:
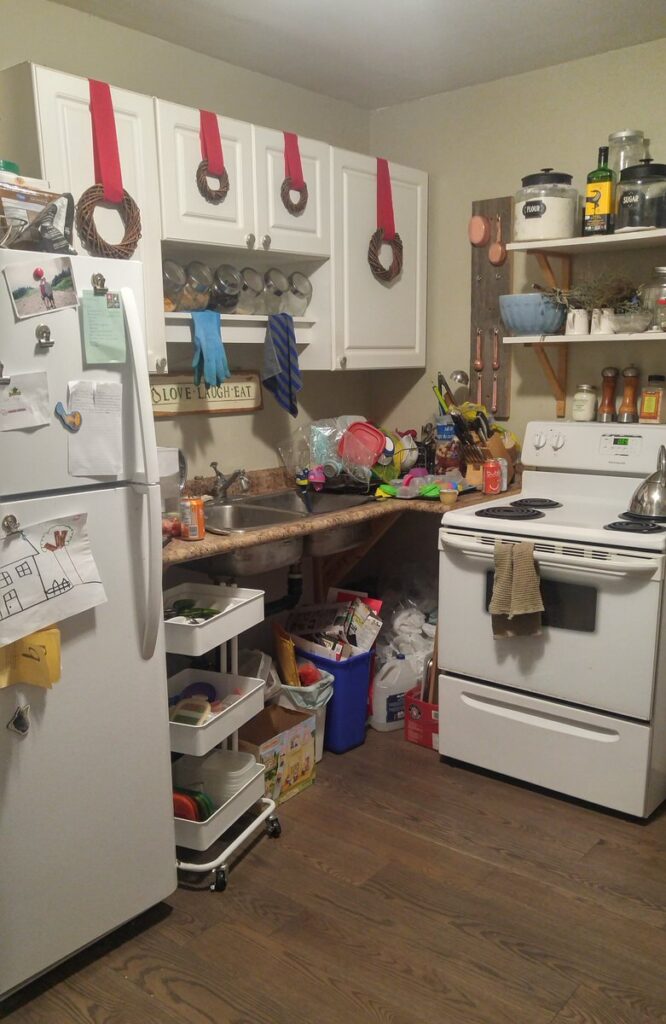

One thing we didn’t have?
Storage. We kept almost everything on old shelves in the basement for years. Running up and down the stairs multiple times a day was both frustrating and tiring, but we did it.
Another thing clearly missing? Counter space!
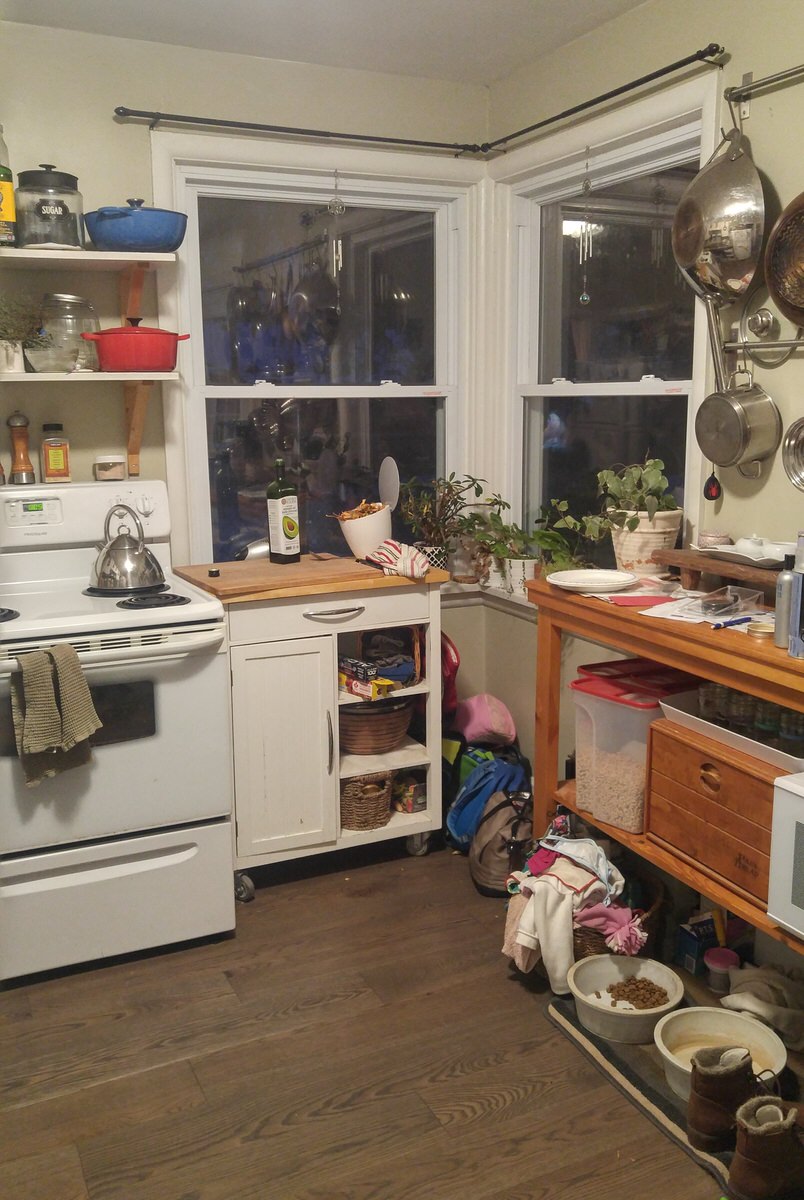


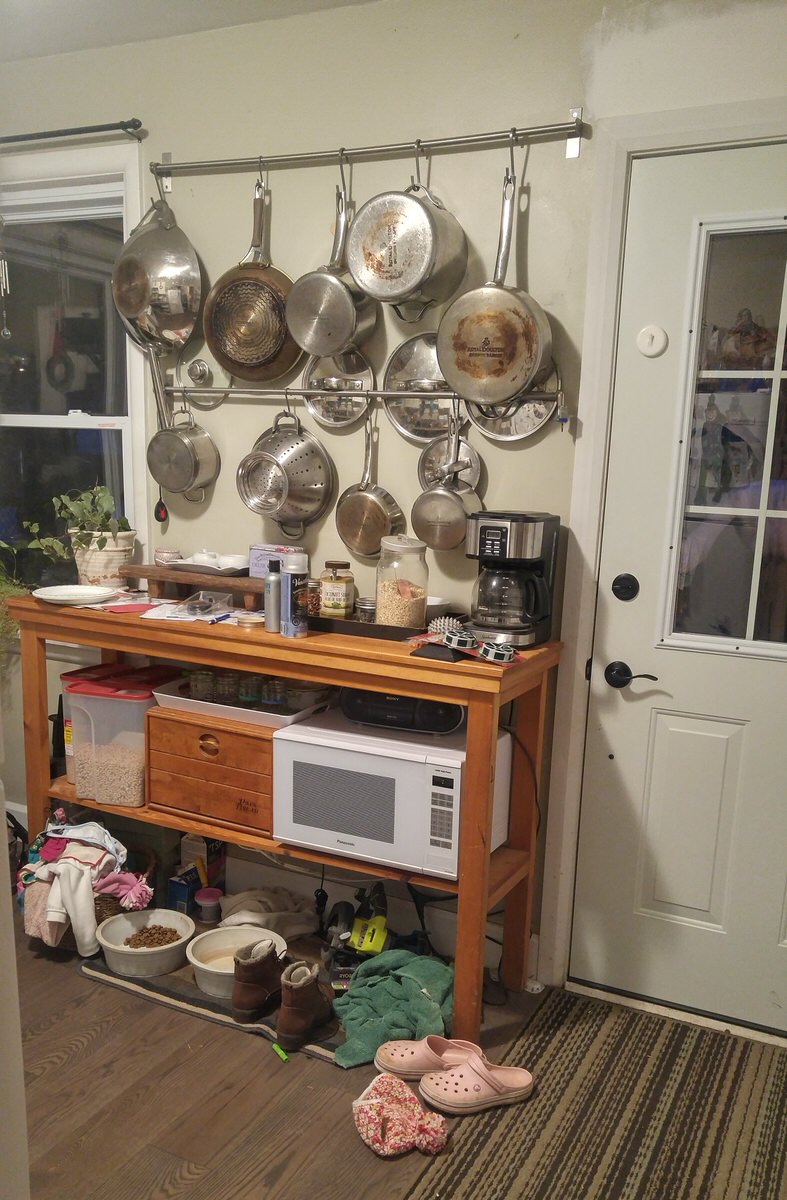

I still can’t believe I made 3 meals a day plus snacks for a family of 5 for years on this tiny bar cart. Somehow I managed, but having more space now, I’m not sure how I did it before.
Small Kitchen Remodel Wish List
Before beginning the remodel, I knew there were a few things it needed to be/have:
- The remodel needed to be affordable. After just buying our first home, there wasn’t a lot of extra money to play with. Budget mattered.
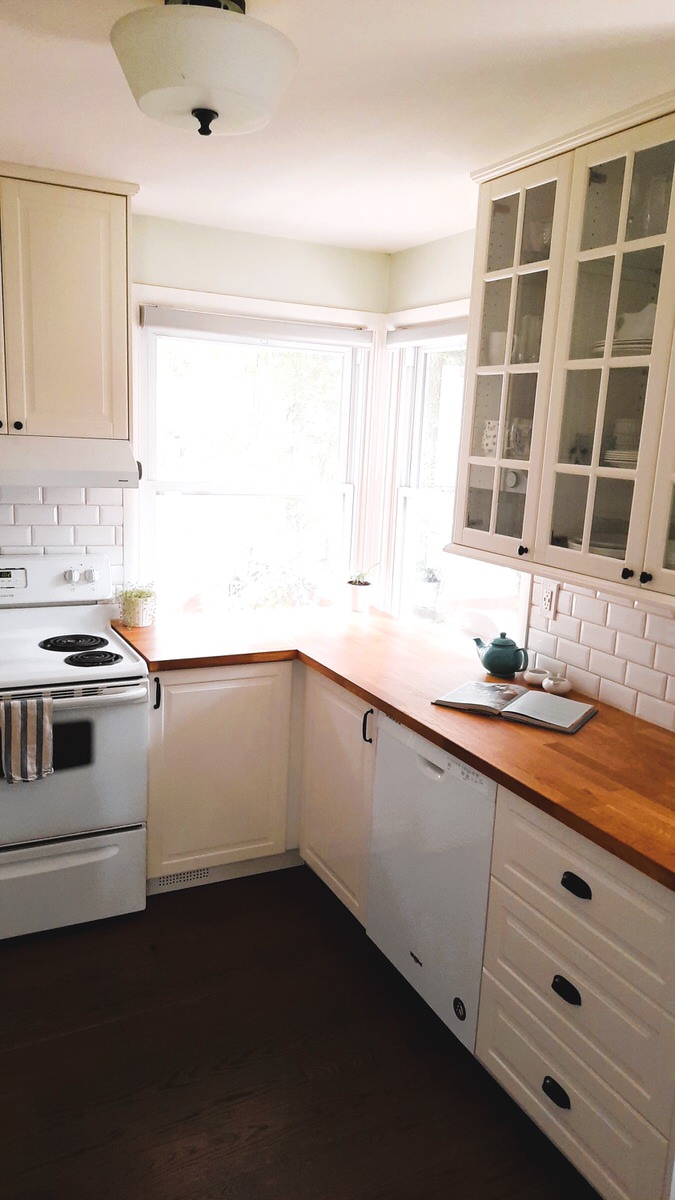
- Lots of counter space. I wanted the counter to be as long as possible. Wrapping it below the large windows helped solve that problem.
- As much storage as possible. I wanted to maximize storage space. Ikea’s cabinets, and especially drawers with hidden compartments, did just that. No more running to the basement!
- A warm, cottage/farmhouse feel. I decided when we bought this small house that I would give it an almost English Cottage look and feel, with a nod to farmhouse decor. This inspired the white cabinets, wood counter, and soft colour scheme. I’m so happy with the result.
- Efficiency. Because there are 3 growing kids always running in and out of the kitchen, efficiency and layout were important. I wanted the kids to be as independent as possible and be able to easily load/unload the dishwasher and make their own breakfasts. Lower cabinets and a dishwasher under the dish cupboard makes things quick and easy for them.
Small Kitchen Remodel Reveal
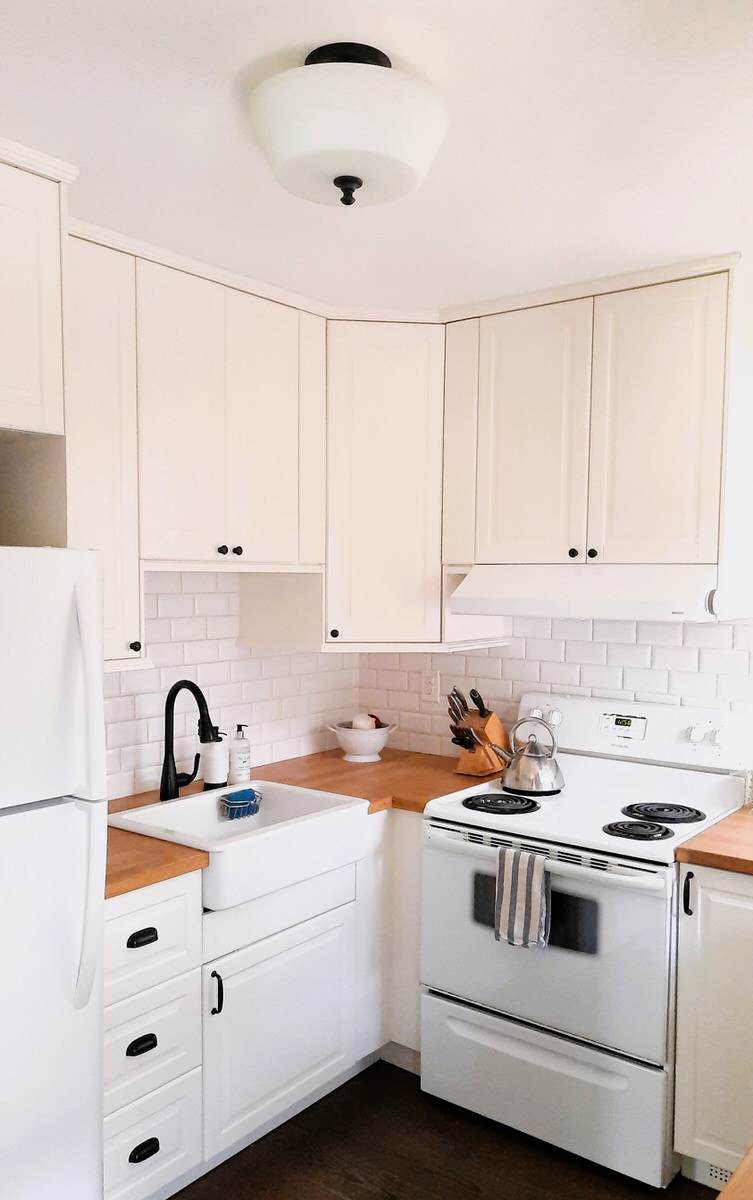
Although it was a lot of work (we did all the labour ourselves) we are so happy with our new tiny kitchen! It’s bright, clean, and full of natural light. I finally have enough counter space to cook the way I love to (ie. not using the stove burners to hold a cutting board)!
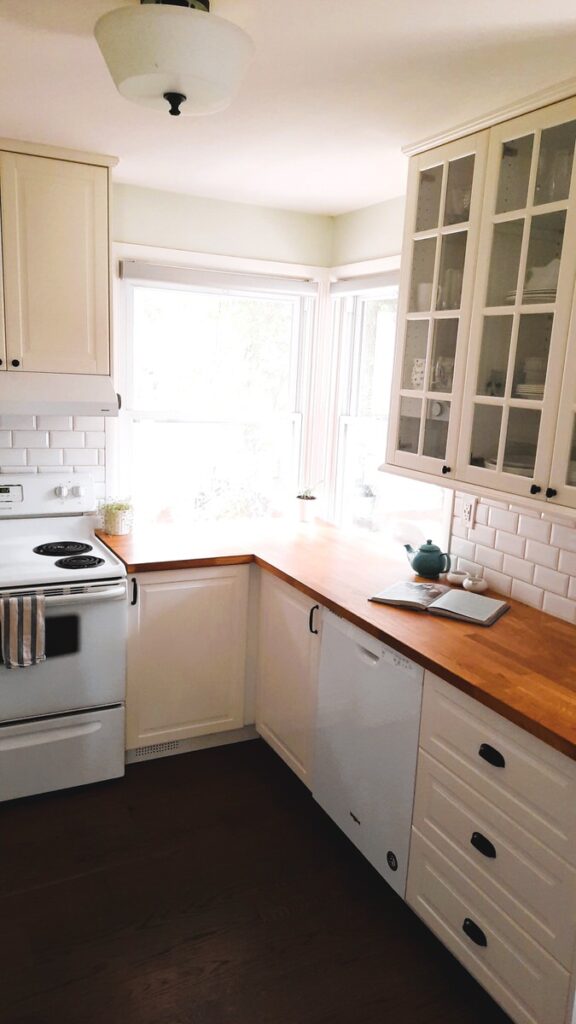

Elements of our Small Kitchen Remodel
Cabinets
To keep with the cottage/farmhouse feel for our kitchen, we opted to use the Bodbyn cabinets from Ikea.
They are a slightly off-white colour, with soft details. Finishing them with matte black Eneryda handles (we used 3 different shapes: knobs, pulls, and handles) kept the cabinets modern and fresh while still keeping the warmth.
One reason was the ton of storage they provided! Lots of drawers and cabinets have been a game-changer! No more running to the basement for things!
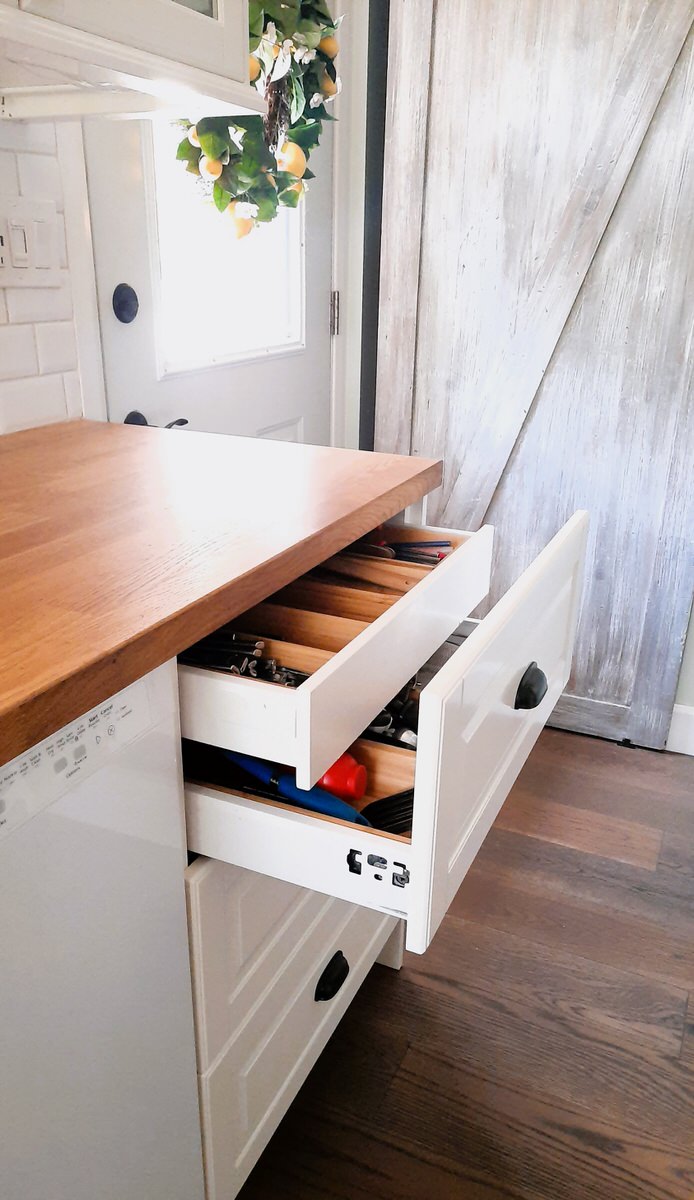

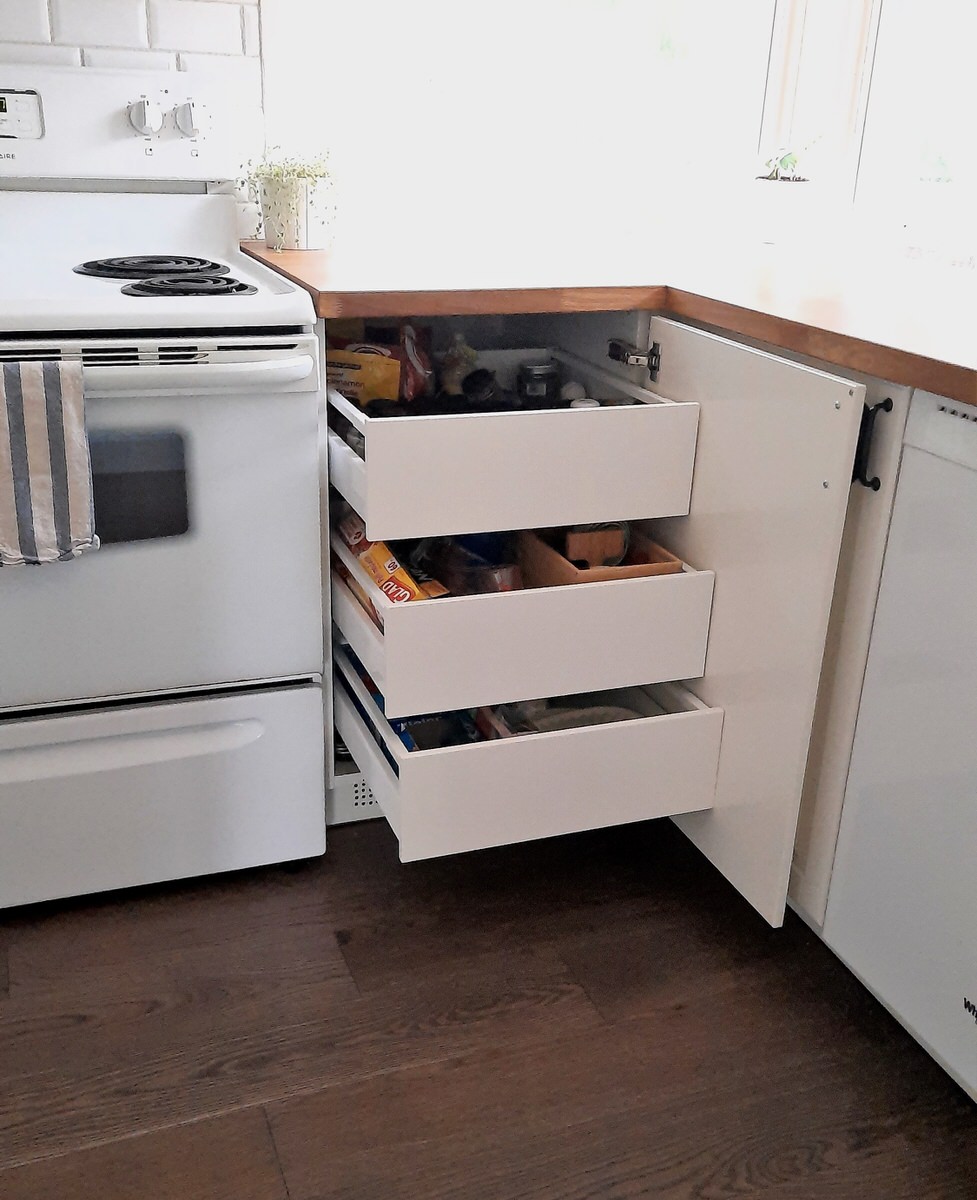

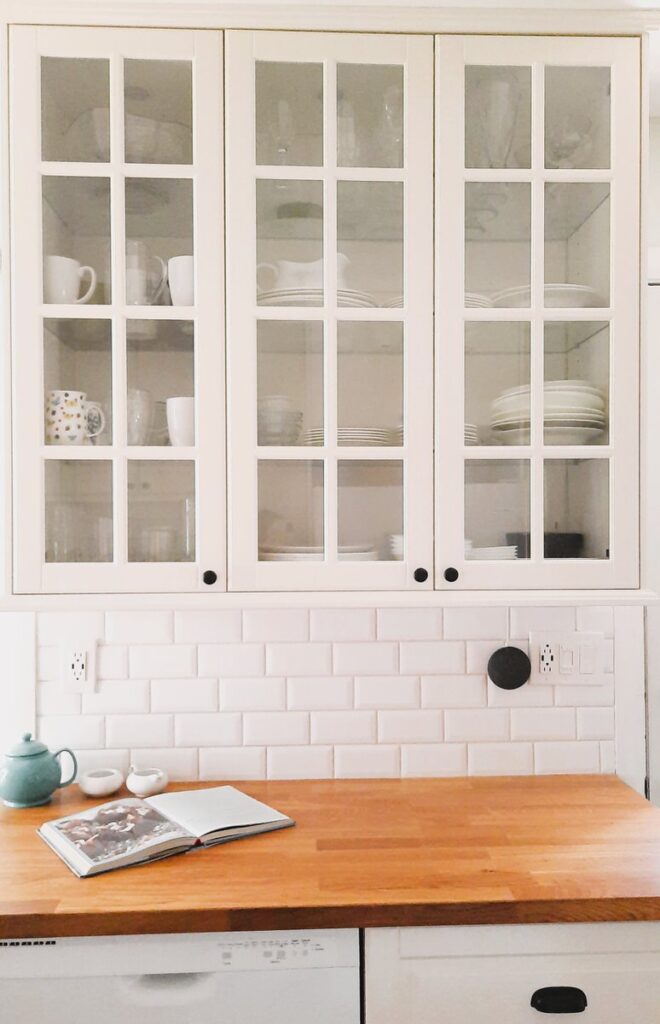

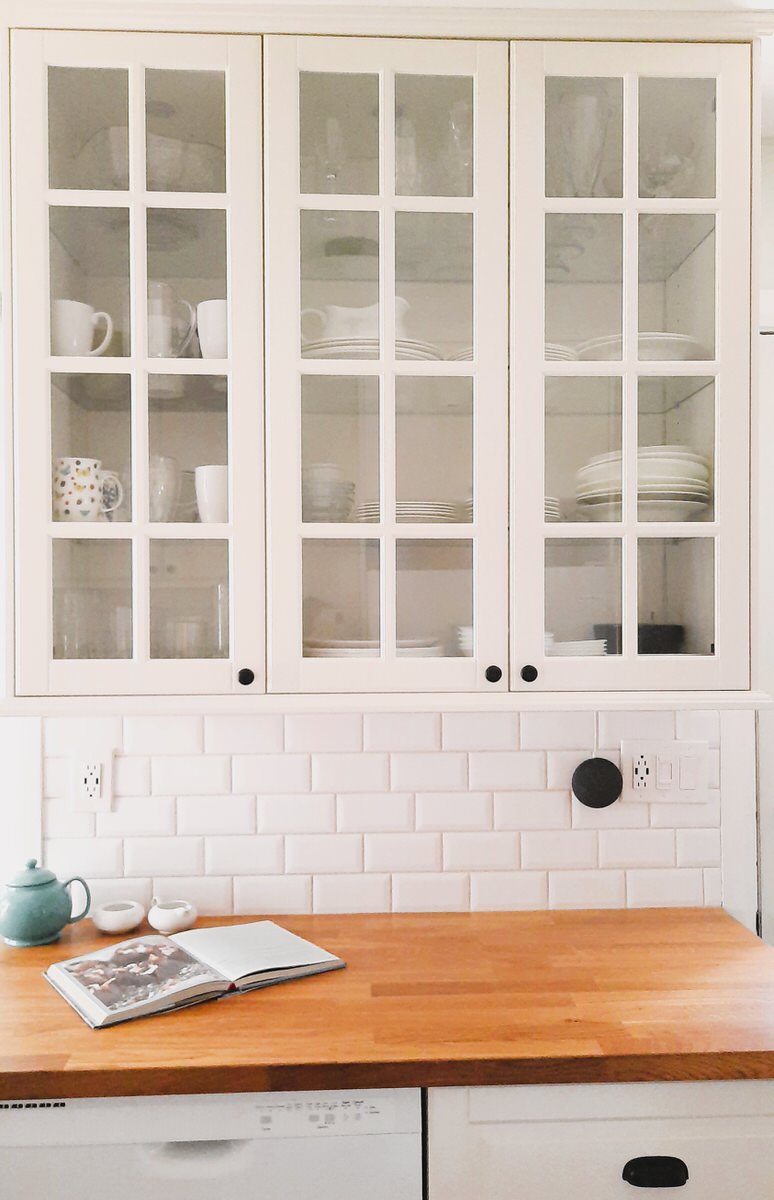
For the ‘butler pantry’, as I prefer to call it, we used glass fronts with interior lights to create a more airy and open feel. Did it help that I prefer white dishes? Yup! Keeps everything neat and clean-looking (we’ve used these sturdy Corelle dishes for years and highly recommend them for families with children). Choosing to place the dishwasher right below this also makes it very easy to unload right into the cupboards.
Counter
We chose Ikea’s wood counter for our kitchen. It’s inexpensive and therefore easy to replace if the kids manage to somehow destroy it (a very real possibility in our home 😉 ). But honestly, we loved the wood look and the way it patinas and ages over time. While this counter isn’t solid wood, the first layers are, which means you can still gently sand it down if needed.
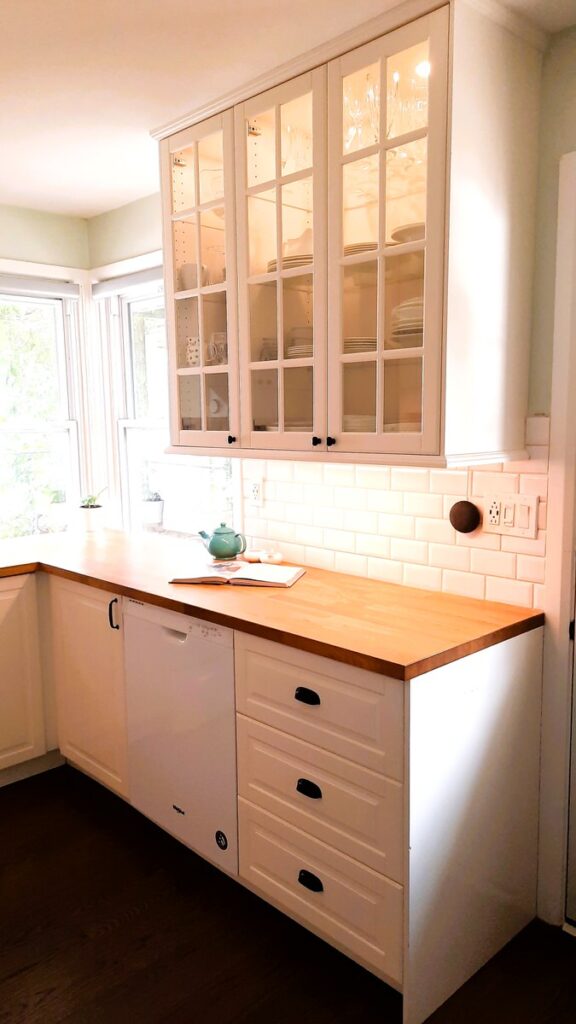

We chose to maximize counter space by having the counter wrap right around the windows. I love it! I can stand at the counter and enjoy all the natural light while also keeping an eye on the kids playing in the backyard.
If you’re getting wooden counters, know you will need to treat them every 6-12 months with Mineral or Tung oil. This will help keep them waterproof and looking their best.
Sink & Faucet
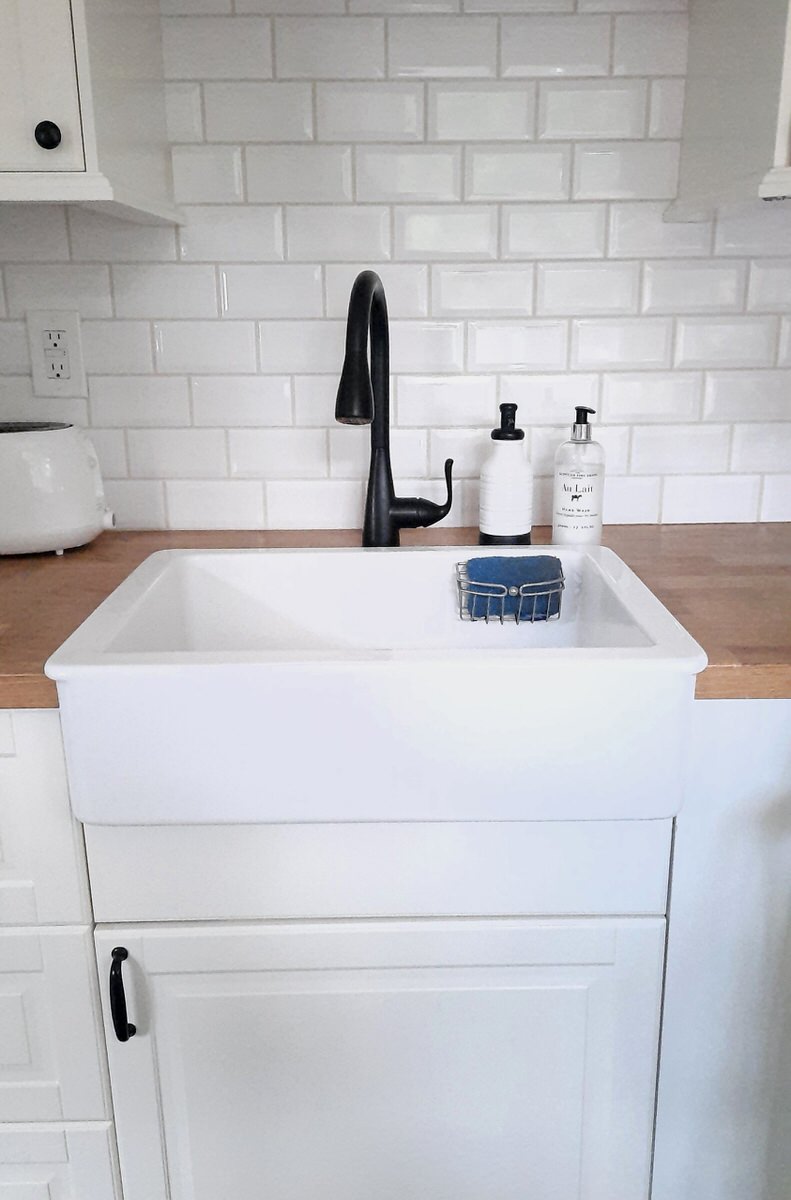
For this small kitchen remodel we decided to use a single apron-front sink. I absolutely love the size of the Havsen sink from Ikea. It’s a medium-size sink that can hold lots of dishes if needed.
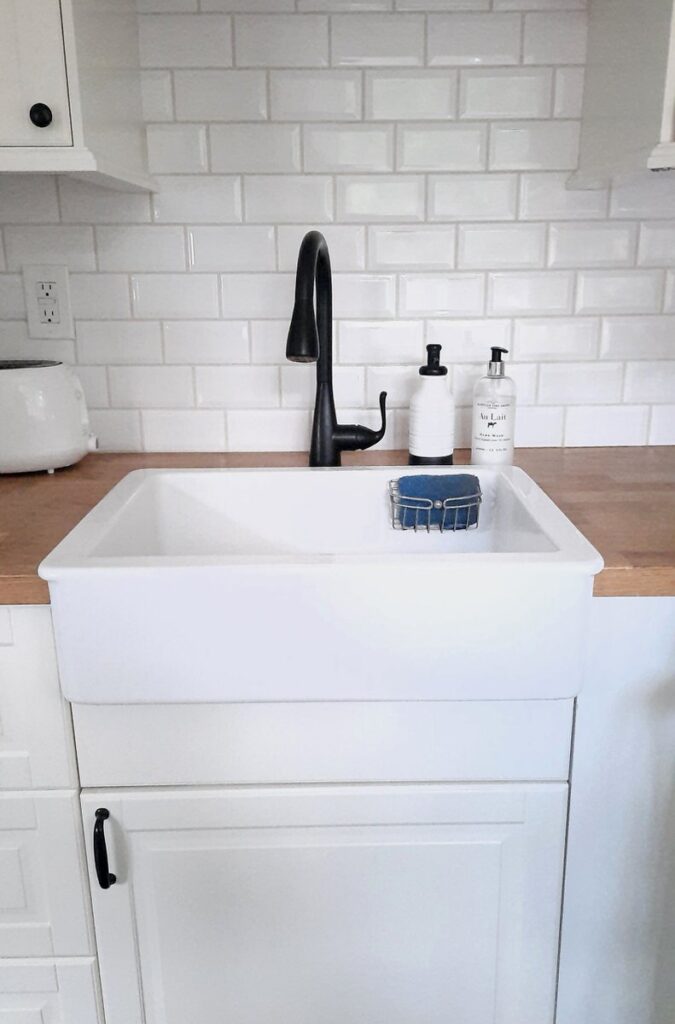

However! We were sooooo disappointed when we spotted a crack in the sink after only a few months of use. Upon further research, we learned this is a problem lots of people have had, and unfortunately Ikea has been hesitant to replace it. So, buyer beware. While we love the shape and size of this sink, an early crack is saddening.
For our faucet, I actually went with a product not from Ikea. I chose the DELTA Grenville Matte Black 1-Handle Deck Mount Pull-Down Kitchen Faucet. I liked that it had a removable sprayer and had a sleek but warm style.
Be aware, however, that wet hands reaching for the on/off handle of this faucet do leave drips on the wood counter, which will need to be wiped. We leave a dish cloth under the handle to catch and hand drips. The cover plate it comes with can help with this if your counter allows for its installation.
Lighting
We used Ikea lighting underneath and inside the glass cabinets. I love the magnetic controller with the fade feature. It allows me to use dim lighting in the early mornings or in the evening when I want the ambiance of the warm light.
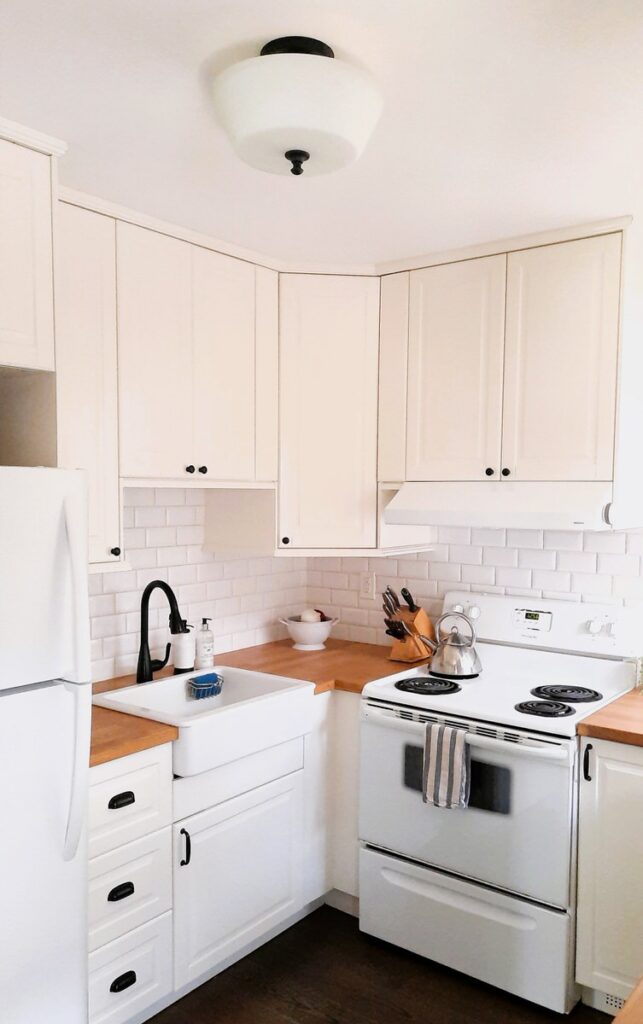

For the overhead light fixture, I chose the Feiss Peyton 8.75-in x 13-in Black 2-Light Semi-Flush Ceiling Mount Light. Again, not from Ikea, but it fit the exact look I was going for. The frosted glass is reminiscent of milk glass, and it’s warm and inviting. Love it.
Appliances
In order to save money, we didn’t replace any of our appliances. I stayed with the white appliances, which I don’t mind as the more popular stainless steel could break up the look of this predominantly-white kitchen. I did purchase the BCS3 Series 30″ Range Hood to go above the stove. Again, I went with a basic range hood to save some money to use elsewhere. It works wonderfully and has had no issues. Sometimes simpler is better 😉
I love that I finally have a functional kitchen. With some careful planning, we’ve been able to utilize as much space as possible to make this small kitchen a beautiful, workable space for our family!
Paint Colour
I chose to use Tea Light by Benjamin Moore. It’s a soft, warm, inviting green with a touch of vintage feel to it. I love love love it. It works perfectly with the soft white cabinets and warm wood counter.
Before & After Pics
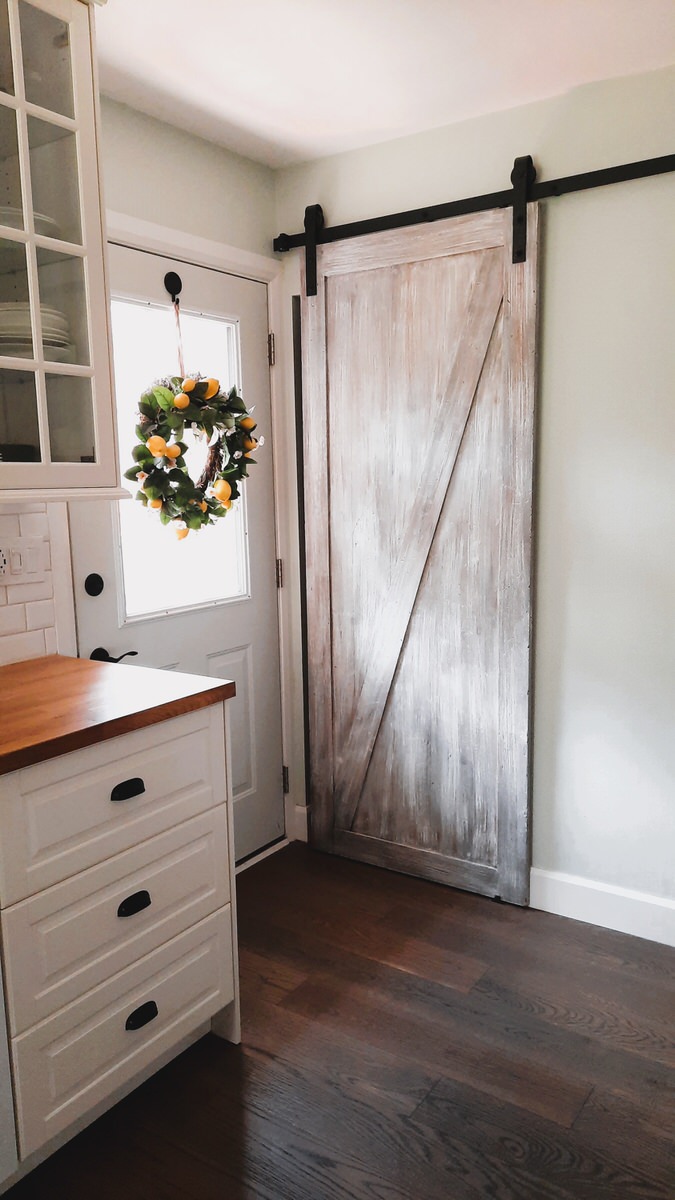
Take a look at the official before and after!











Looking for more?
Take a peek at some more projects around my bungalow home:
DIY Rustic Farmhouse Barn Door
DIY Corner Shelves with Leather Strap Brackets
Pin it for later

Thanks for stopping by A Little Hint of This!

Thanks.
You are most welcome 🙂